The Windows operating system allows you to configure the network adapter to use a static IP address manually or use an automatically assigned configuration (automatically obtaining an IP address) using a local DHCP (Dynamic Host Configuration Protocol) server.
Using a static IP address is recommended for devices that provide services to network users because its configuration never changes, but there may come a time when you no longer need to maintain this configuration and a dynamically assigned network configuration is more appropriate.
If you’re using a static IP address and need to switch to dynamic configuration (automatically obtaining an IP address), there are several ways to accomplish this task, including using network connection properties, the command prompt, the Windows PowerShell console, and using the Settings app in Windows 10
How to configure automatic IP-Address using the command prompt
You can use the command prompt to configure automatic acquisition of an IP address.
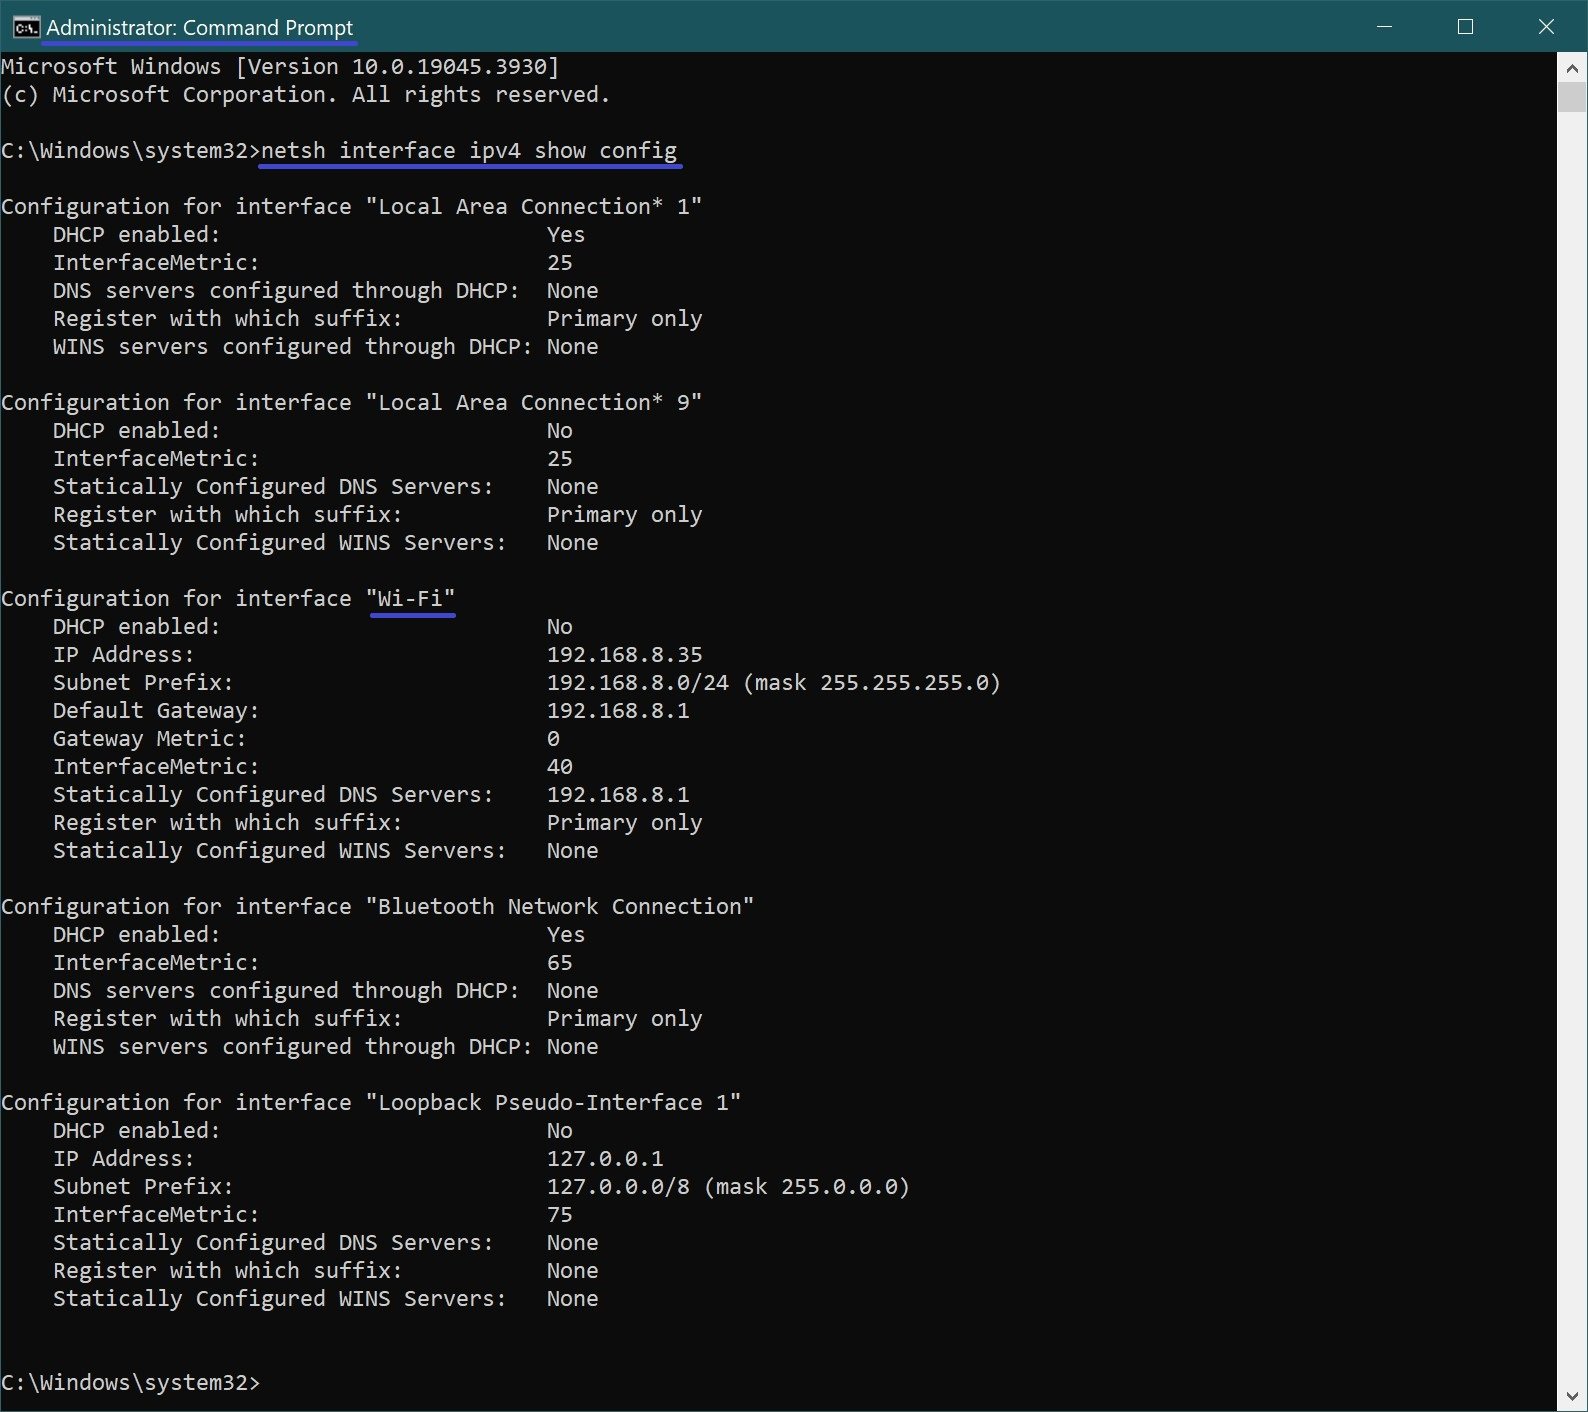
The first thing to do is to see the names of the available network connections and IP addresses, to do this, run a command prompt as administrator and run the following command:
netsh interface ipv4 show config
Among the resulting list, see the name of the network connection.
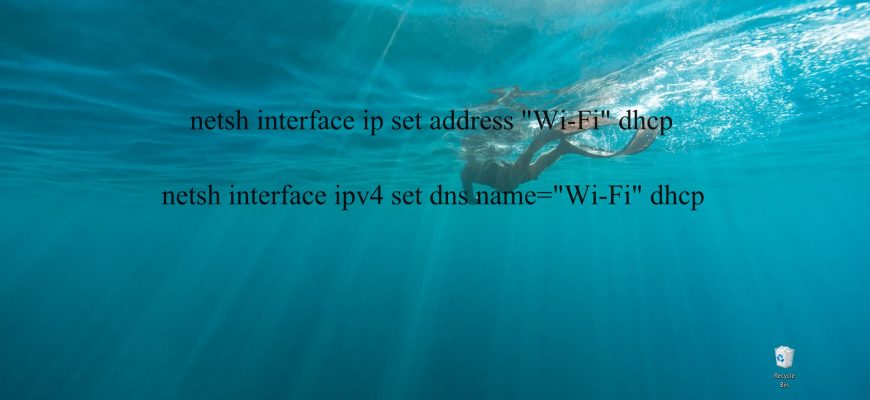
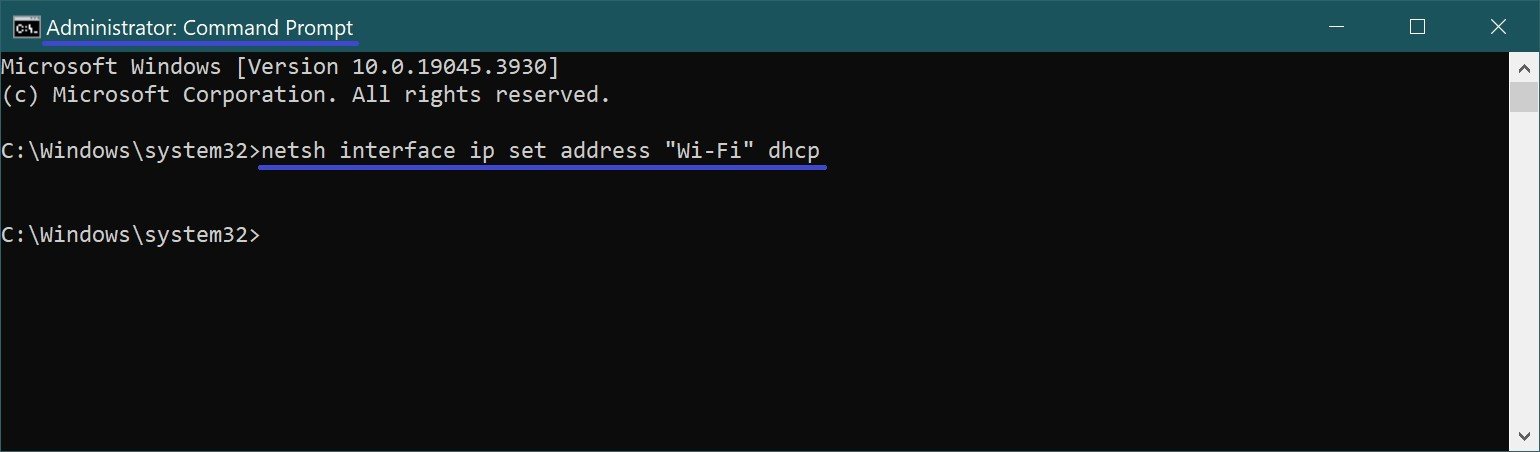
To set automatic acquisition of an IP-Address, run the following command:
netsh interface ip set address “Wi-Fi” dhcp
Where Wi-Fi is the name of the network connection.
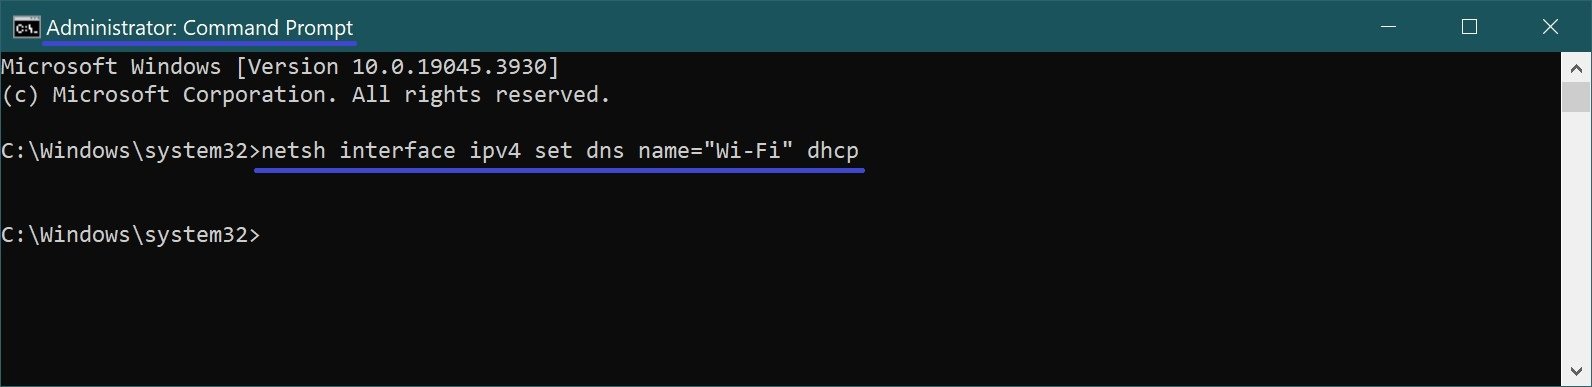
Using the following command, enable the network adapter to automatically obtain DNS server address configuration using DHCP:
netsh interface ipv4 set dns name=”Wi-Fi” dhcp
In the above command, change the Wi-Fi to a name that matches your network adapter.
After performing these steps, the network adapter will stop using a static IP address and automatically obtain a dynamic IP address and DNS server addresses from a DHCP server.
How to configure automatic IP-Address using Windows PowerShell
You can also configure automatic IP address acquisition using the Windows PowerShell console.
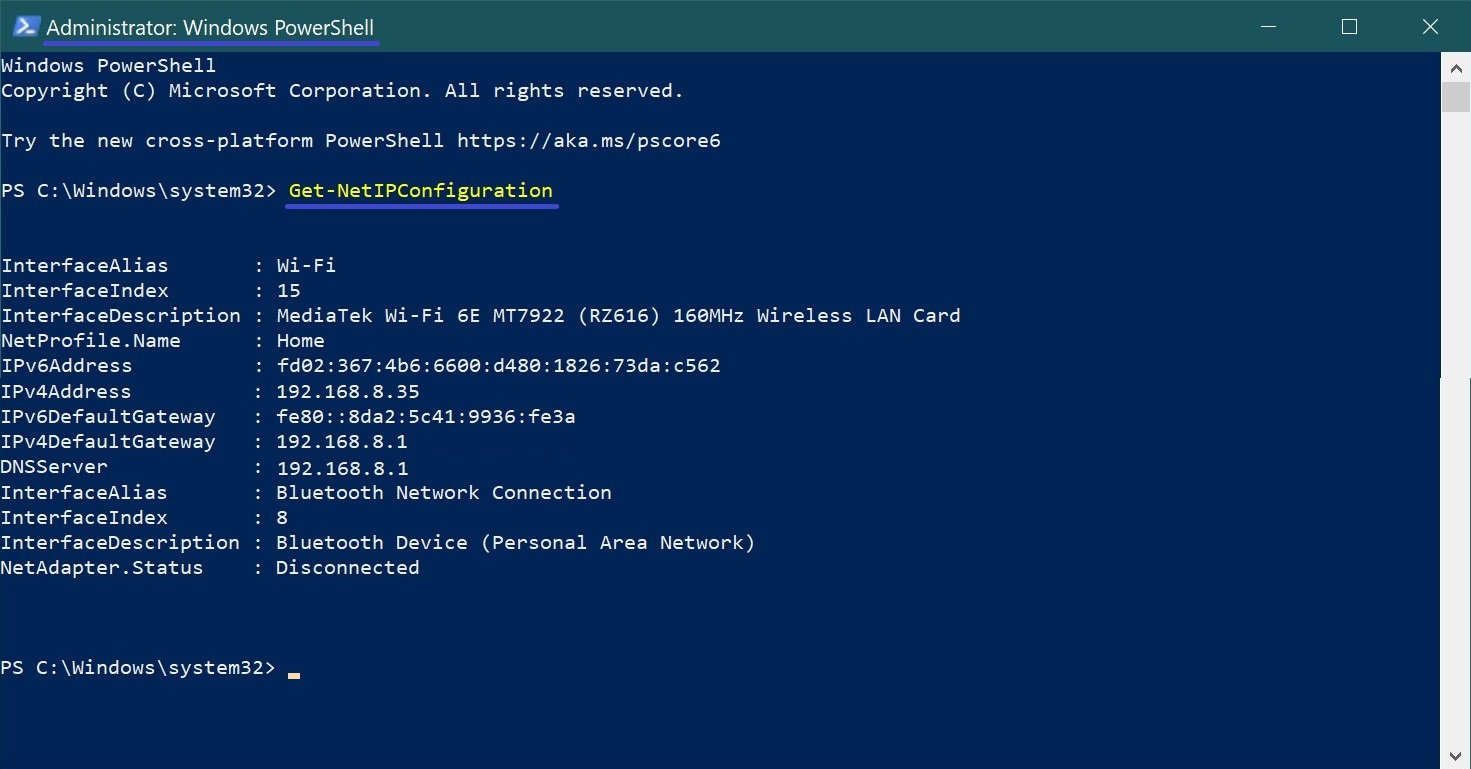
To get the current network configuration, open the Windows PowerShell console as administrator and run the following command:
Get-NetIPConfiguration
Among the results, find the desired network interface and memorize its InterfaceAlias, in this example it is Wi-Fi.
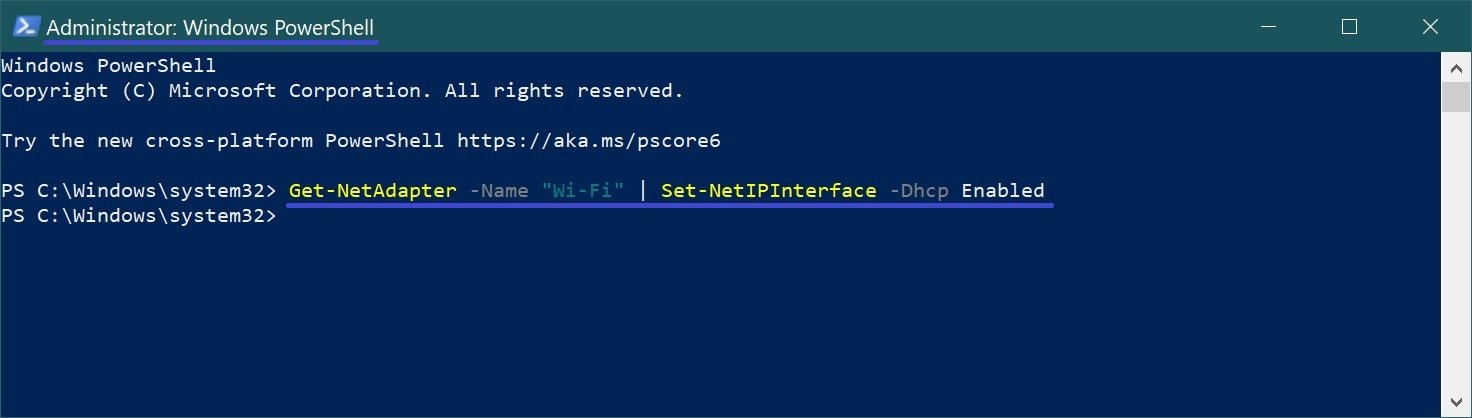
Set to automatically obtain an IP address with the following command:
Get-NetAdapter -Name “Wi-Fi” | Set-NetIPInterface -Dhcp Enabled
In the above command, change the Wi-Fi to a name that matches your network adapter.
Using the following command, enable the network adapter to automatically obtain DNS server address configuration using DHCP:
Set-DnsClientServerAddress -InterfaceAlias “Wi-Fi” -ResetServerAddresses
In the above command, change the Wi-Fi to a name that matches your network adapter.
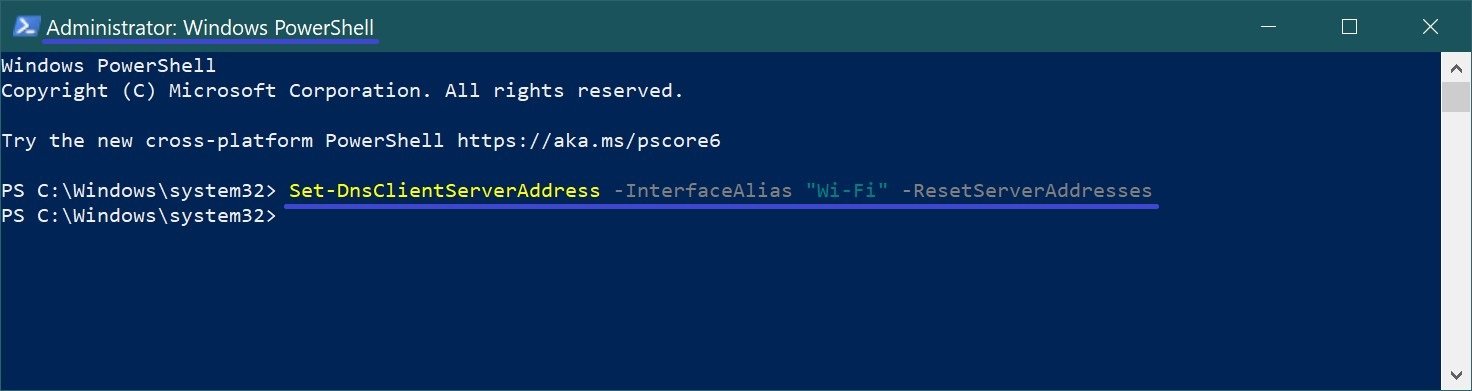
After performing these steps, the static IP address and DNS addresses of the network adapter will be reset and your computer will receive a new dynamic configuration from DHCP.
How to configure automatic IP-Address using network connection properties
This method involves using the graphical interface of network connection and is applicable to Windows 7, Windows 8.1, Windows 10 operating systems.
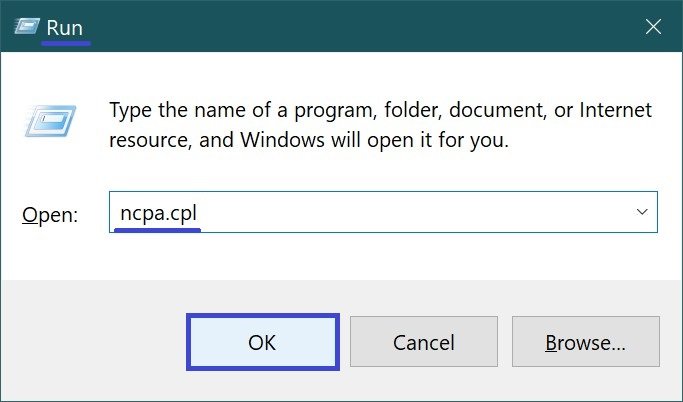
To configure automatic IP address acquisition using this method, press the Win+R key combination, type (copy and paste) ncpa.cpl in the opened Run window and press Enter ↵.
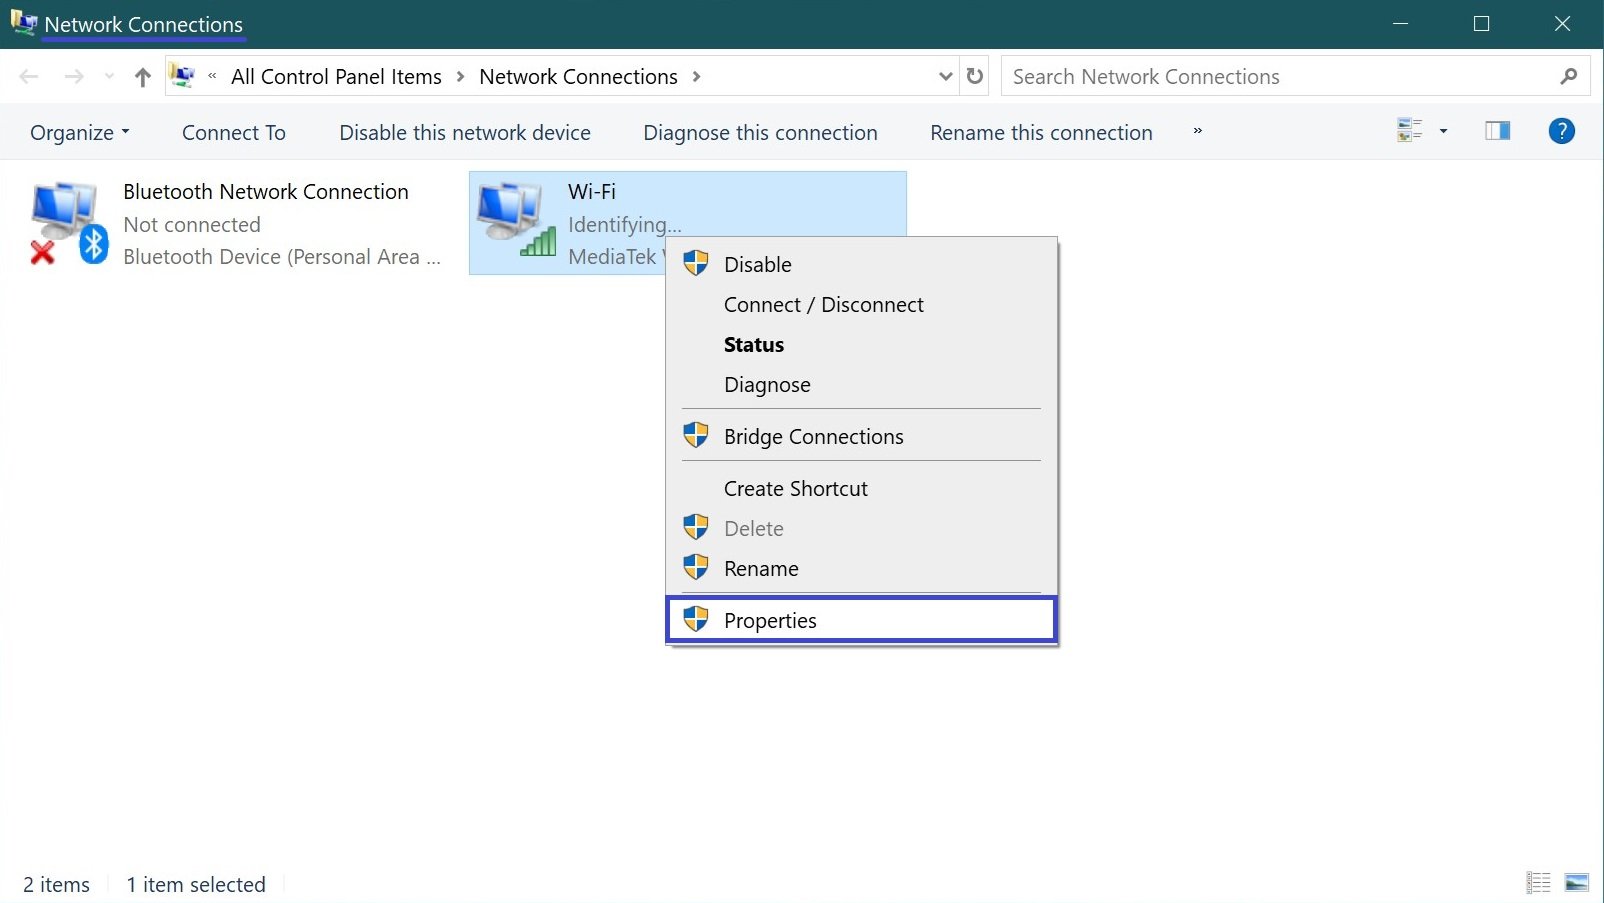
In the “Network Connections” window, select the desired network adapter and right-click on it, select Properties in the context menu that appears.
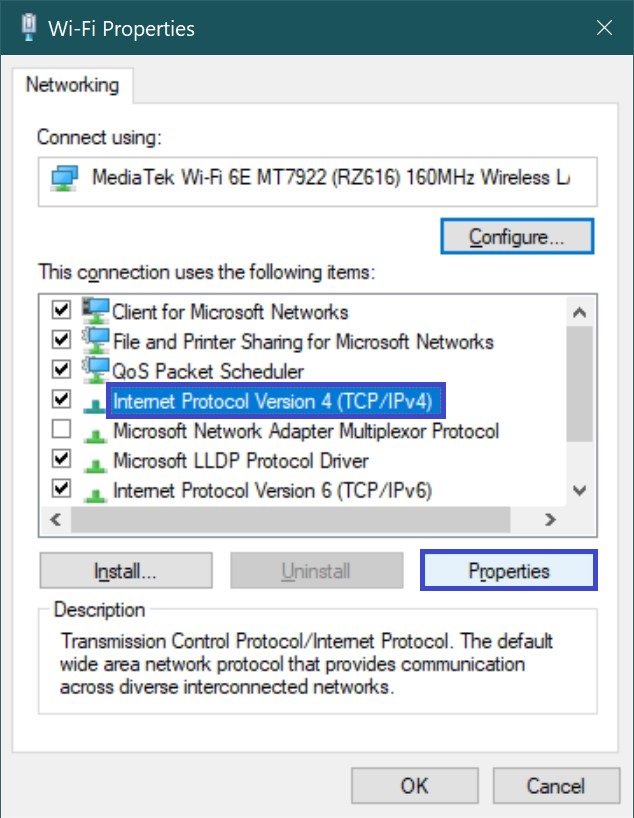
In the next window, select the IP version 4 (TCP/IPv4) component and click Properties.
In the window that opens, enable the Obtain an IP address automatically and Obtain DNS server address automatically options, then click OK and close the other windows.

After the steps are completed, the statically assigned TCP/IP configuration will be removed and the device will attempt to automatically request a dynamic configuration from the network.
How to configure automatic IP-Address using “Settings”
This method is only applicable in Windows 10 operating system.
Windows 10 allows you to change IP address settings using the Settings application for wireless and wired adapters.
Configuring Automatic IP Address Acquisition for the Wi-Fi Adapter
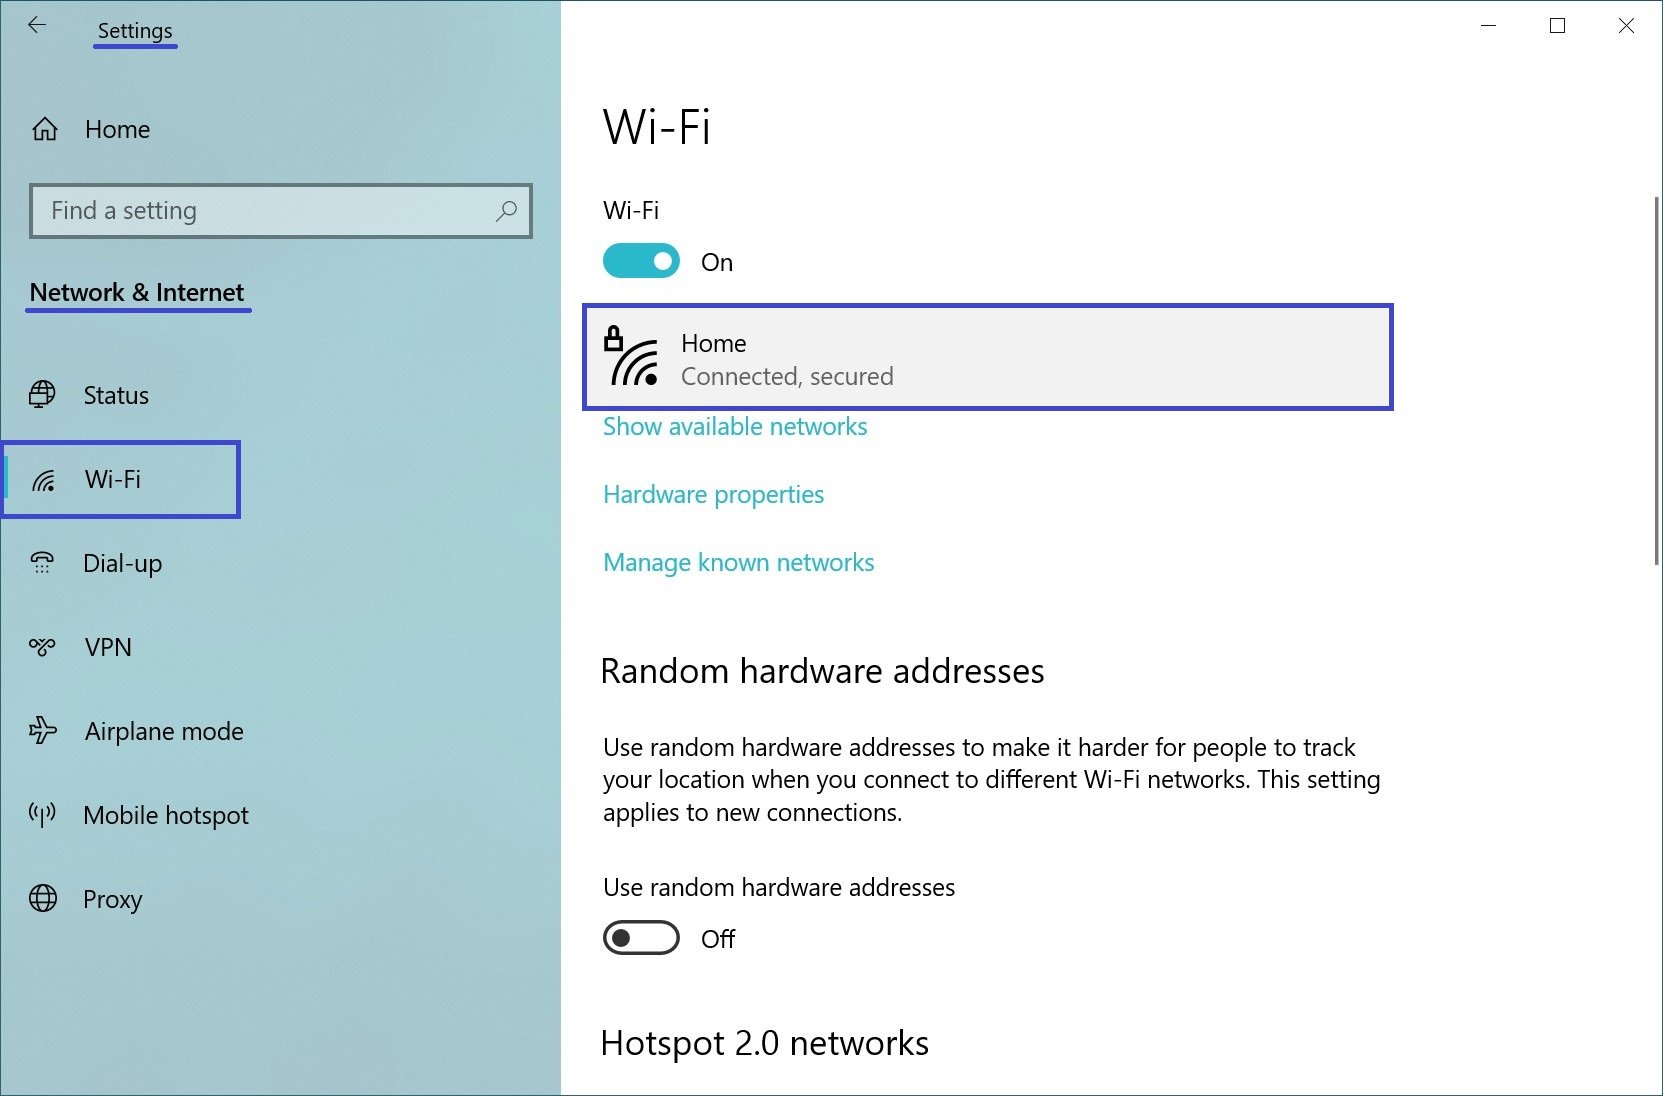
To configure automatic IP address acquisition for the Wi-Fi adapter, open the following in sequence:
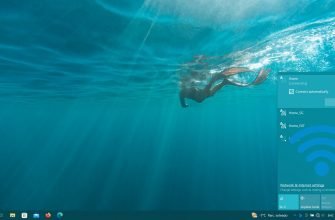
Start ➯ Settings ➯ Network and Internet ➯ Wi-Fi
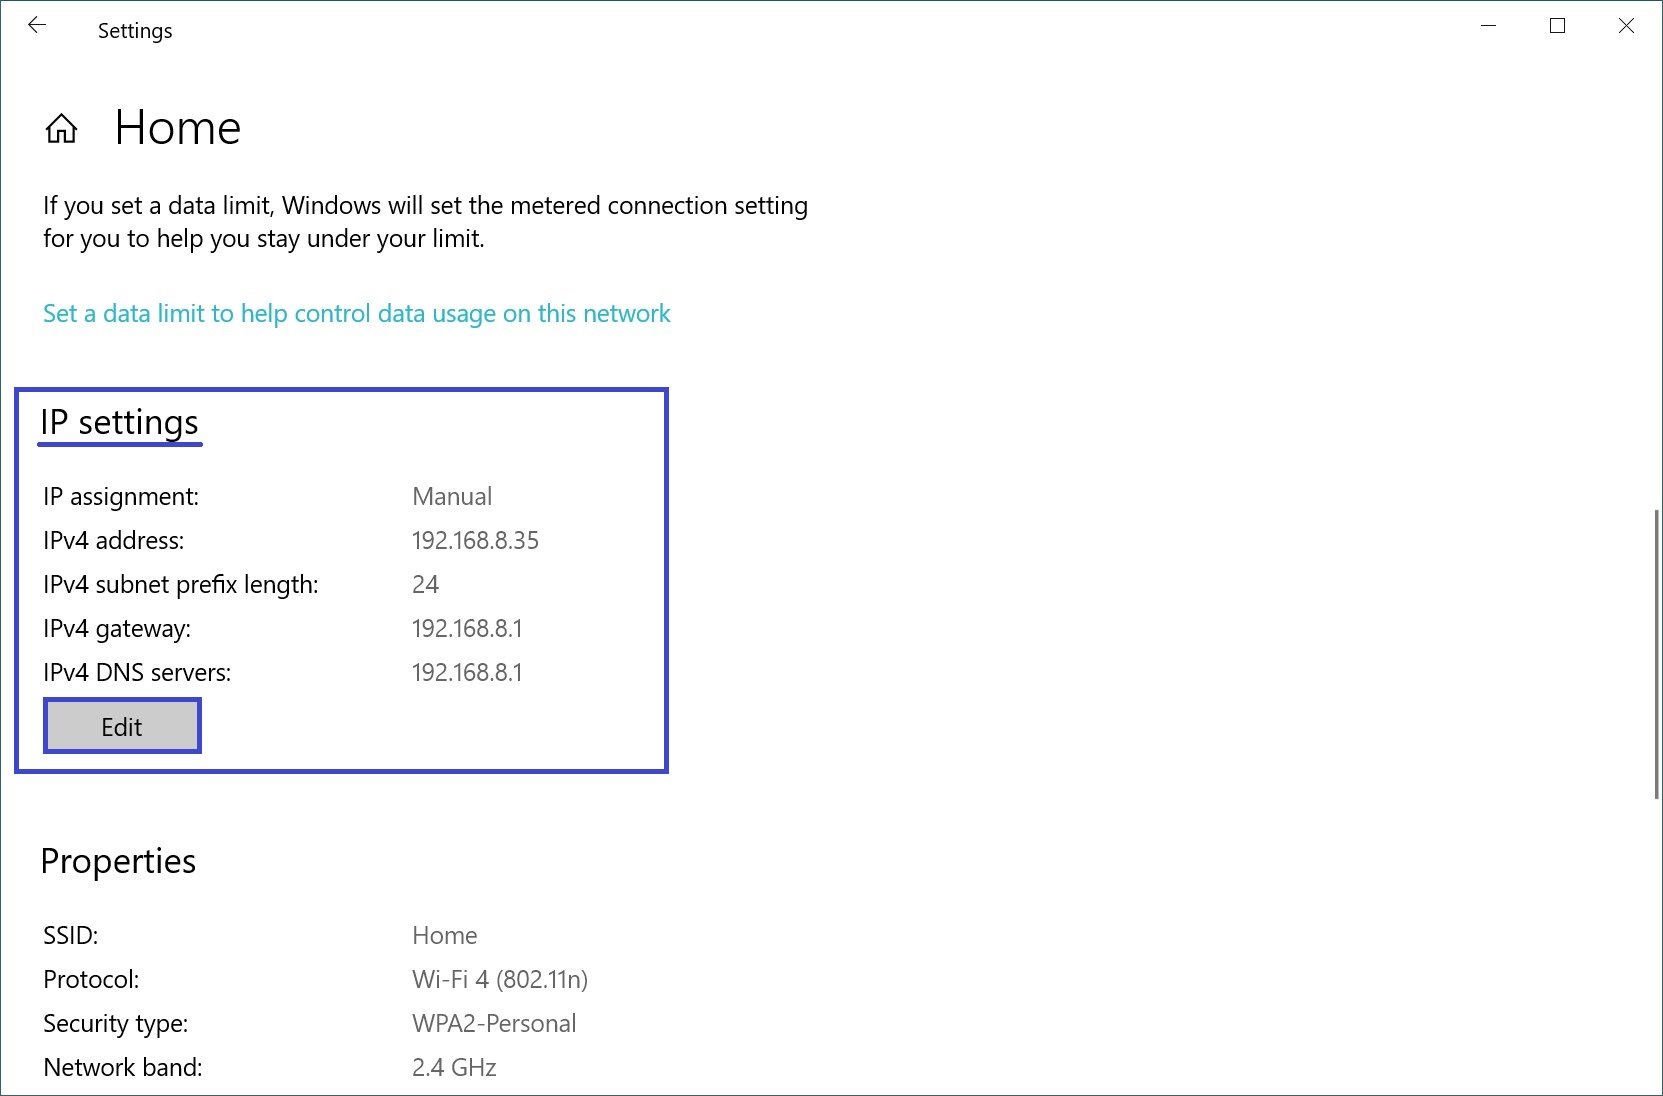
On the right side of the window, click on the current Wi-Fi connection.
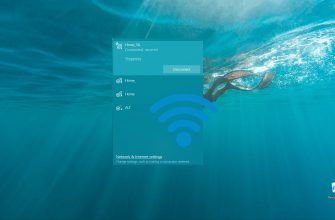
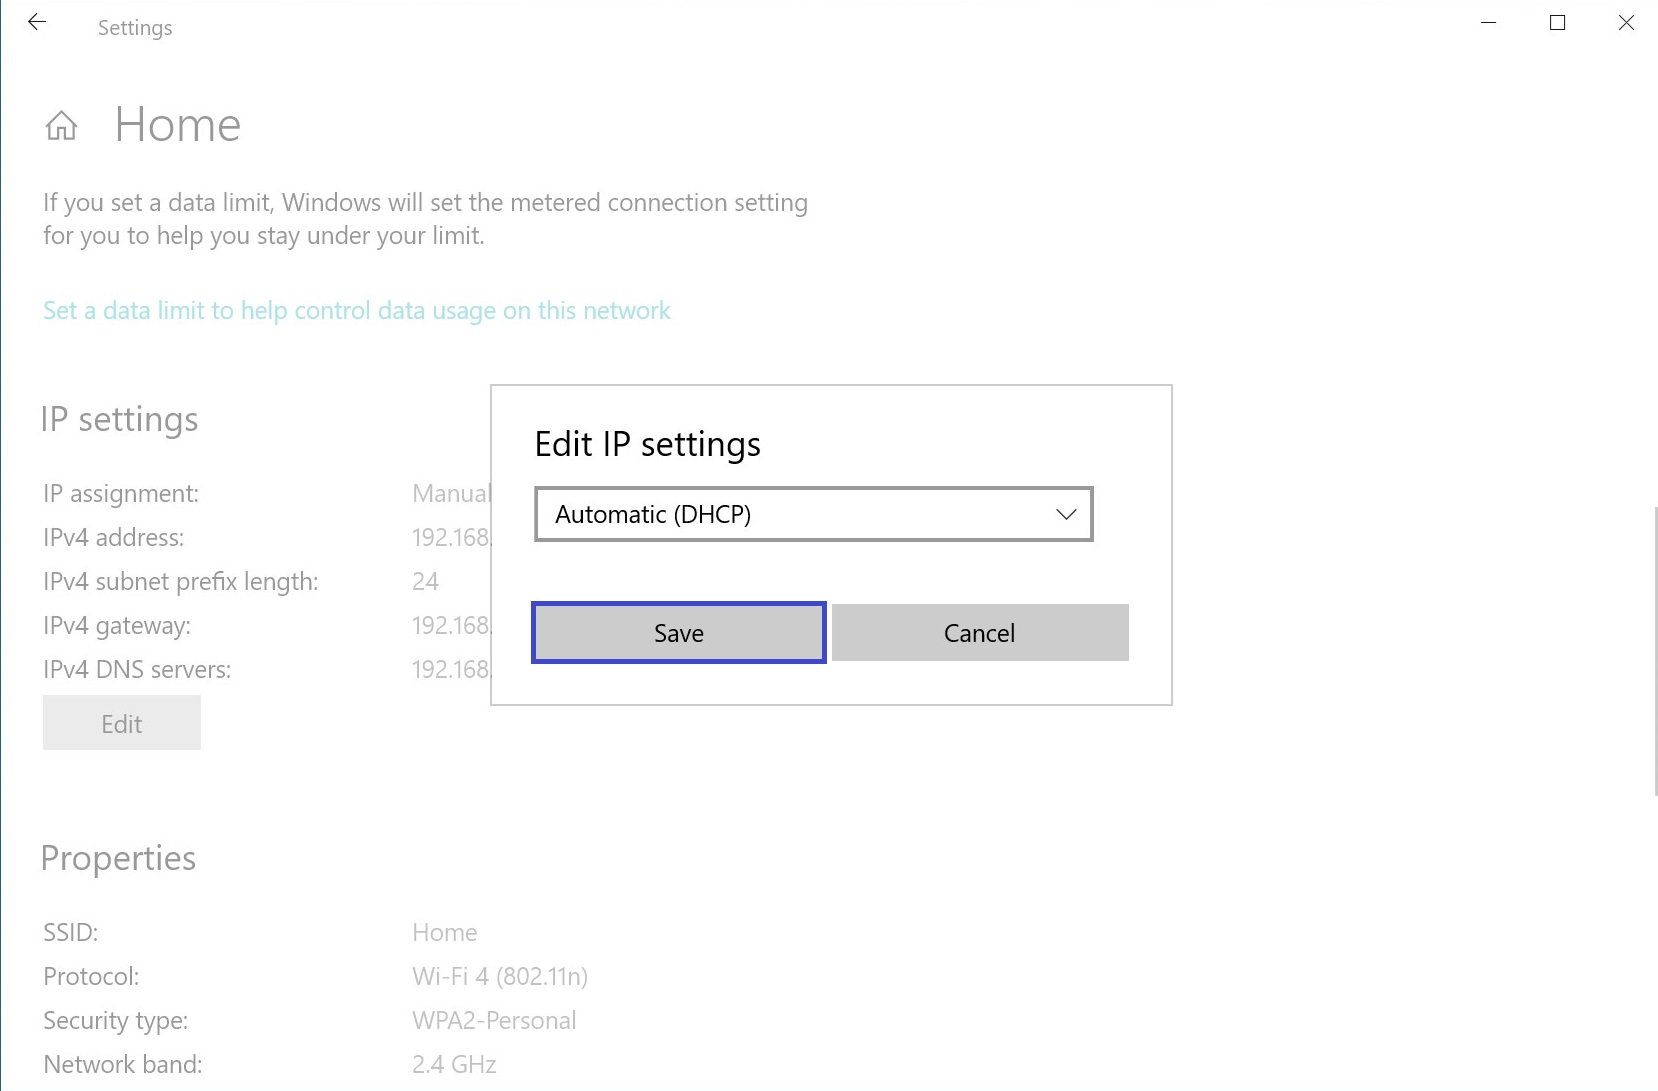
Then in the IP Settings section, click the Edit button.
In the Change IP Settings window, select Automatic (DHCP) from the drop-down menu

Then click the Save button.
Once these steps are completed, the network stack configuration will be reset and the device will request an IP address from a DHCP server (usually a router).
Configuring automatic IP address for the Ethernet adapter is done in the same way as for the Wi-Fi adapter
Using the steps discussed above, you can configure (set) automatic IP address acquisition on a device running Windows 7, Windows 8.1, Windows 10.