When you connect to a new wireless network, the operating system creates a wireless network profile. The wireless network (Wi-Fi) profile contains the SSID (network name), password, and security information for connecting to the wireless network.
The following article discusses various ways to enable or disable automatic connection to a wireless network within range.
- How to enable or disable automatic connection to a wireless network when you connect to a network
- How to enable or disable automatic connection to a wireless network using Windows Settings
- How to enable or disable automatic connection to a wireless network in the Network Connections window
- How to enable or disable automatic connection to a wireless network on the command prompt
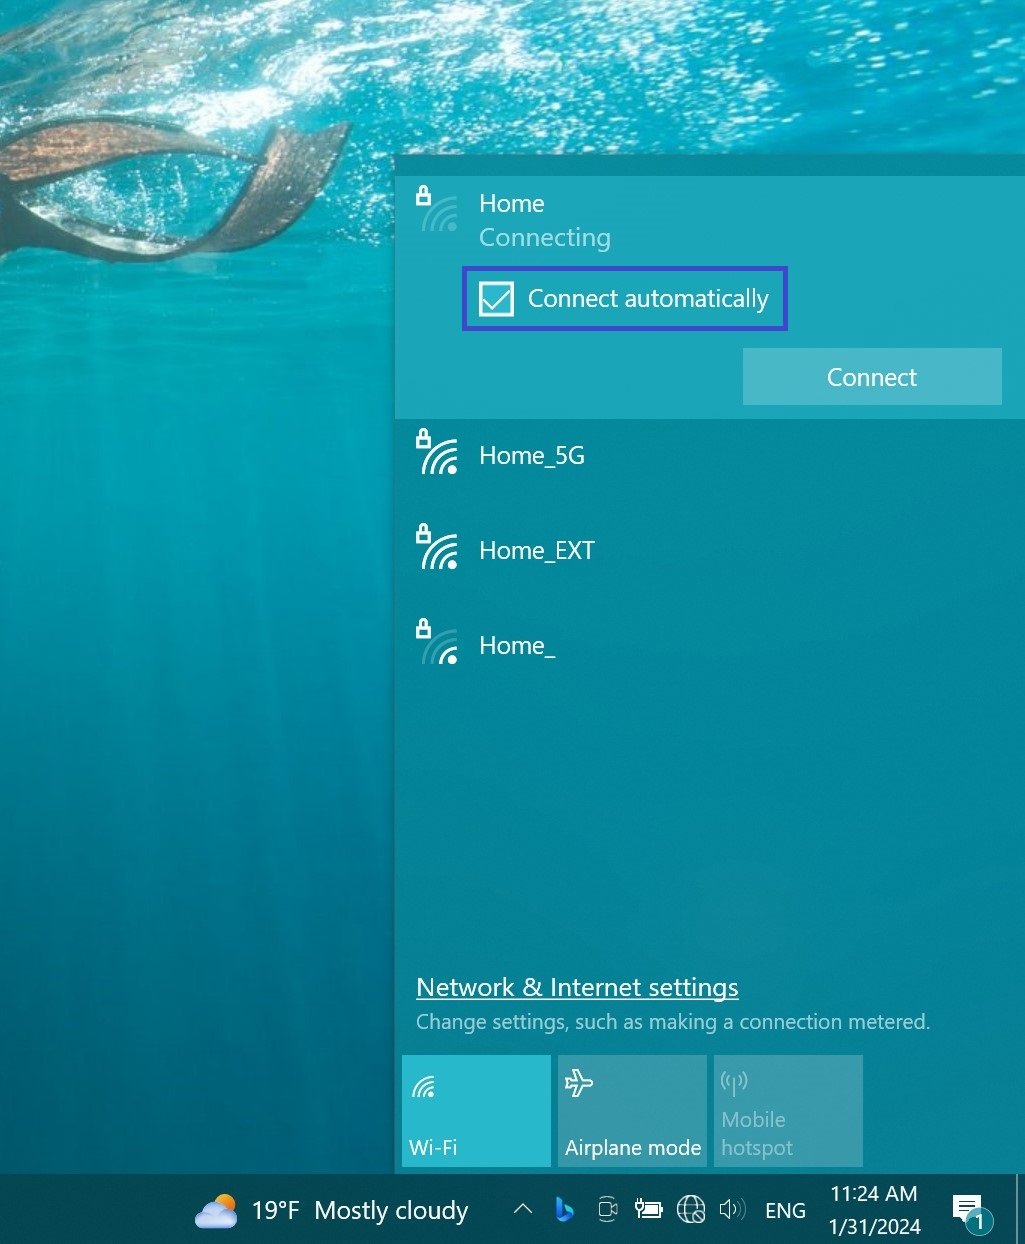
How to enable or disable automatic connection to a wireless network when you connect to a network
To enable automatic network connection, select the Connect automatically check box when connecting to a wireless network.
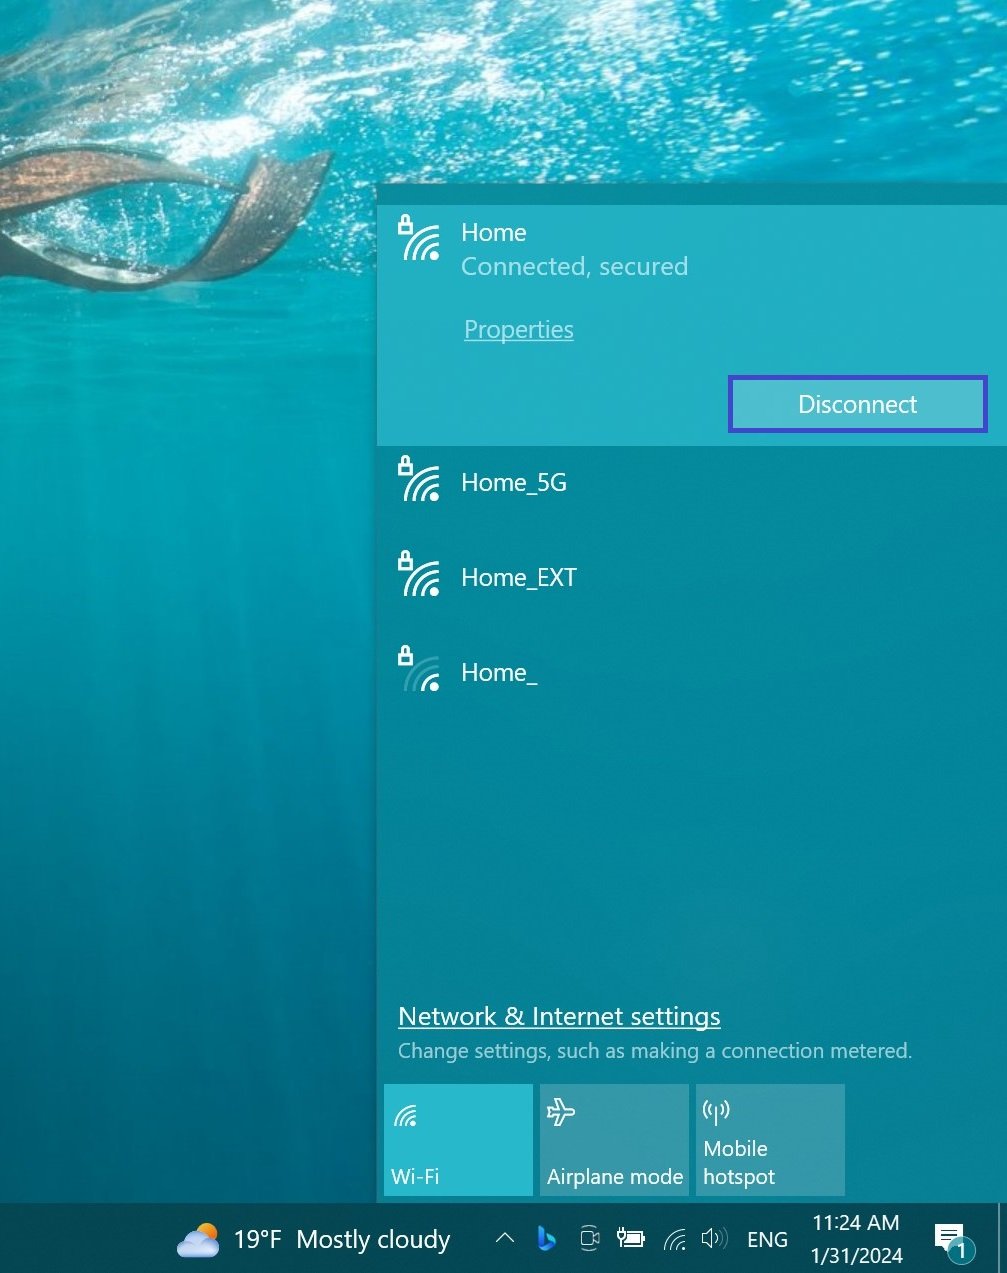
To disable automatic network connection, disconnect from the wireless network. Now, if you want to reconnect to this network, you will need to connect manually.
How to enable or disable automatic connection to a wireless network using Windows Settings
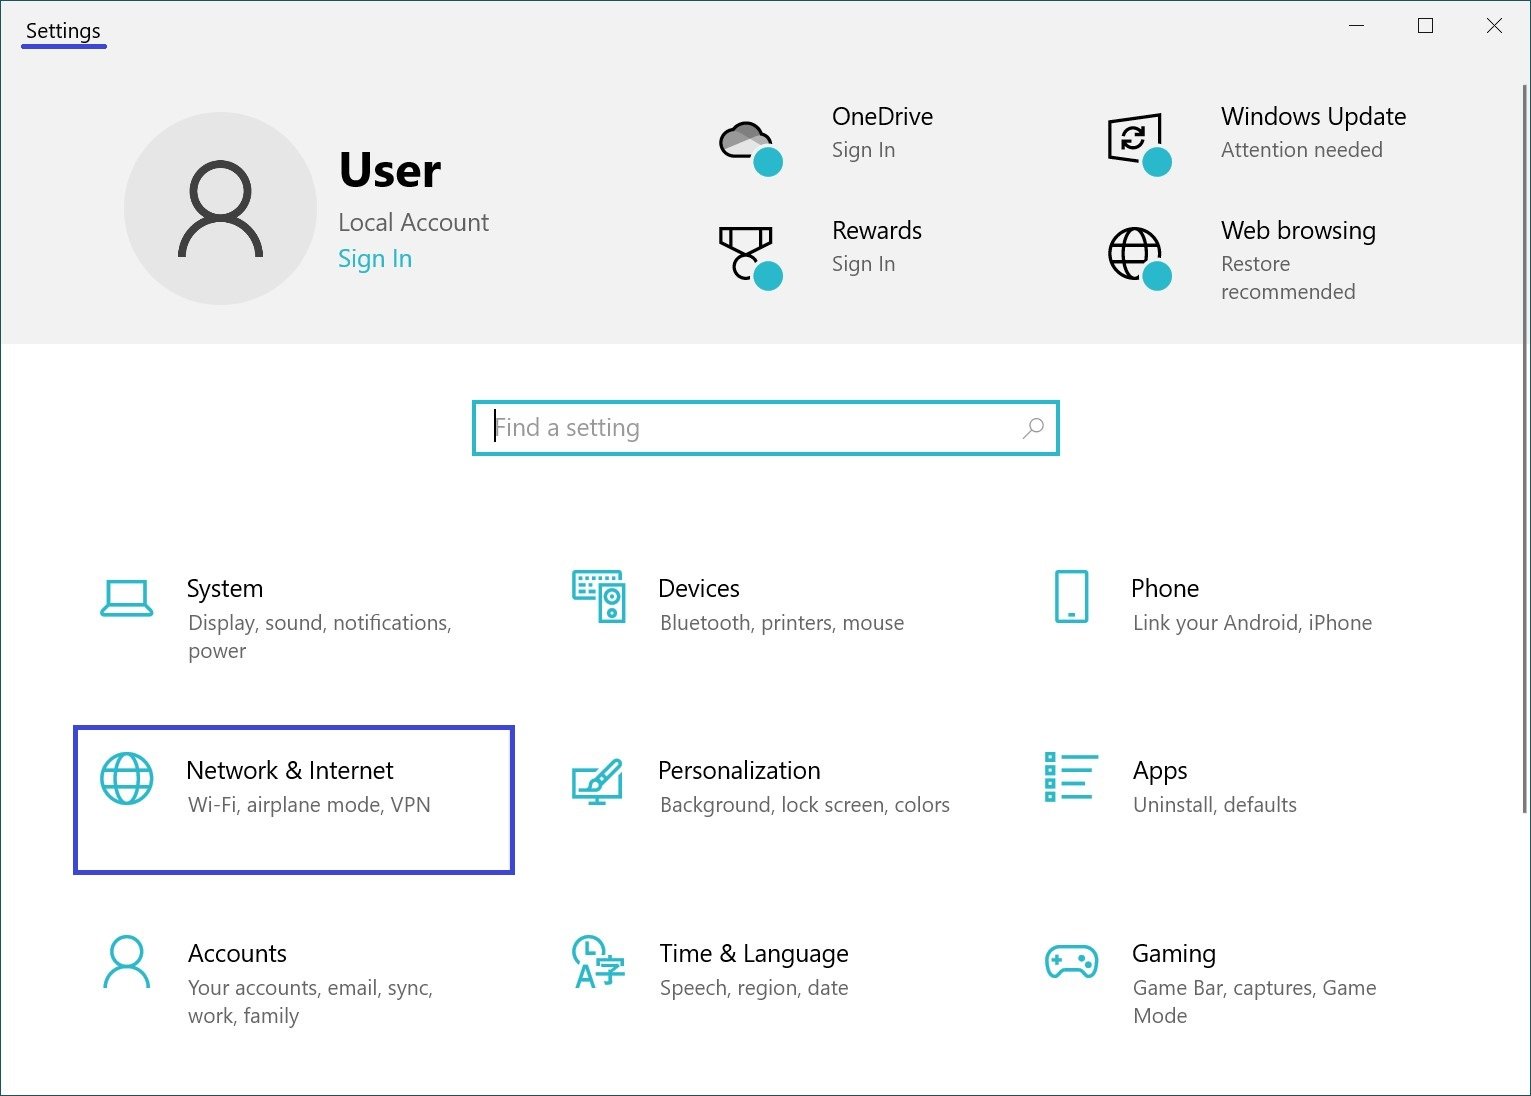
To enable or disable automatic connection to a wireless network, click the Start button on the taskbar and then select Settings or press the Win + I keyboard shortcut.

In the Windows Settings window that opens, select Network and Internet.
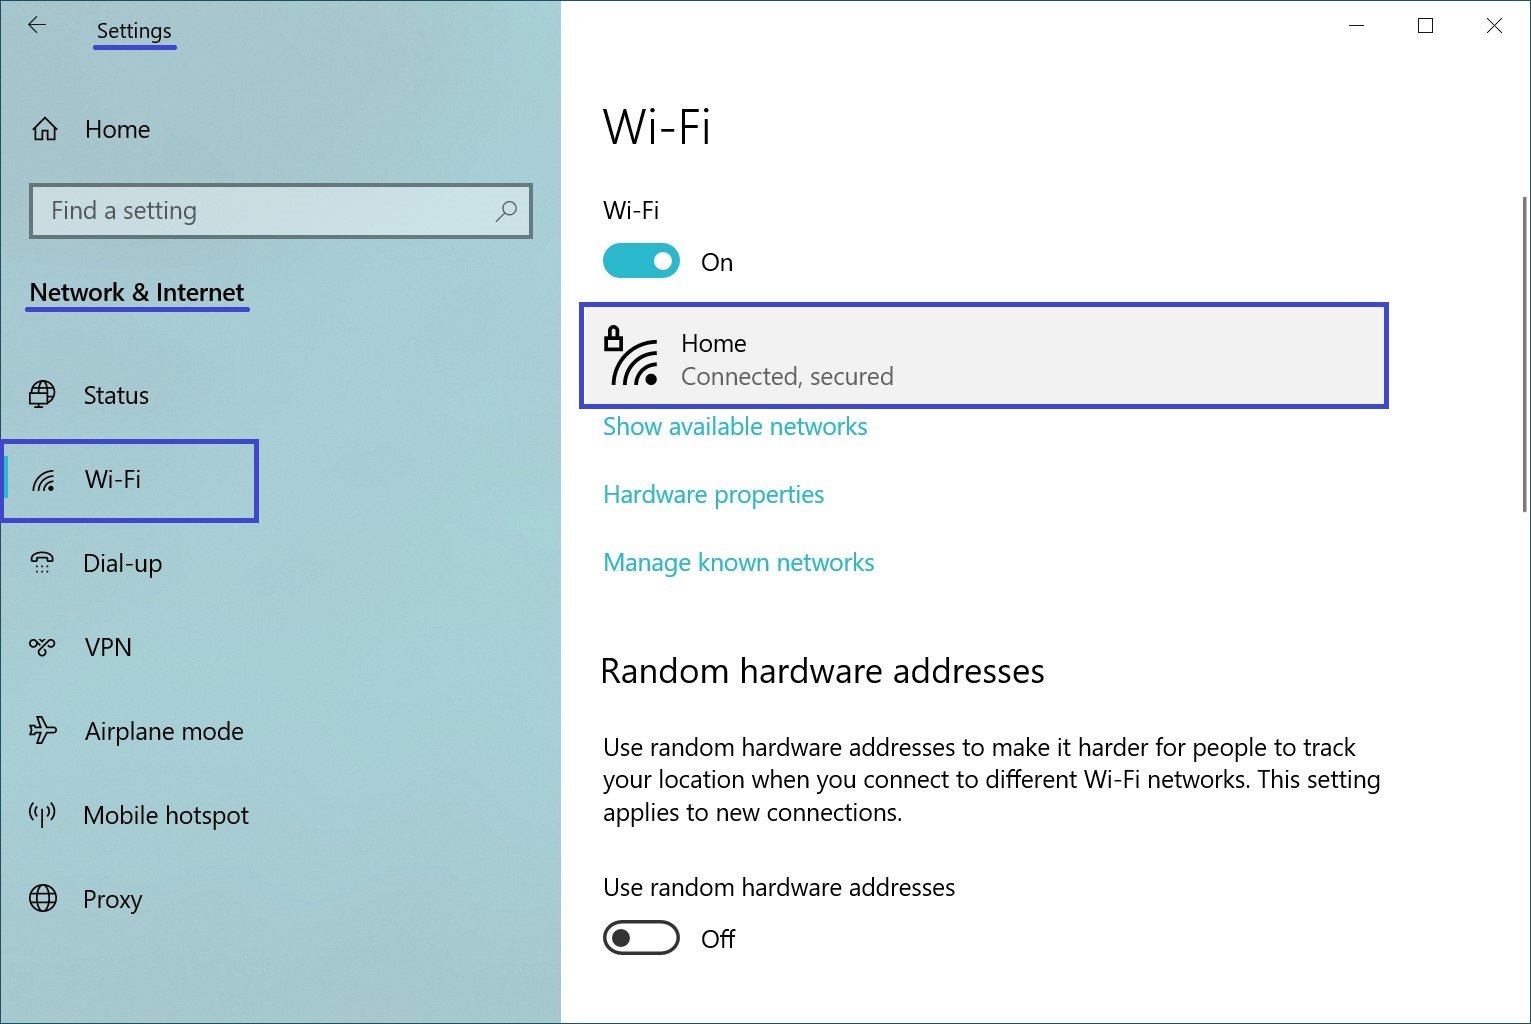
Then select the Wi-Fi tab, and on the right side of the window, click on the connected wireless network (in this example, Home).
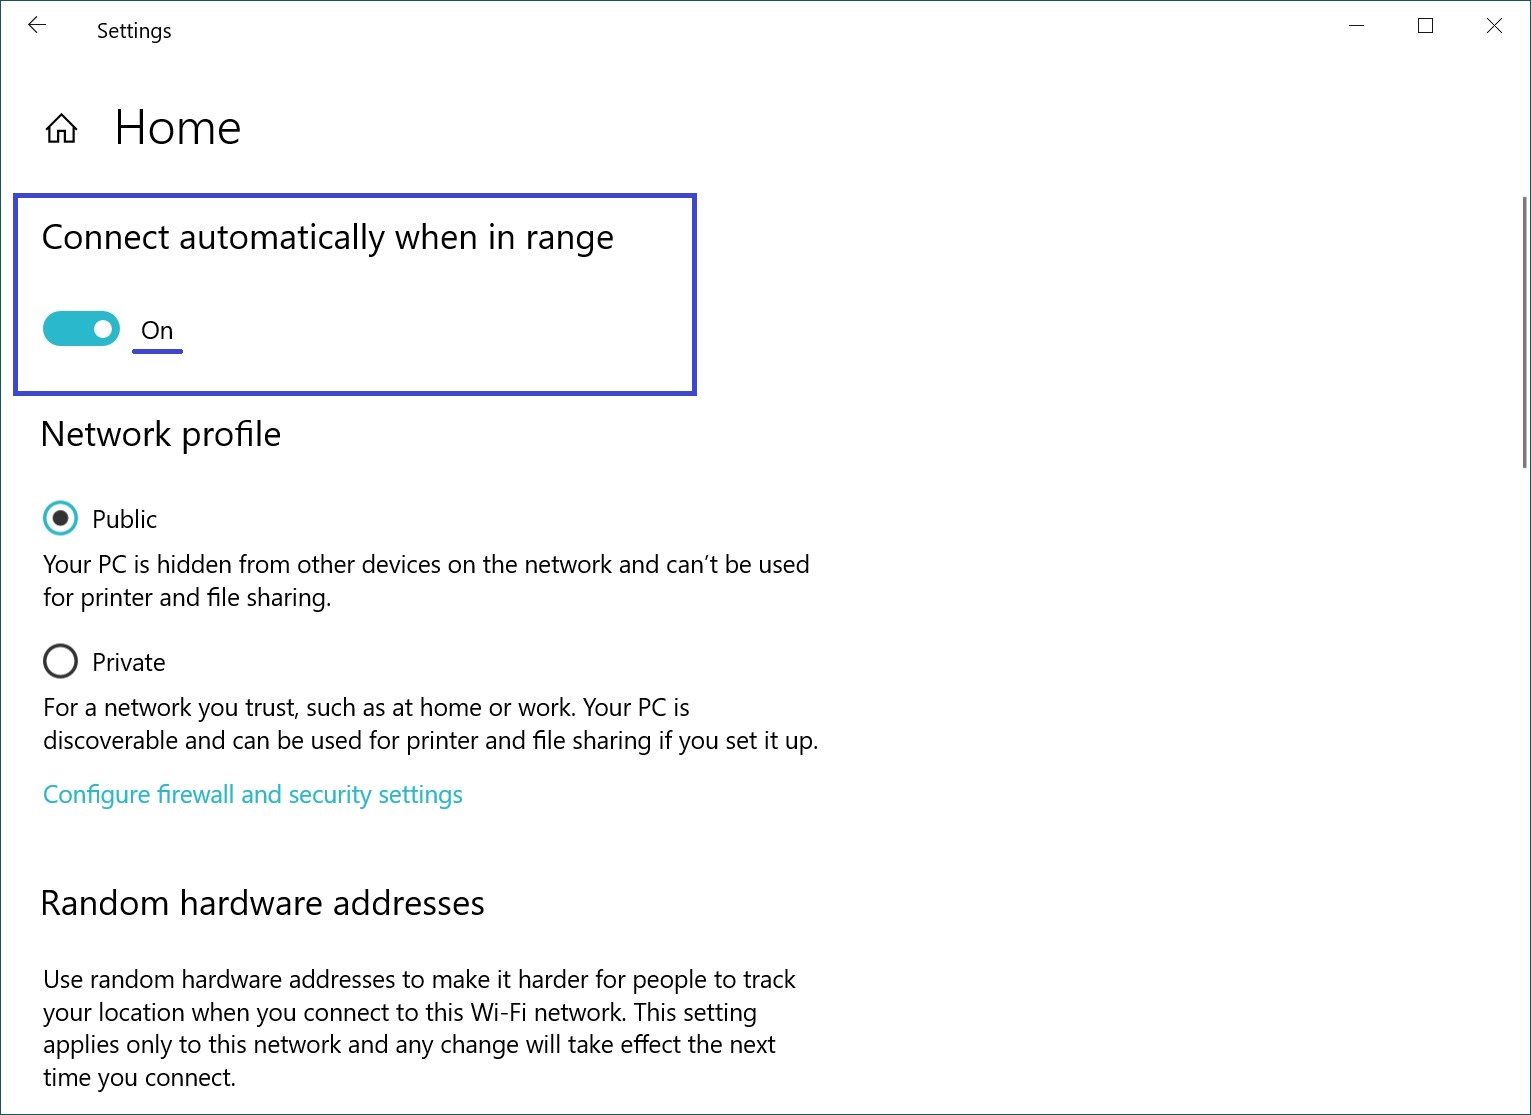
Now set the Connect automatically when in range switch to the appropriate position.
How to enable or disable automatic connection to a wireless network in the Network Connections window
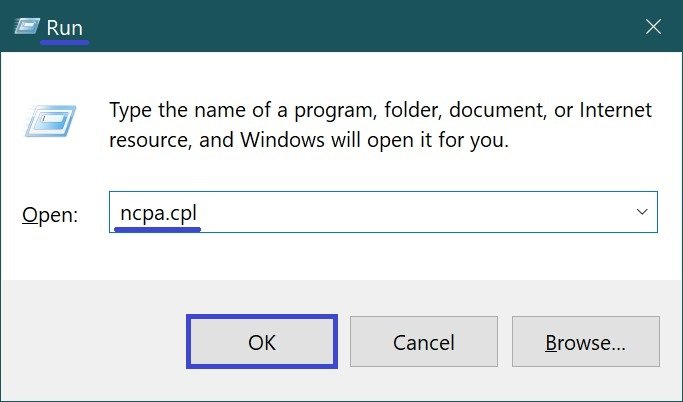
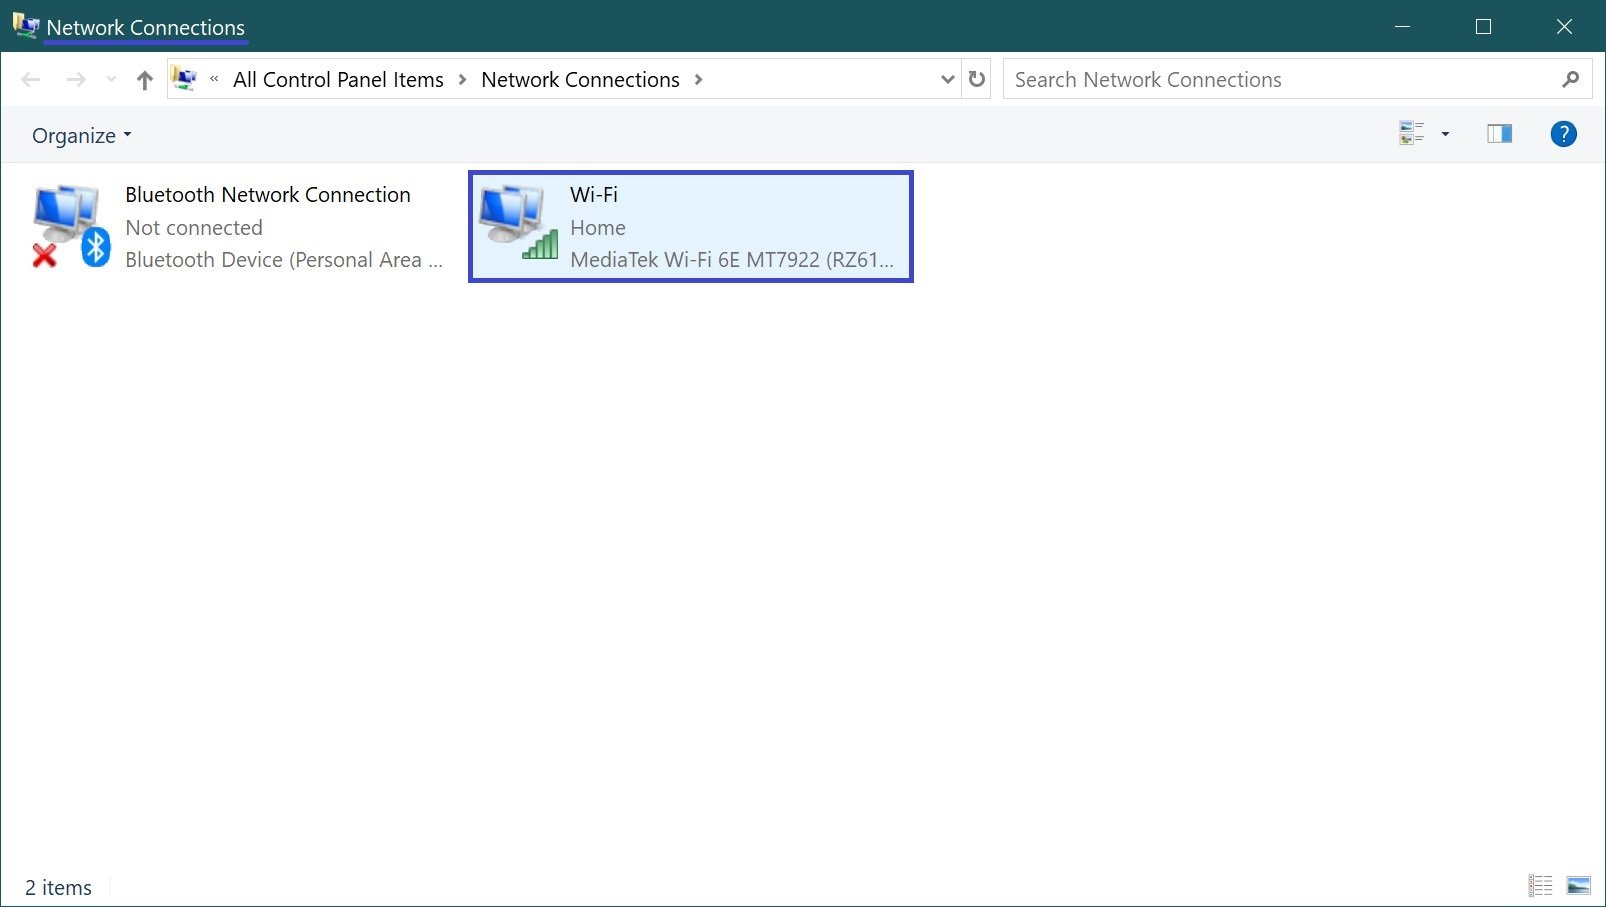
To enable or disable automatic connection to a wireless network using this method, press the Win+R keyboard shortcut, type ncpa.cpl in the Run window that opens, and press Enter.
In the “Network Connections” window that opens, double-click on the connected wireless network connection.
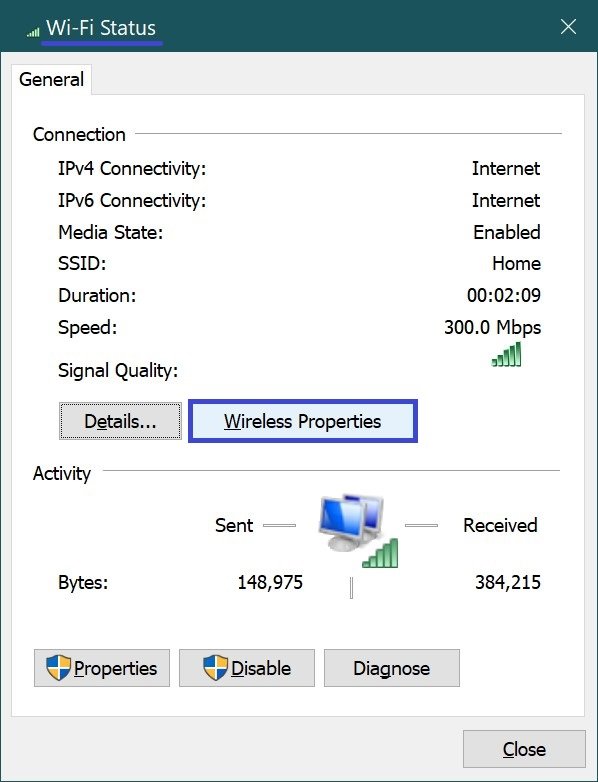
In the Wi-Fi Status window that opens, click Wireless Properties.
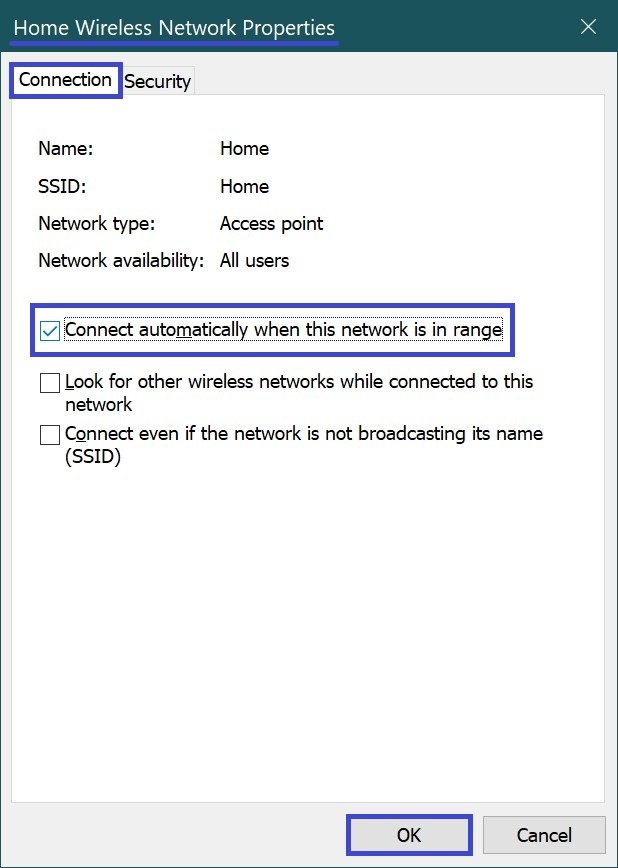
Then in the “Wireless Network Properties” window on the Connection tab, check (to enable) or uncheck (to disable) the option Connect automatically when this network is in range and then click OK.
How to enable or disable automatic connection to a wireless network on the command prompt
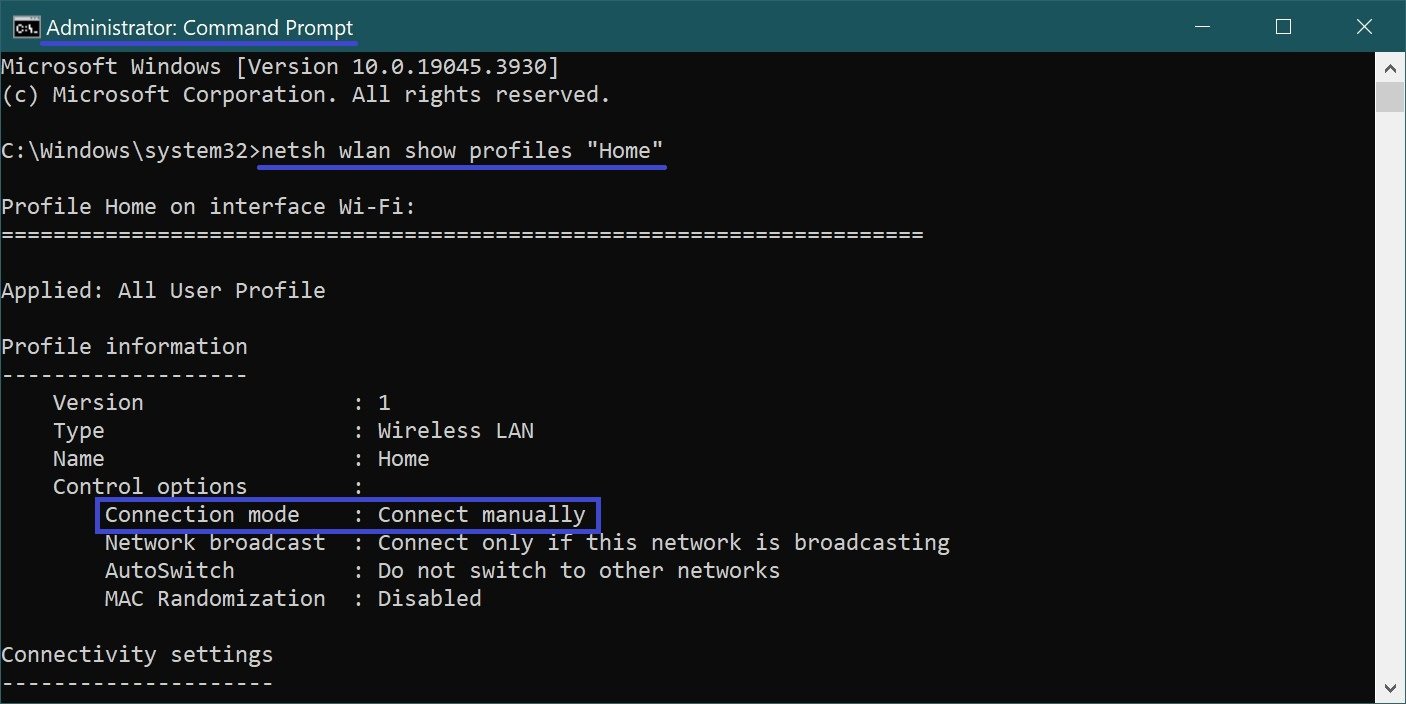
The first thing you need to do is to find out the name of the wireless network profile for which you want to enable or disable automatic connection, for this purpose run a command prompt as administrator and execute the following command:
netsh wlan show profiles
Remember the name of the wireless network profile (Home in this example).

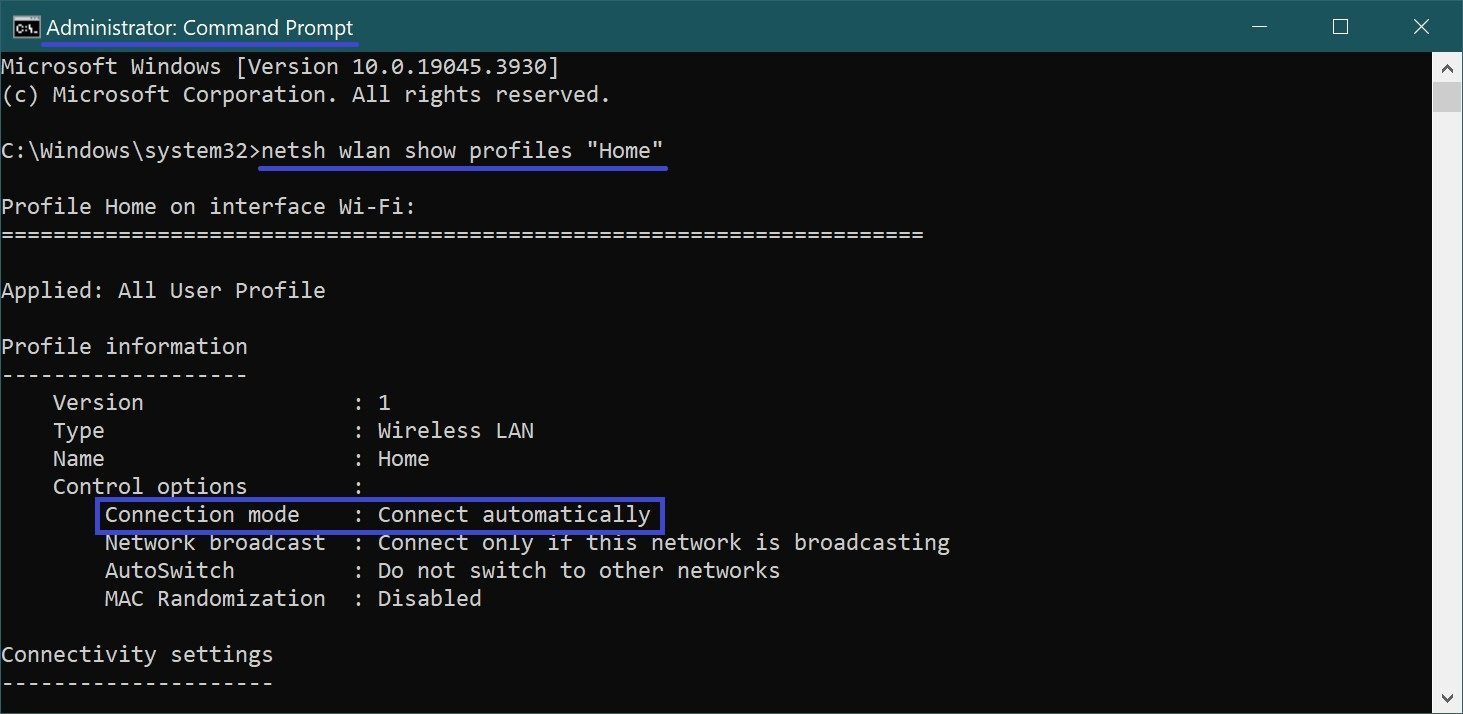
Now let’s check if the connection mode of this wireless network is set to automatic connection or manual connection, for this purpose execute the following command:
netsh wlan show profiles “Name”
Replace the Name in the command above with the actual name of the wireless network profile (Home in this example).
In this example, the command looks like this:
netsh wlan show profiles “Home”
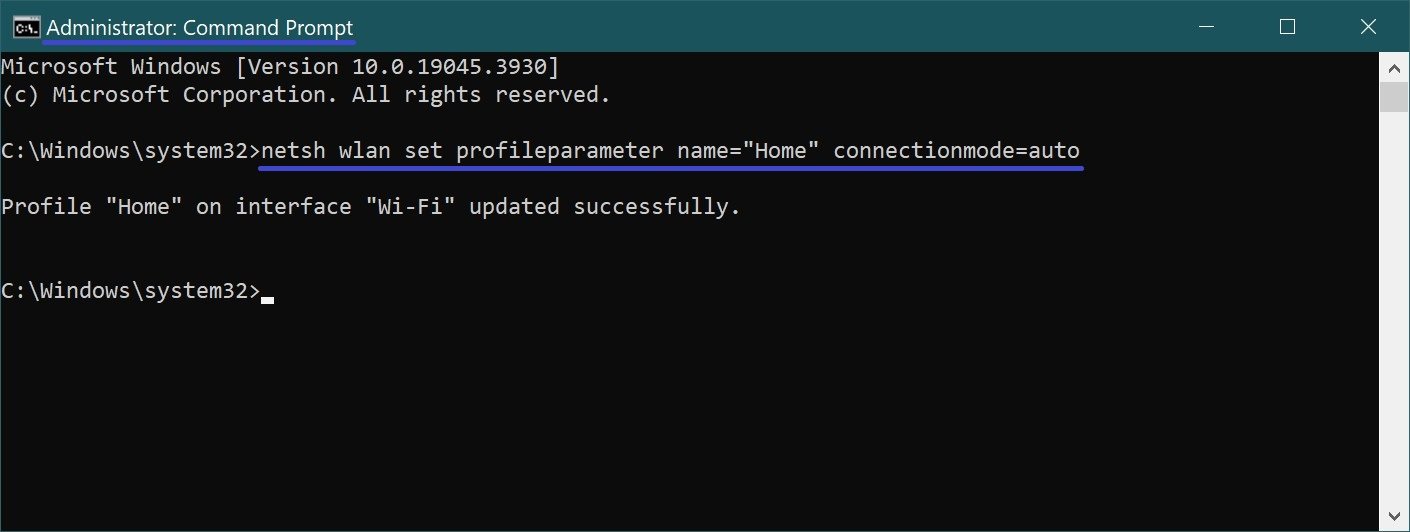
To enable automatic connection to a wireless network, run the following command:
netsh wlan set profileparameter name=”Name” connectionmode=auto
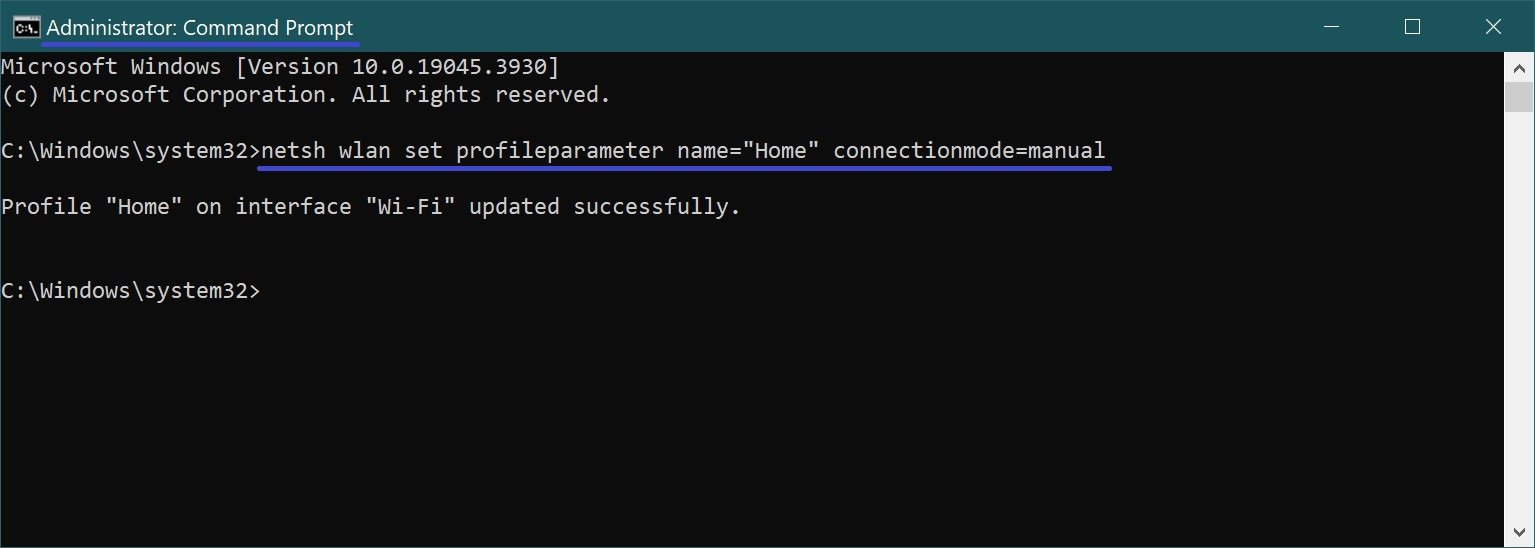
To disable automatic connection to a wireless network, run the following command:
netsh wlan set profileparameter name=”Name” connectionmode=manual
Replace the Name in the commands above with the actual name of the wireless network profile. In this example, the commands are as follows:
netsh wlan set profileparameter name=”Home” connectionmode=auto
netsh wlan set profileparameter name=”Home” connectionmode=manual