Airplane Mode is a feature that allows you to quickly disable all wireless connections on your device, specifically Wi-Fi connectivity, cellular (mobile) communication, Bluetooth, GPS, NFC, and other types of wireless communication.
As the name implies, the “in-airplane” mode was originally designed to avoid interfering with airliner control systems, but it can also be used in other situations, such as in medical facilities where Wi-Fi or GPS may adversely affect the operation of medical equipment.
Enable and disable in the Notification Center
To enable or disable Airplane Mode, click the Notification Center icon in the taskbar, and then click the Airplane Mode quick action button
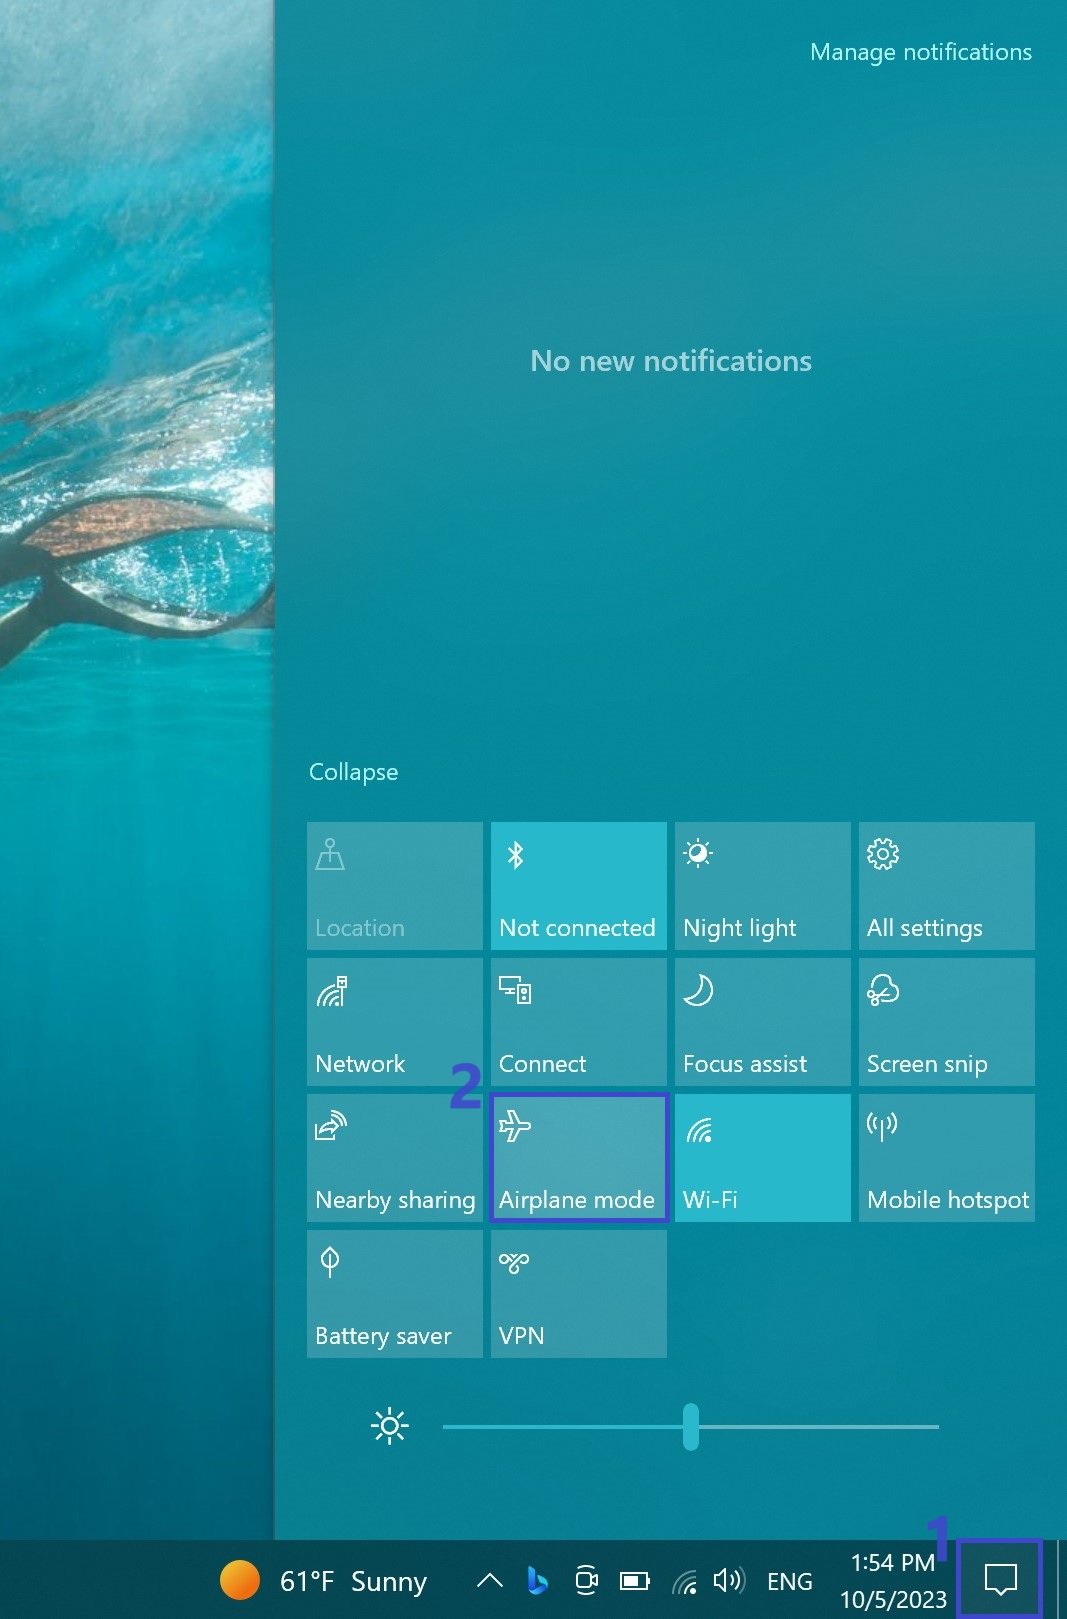
If airplane mode is enabled, instead of the network connection icon, you will see an airplane icon in the taskbar notification area.
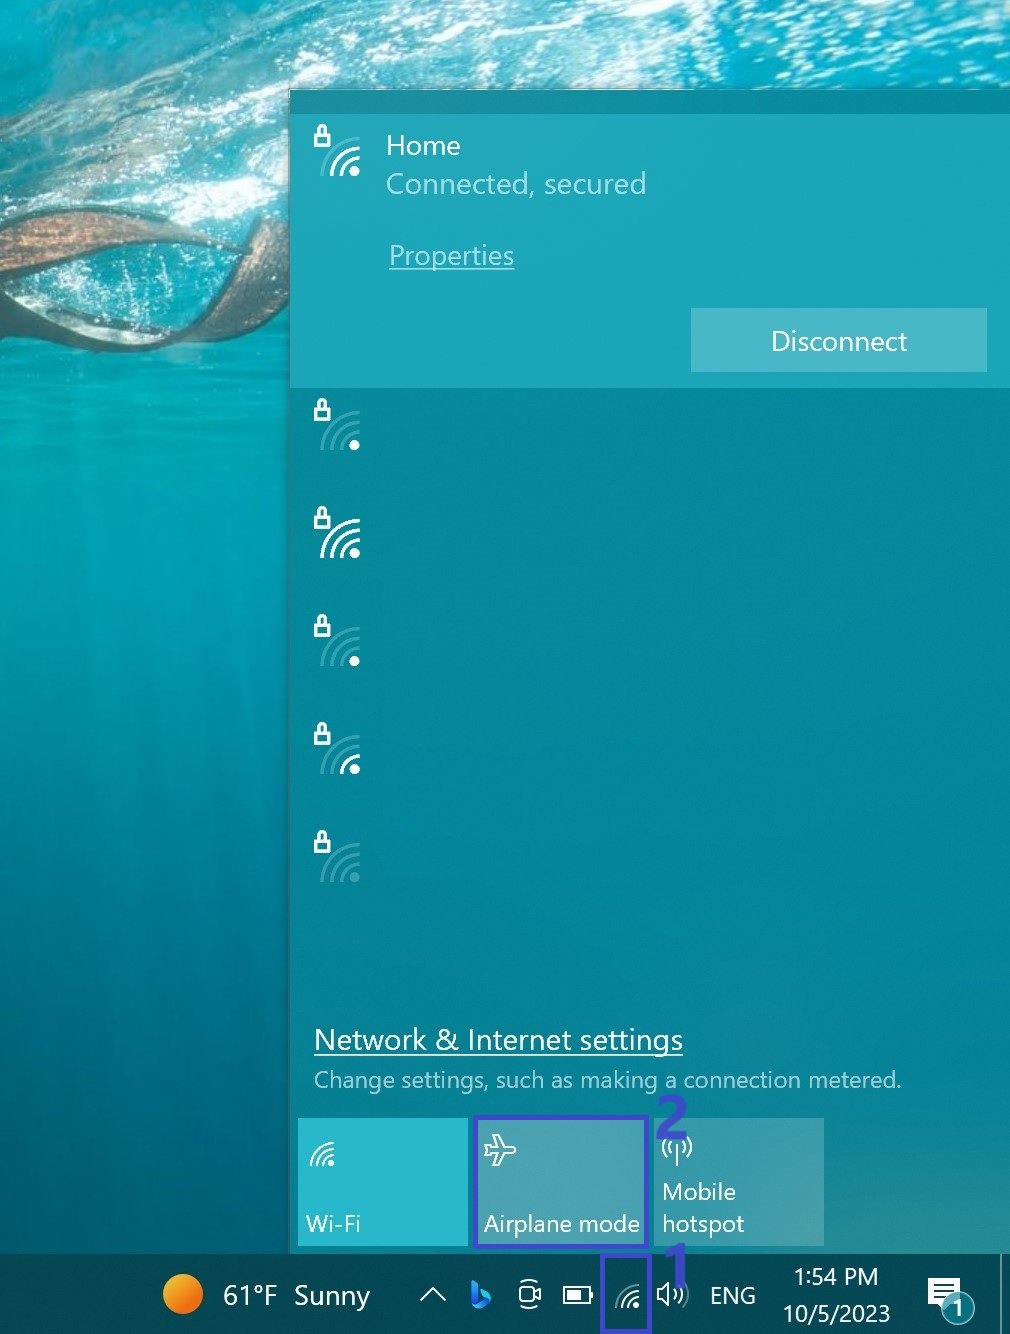
Management via the “Network List” panel
To enable or disable airplane mode using the Network List panel, left-click on the network activity icon in the notification area of the taskbar and click Airplane Mode in the panel with the list of available networks that appears
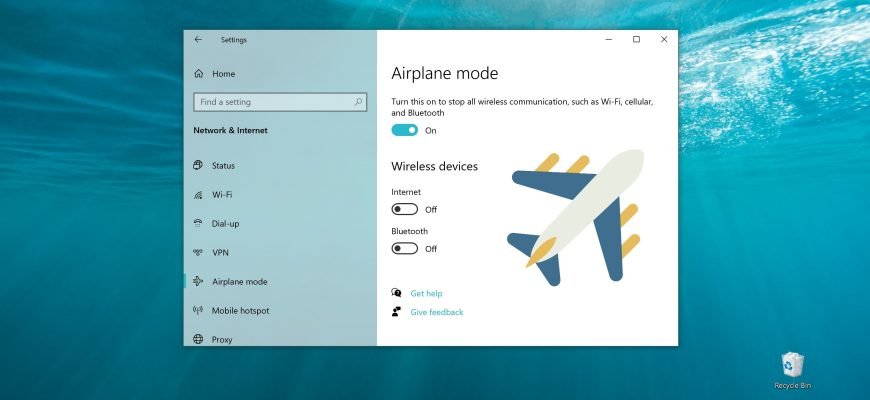
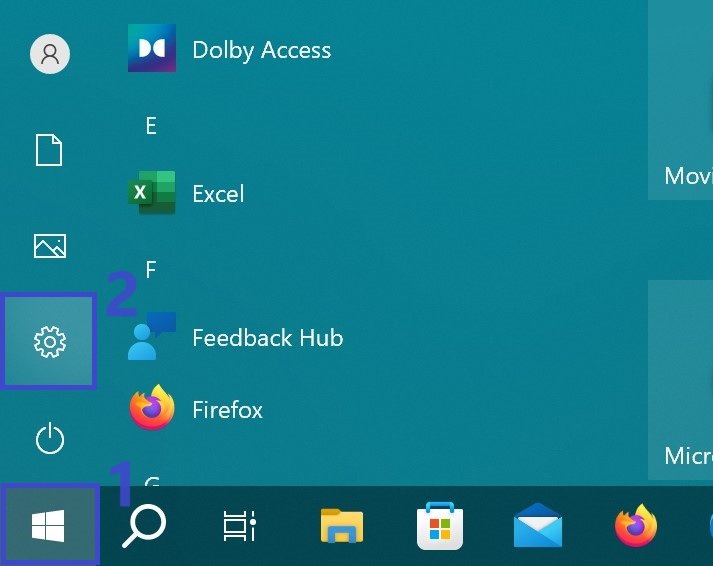
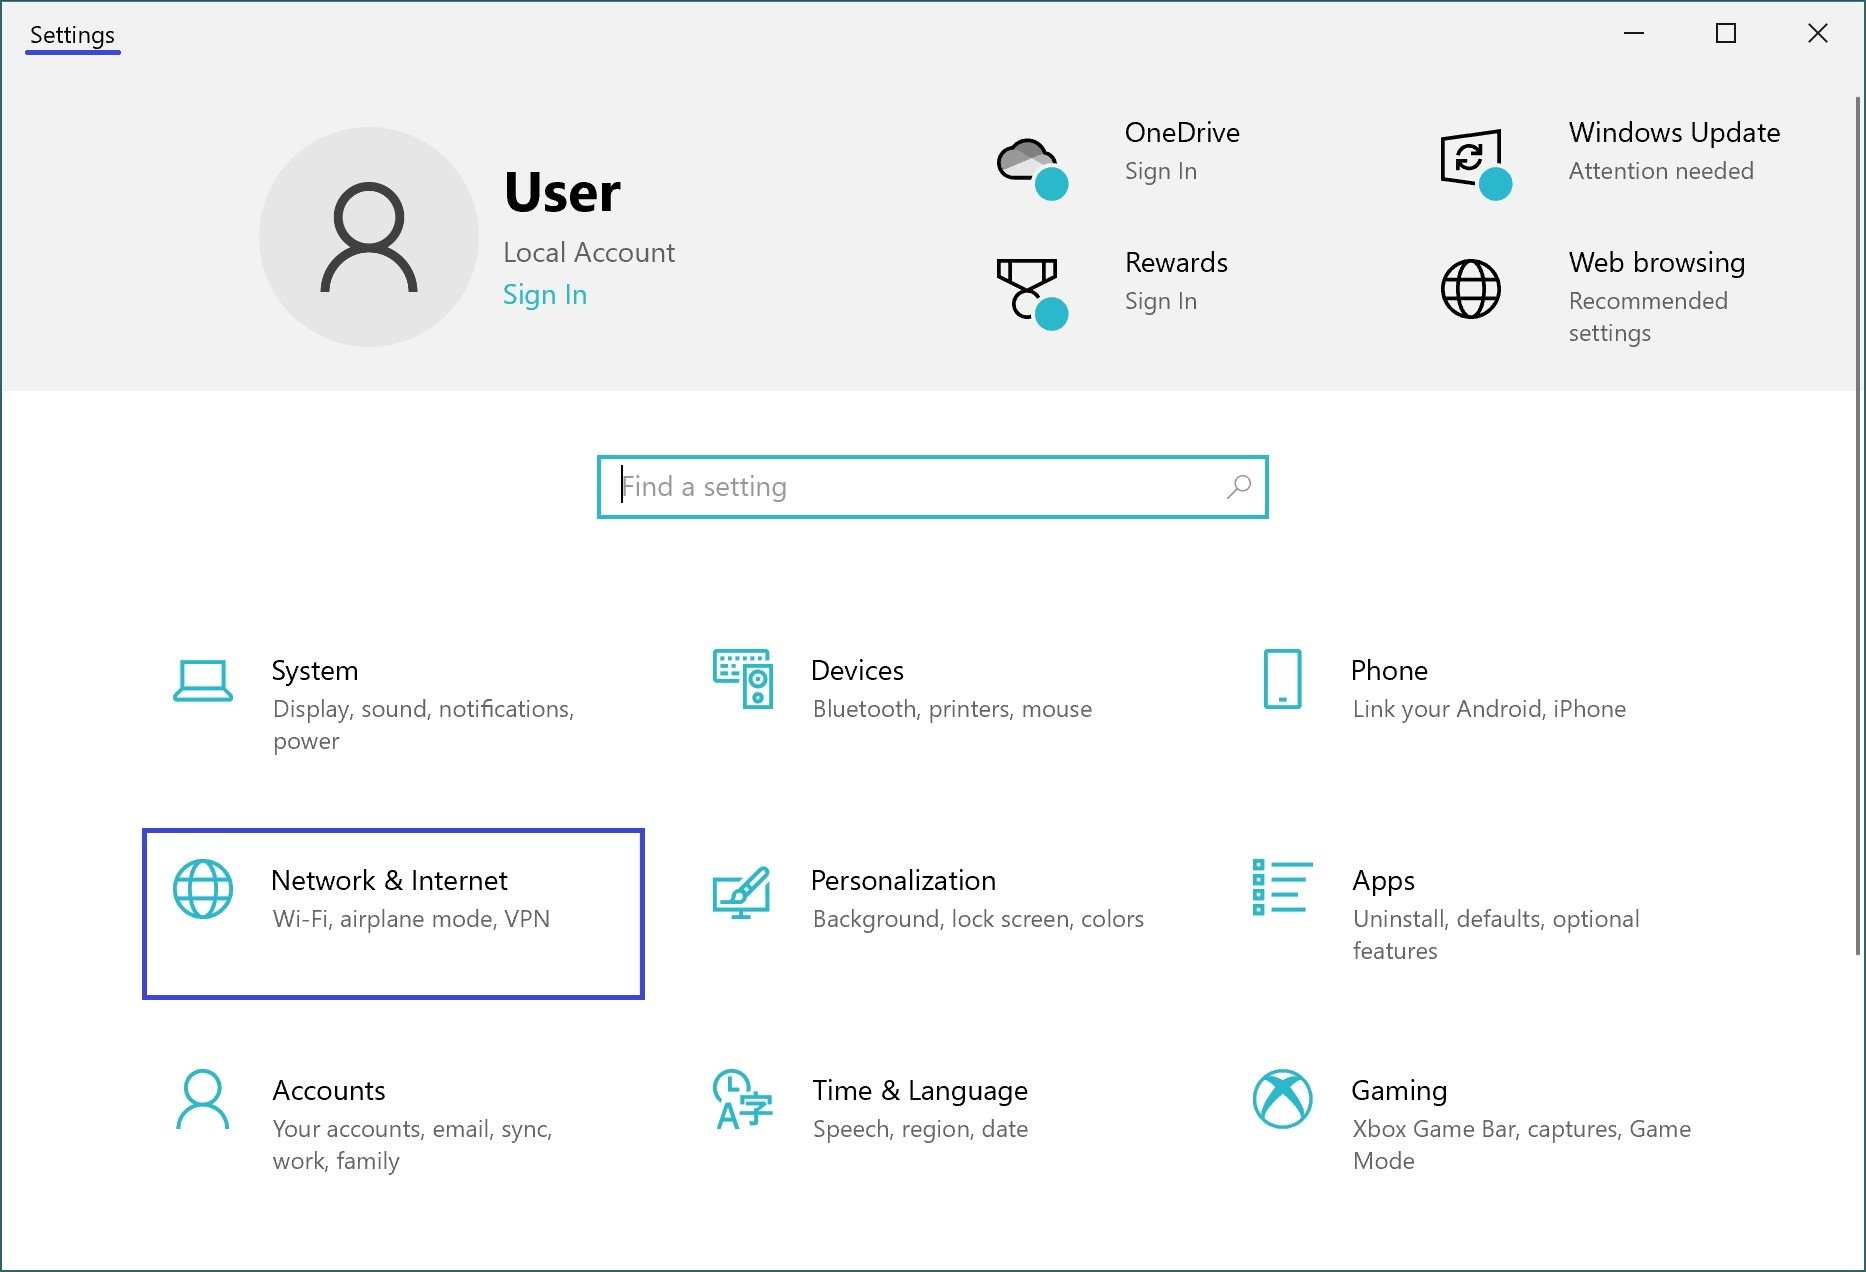
Through Windows Settings
To enable or disable airplane mode, click the Start button on the taskbar and then select Settings or press the Win+I key combination on your keyboard
In the Settings window that opens, select Network and Internet
Then select the Airplane Mode tab, and on the right side of the window, set the Airplane Mode switch to the appropriate position.
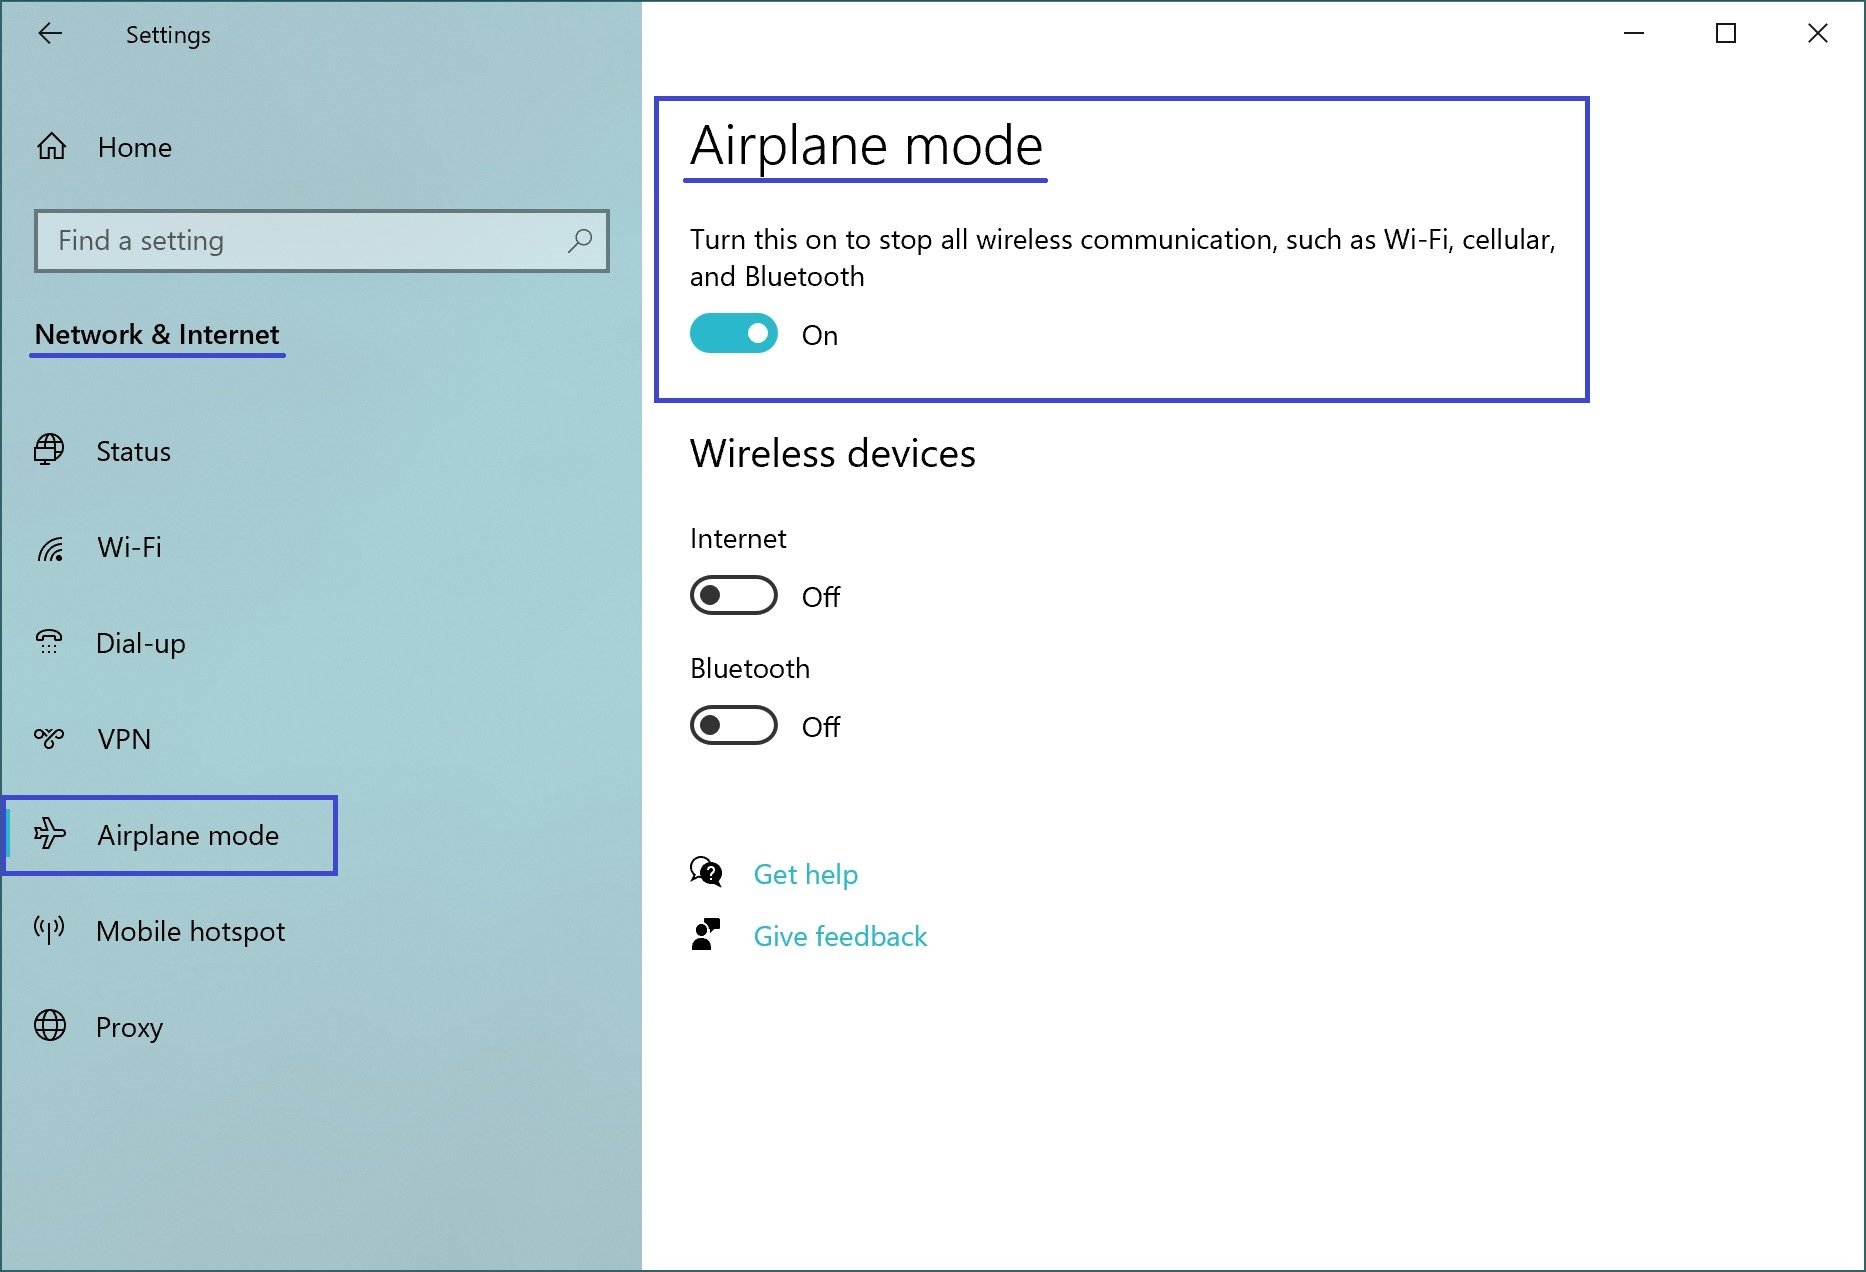
When airplane mode is enabled, you will still be able to enable or disable individual wireless devices (Wi-Fi or Bluetooth).
Using the steps discussed above, you can enable or disable airplane mode in Windows 10 operating system.