The Windows 10 operating system has the ability to manage and restrict user access to Wi-Fi networks. This feature allows you to centrally manage and allow/restrict user access to Wi-Fi network whitelists/blacklists.
To manage the list of Wi-Fi networks available to the user, let’s use the WLAN filtering functionality of the netsh utility.
All operations are performed with local administrator rights. It also means that if the computer administrator has restricted access to certain Wi-Fi networks, a normal user will not be able to change this behavior.
Filtering of the list of available Wi-Fi networks is based on the concepts of “white” and “black” list of SSID Wi-FI networks.
The SSID (Service Set Identifier) is a unique wireless network name, the same one you see in the list of available Wi-Fi networks when viewing the wireless environment. This name is specified in the Wi-Fi access point’s settings (hardware or software) and is 32 characters long with a maximum length of 32 characters and is case sensitive.
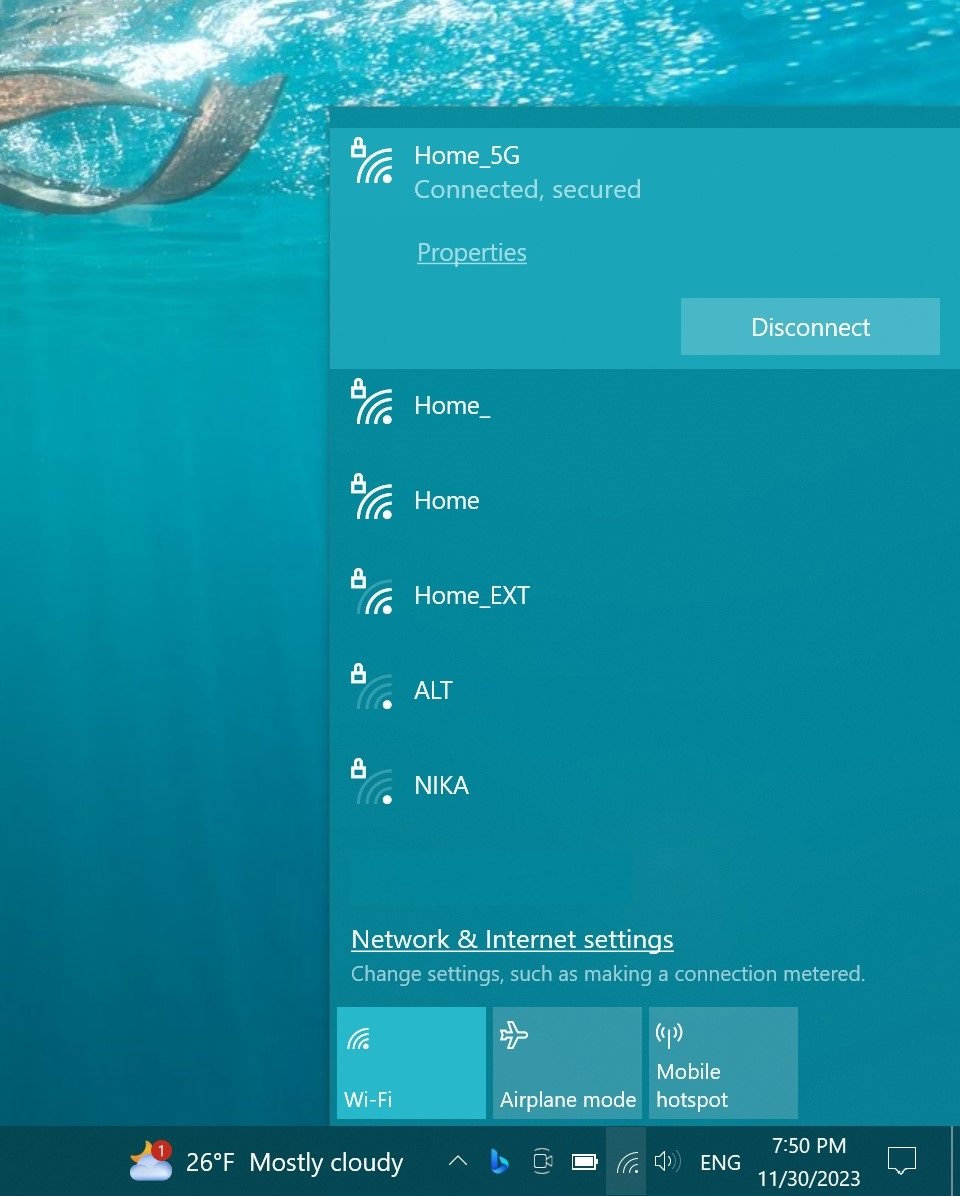
Let’s look at two examples of using Wi-Fi network filtering:
- Example 1: Hide all Wi-Fi networks from the user except the allowed ones
- Example 2: Hide only certain Wi-Fi networks
The first example assumes that we need to configure Windows 10 so that the system only sees the Wi-Fi networks that the administrator has specified (all other networks should be blocked and hidden from the user).
To implement this example, run a command prompt with administrator privileges.
Create a new filter by specifying the SSID of the network that should be available for connection in the Wi-Fi network list (whitelist) by executing the command:
netsh wlan add filter permission=allow ssid=”Home_5G” networktype=infrastructure
where “Home_5G” is the network name.
Using similar commands, you can add the SSIDs of all allowed Wi-Fi networks that the user’s computer should see to the whitelist.

The next command will disable the display of all other Wi-Fi networks:
netsh wlan add filter permission=denyall networktype=infrastructure
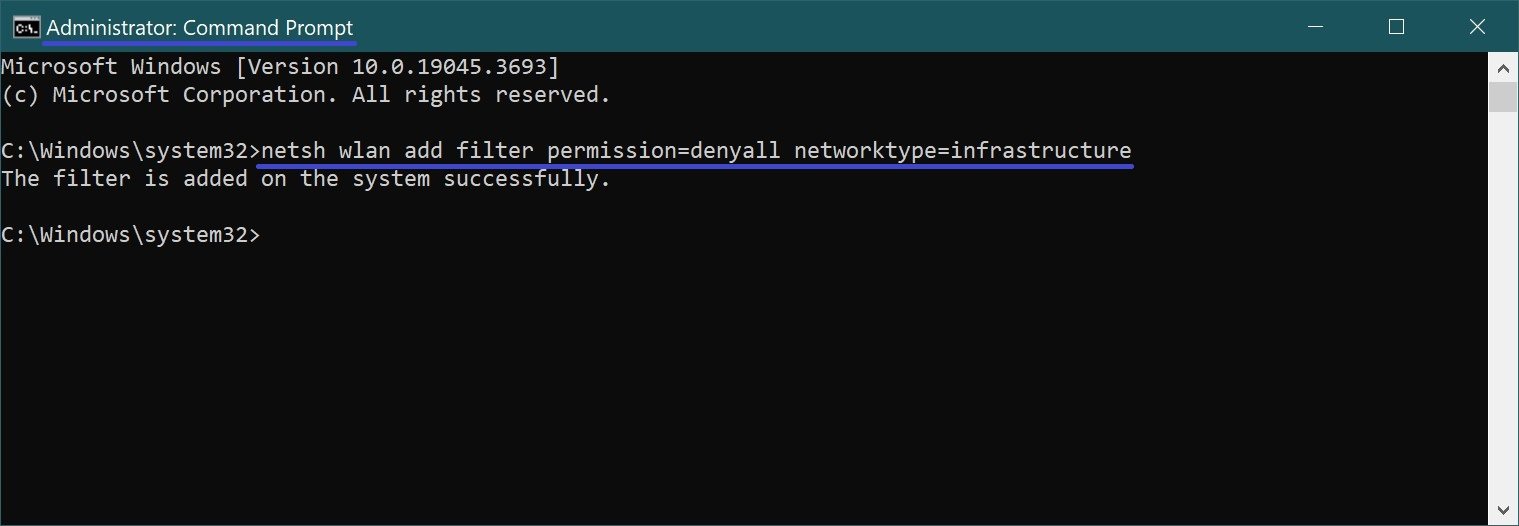
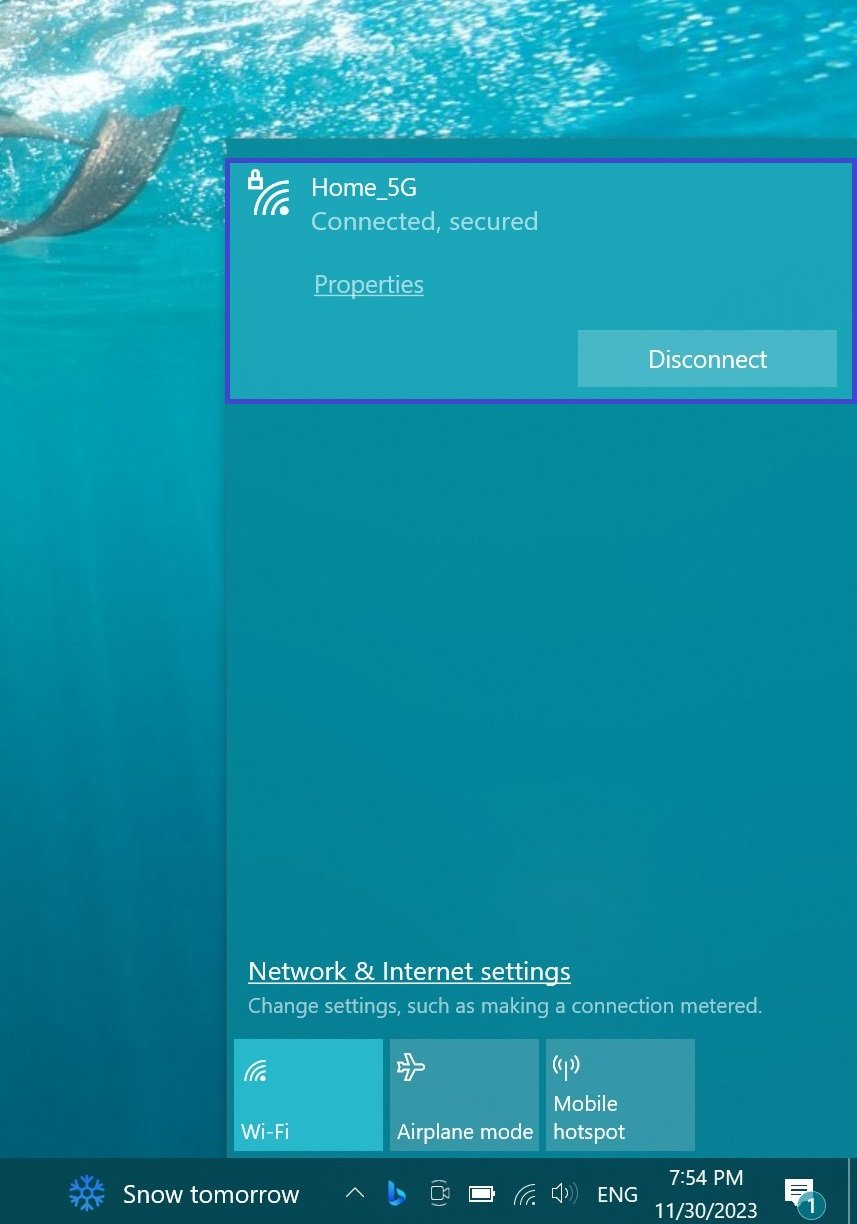
As a result, only the allowed network will be displayed in the Networks panel.
Let’s consider the second scenario where we need to hide the SSIDs of certain Wi-Fi networks from the user.
To do this, run a command prompt with administrator privileges and for each of the Wi-Fi networks we want to hide, run the command:
netsh wlan add filter permission=block ssid=”Home_EXT” networktype=infrastructure
where “Home_EXT” is the name of the network we want to hide.

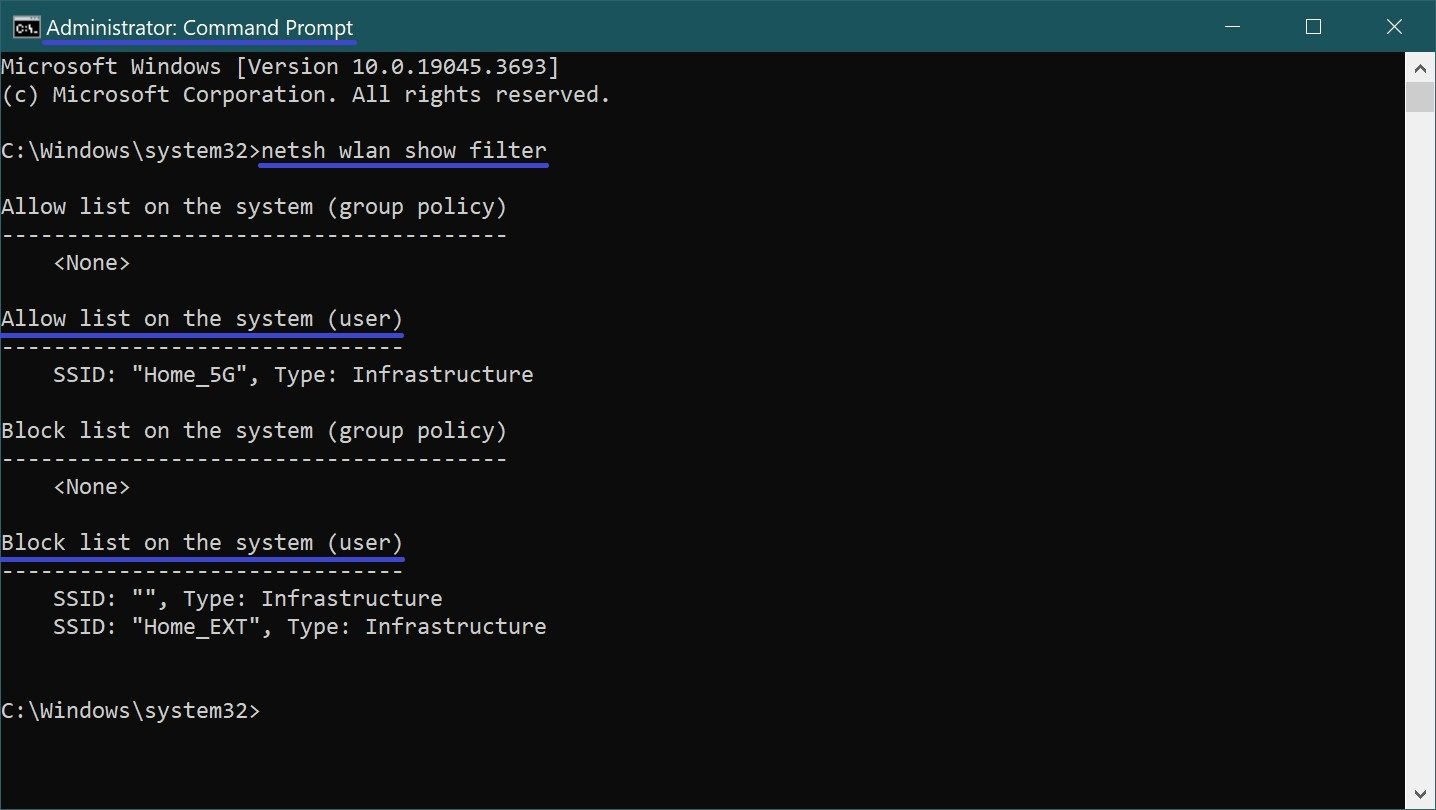
The list of applied filters can be retrieved using the command:
netsh wlan show filter
In this case, you can see that two custom filters are used: one network is added to the Allowed Networks List and one to the Blocked Networks List.
To remove a WiFi network SSID from the banned list, you need to execute the command:
netsh wlan set blockednetworks display=show

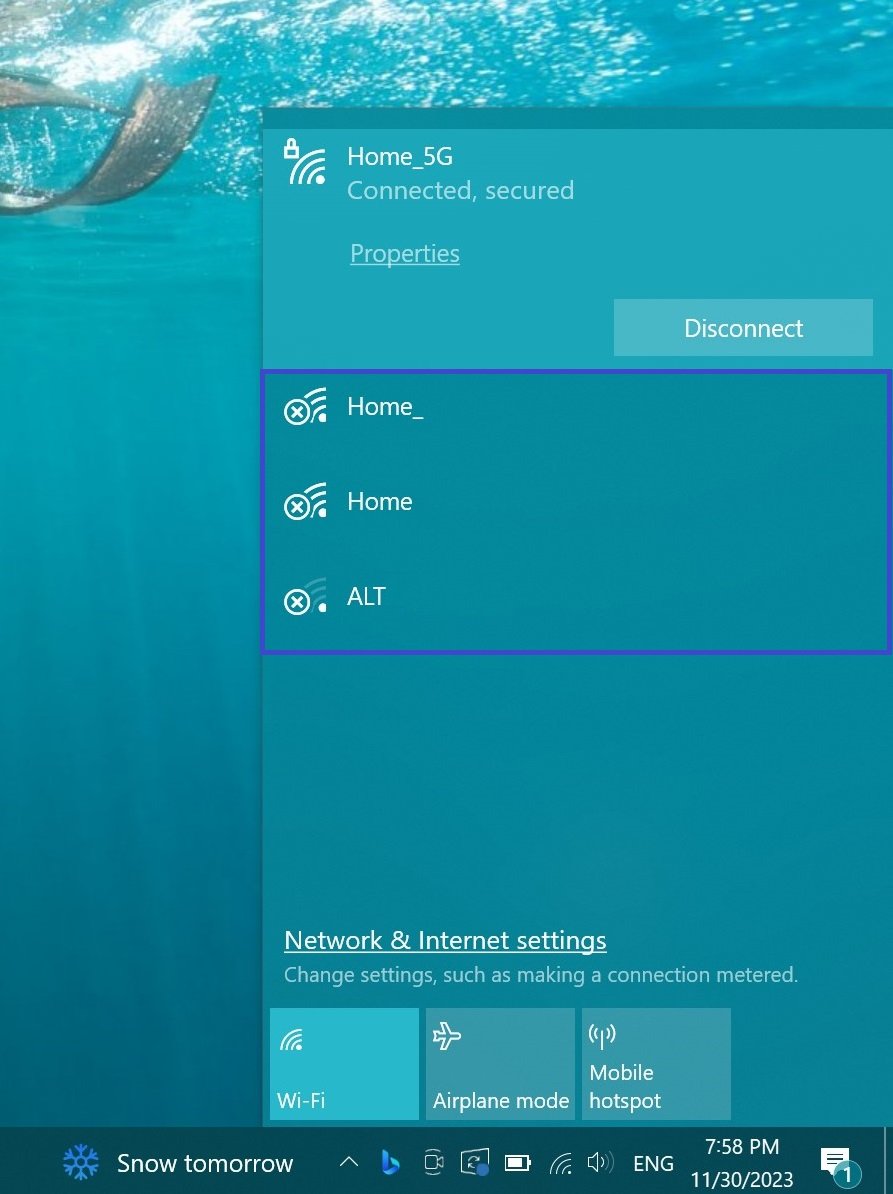
After executing the previous command, all the networks blocked by the Wi-FI filter will be displayed in the list with a small cross icon (it means that this network is blocked).
Remove this network from the blacklist by executing the command:
netsh wlan delete filter permission=block ssid=Home_EXT networktype=infrastructure

Disable the display of hidden wireless networks:
netsh wlan set blockednetworks display=hide

To clear all Wi-Fi filters in use, run the command:
netsh wlan delete filter permission=denyall networktype=infrastructure

To remove the SSID of a WiFi network from the list of allowed networks, you need to execute the command:
netsh wlan delete filter permission=allow ssid=”Home_5G” networktype=infrastructure

If a computer administrator uses filters to restrict user access to wireless networks, a regular personal computer user can list all currently available wireless networks with the command:
netsh wlan set blockednetworks display=show

Blocked networks will be marked with a red cross icon and you will not be able to connect to them.
The methods of filtering access to Wi-Fi networks discussed above also work in Windows 8.1, Windows 8 operating system.

