Windows 10 operating system supports multi-monitor systems of different configurations by default and so you don’t need to install third-party software to configure multiple displays.
The need for a second monitor is primarily to expand your workspace, which in some cases makes it easier to perform multiple tasks simultaneously.
It is important to note that some video cards do not support multiple monitors, and that older displays may not always connect automatically.
The following article discusses how to configure various settings when connecting a second monitor to your computer.
To connect a second monitor you need a computer (laptop) or video card with an additional video signal output to an external display using various connectors such as HDMI, VGA, DVI port or DisplayPort, as well as the appropriate cable that connects the monitor to the connector (port).
Switching between display modes
By connecting the monitors to a computer, you can select a suitable display mode.
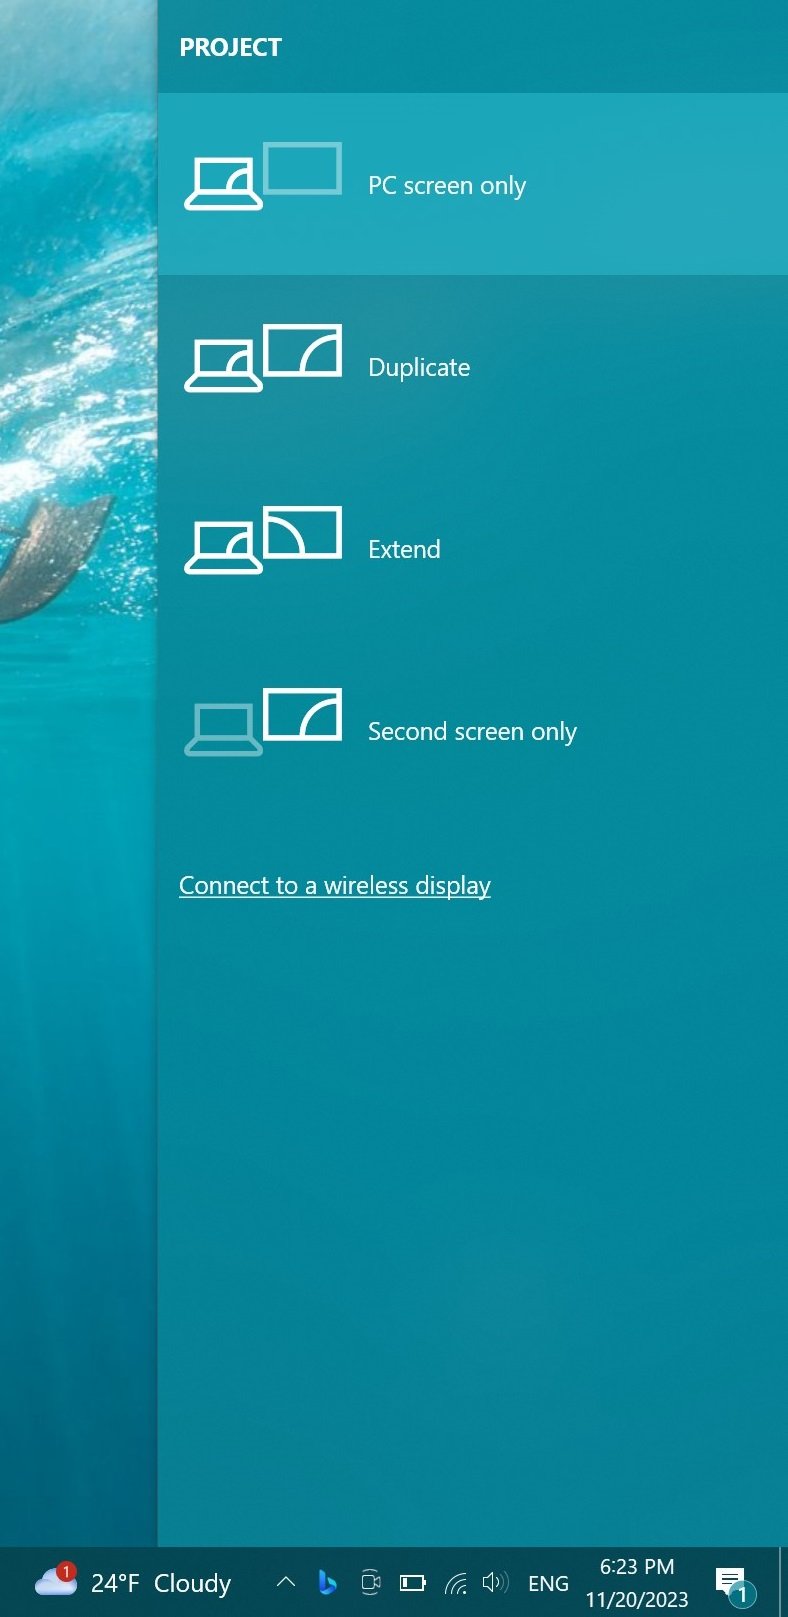
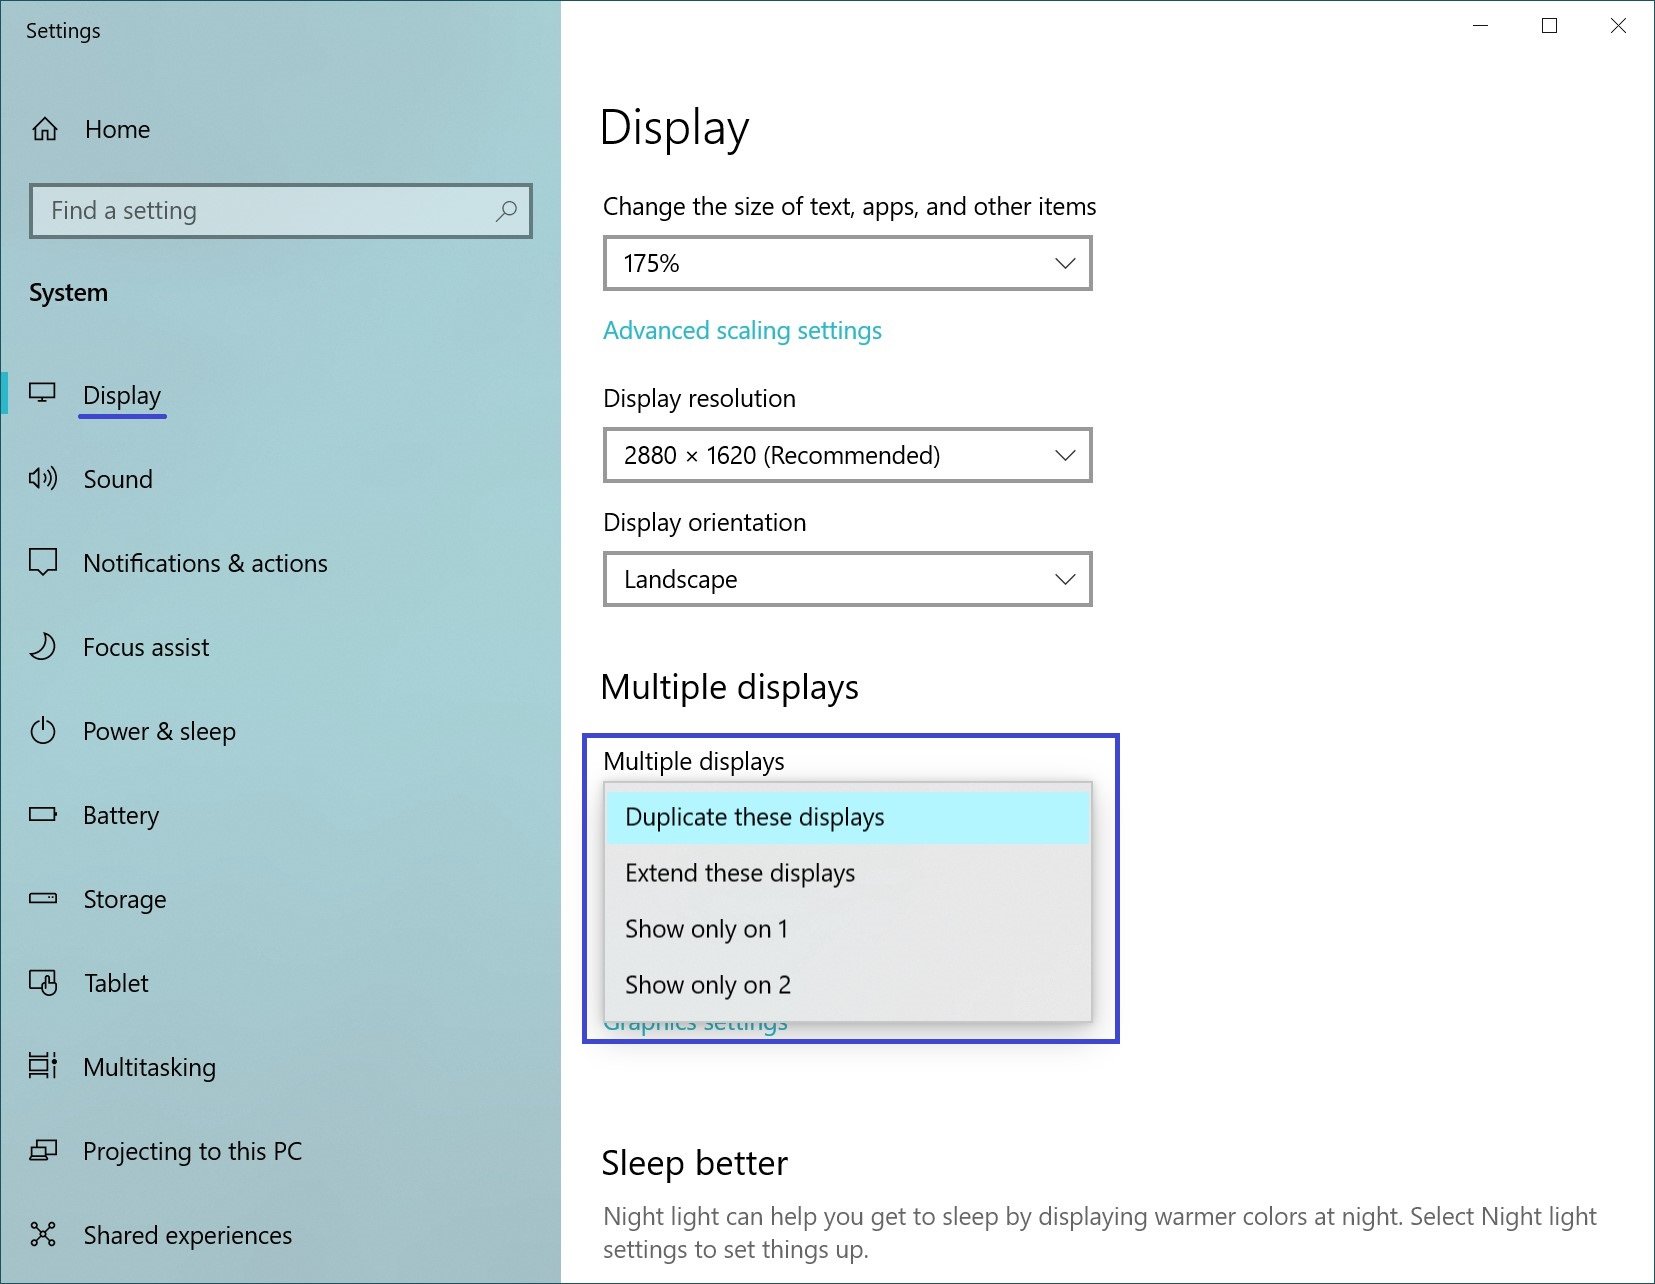
There are four display modes available in Windows 10:
- PC screen only – The image will be displayed on the first monitor of the computer or on the main screen of the notebook. The second monitor will not be used and nothing will be projected onto it.
- Duplicate – The content of the main monitor is copied to the second monitor. This option is best suited for presentations.
- Extend – Two monitors become one large virtual screen. This allows you to display a single file, such as a large photo, on two monitors.
- Second screen only – Only the secondary monitor is used. This mode allows you to check the resolution of the second monitor. Therefore, if you have a laptop with a presentation projected onto a large monitor, select this option for optimal results.
Depending on which device you are using, the appropriate display mode will automatically be selected:
- When you connect a second monitor to your laptop, the default display mode is Duplicate.
- When a second monitor is connected to the desktop computer, the default display style is set to Extend
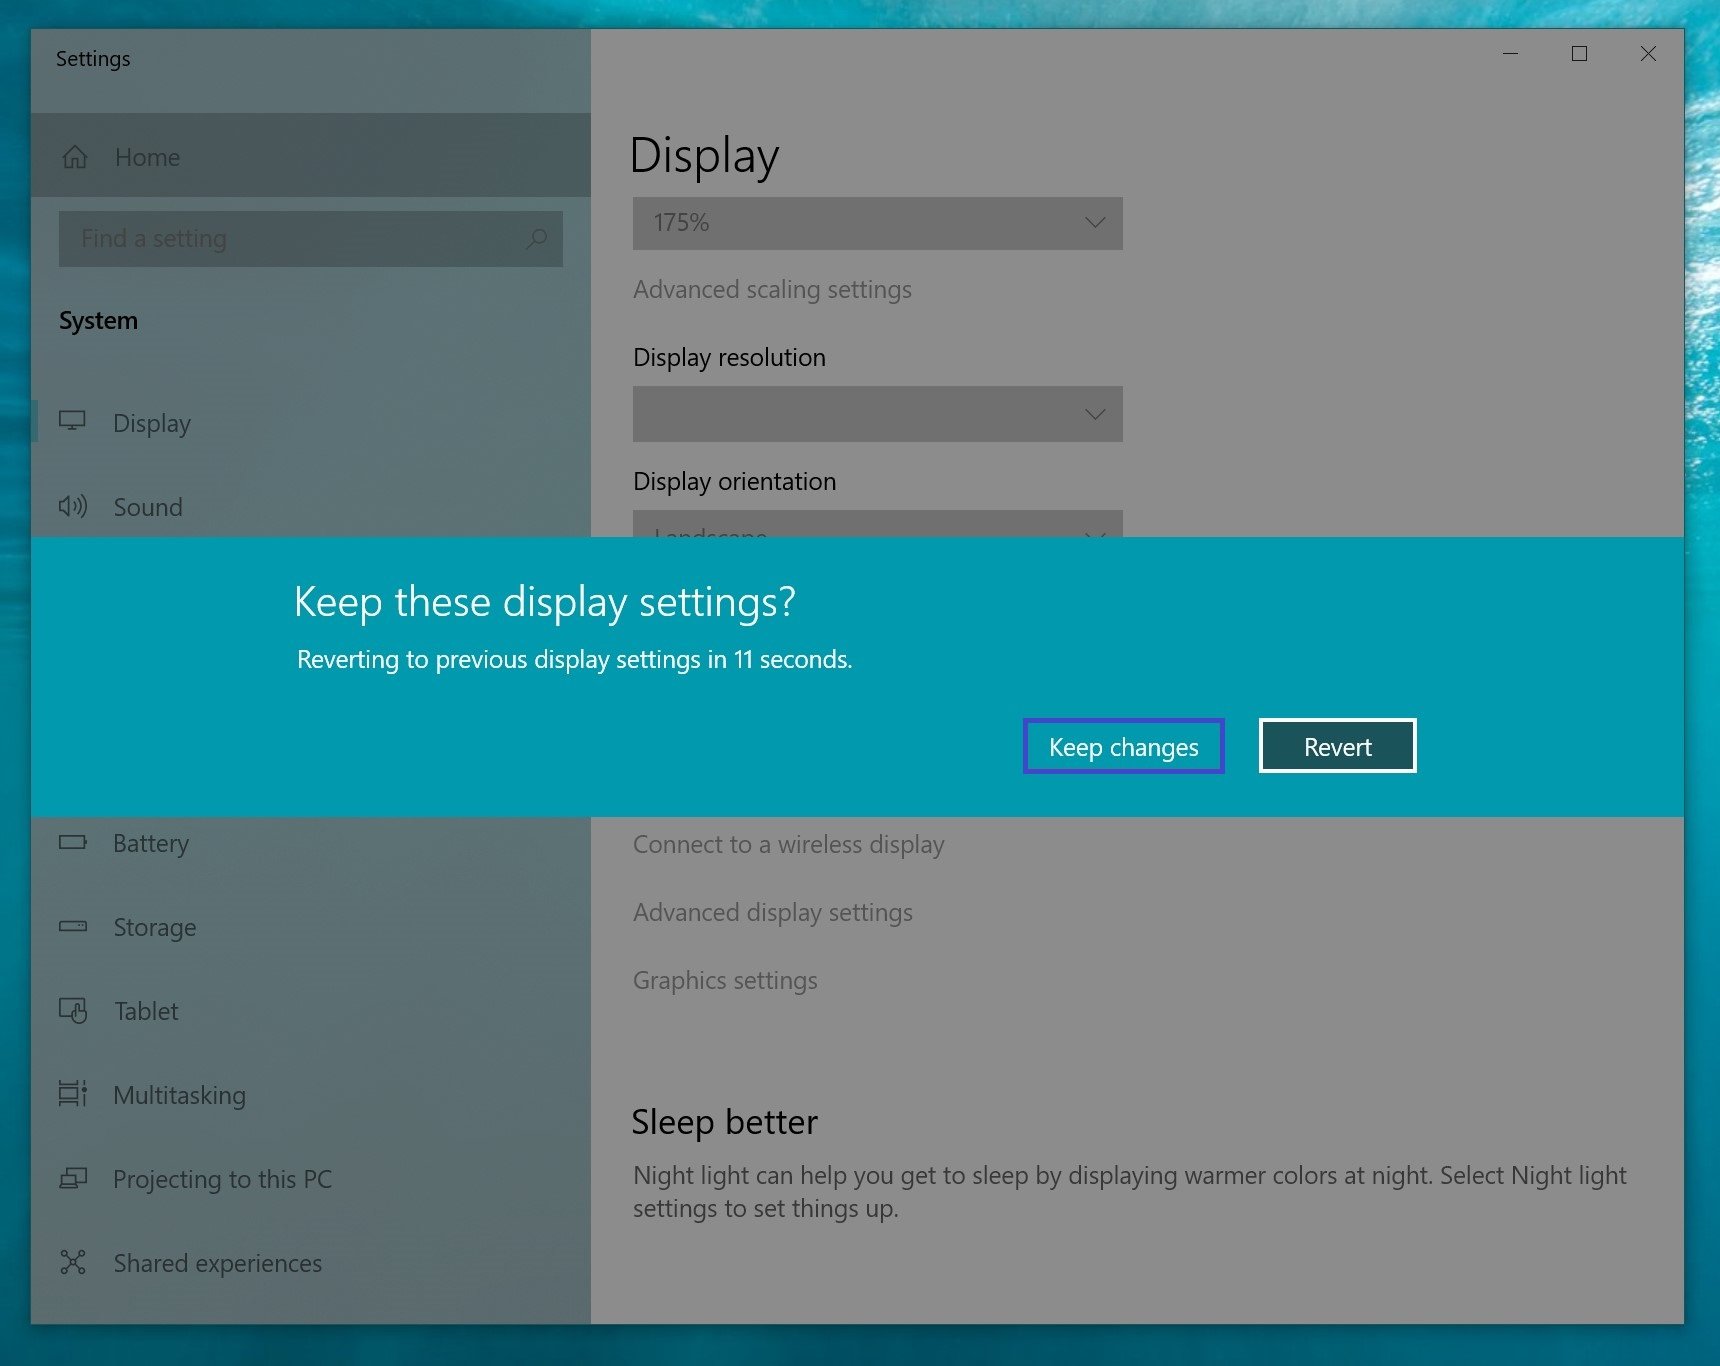
To quickly switch between modes press the Win+P keyboard shortcut, this brings up the PROJECT sidebar with four options.
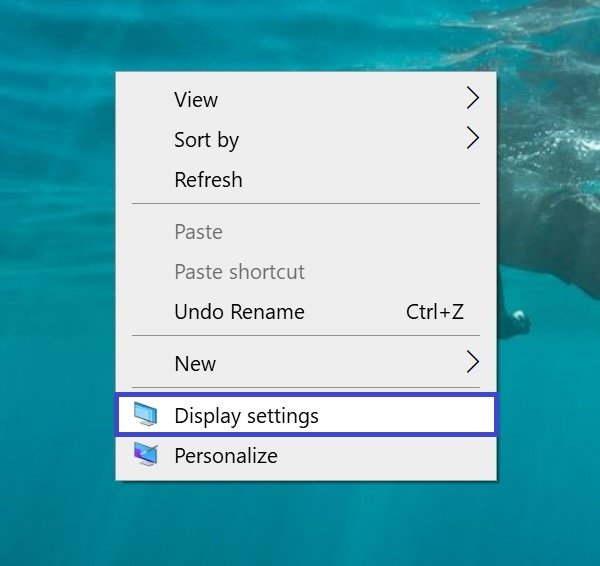
You can also select the display mode using the screen options, to do this, open: Windows Settings ➯ System ➯ Display, or right-click in an empty area of the desktop and select Display settings in the context menu that appears.
Then on the right side of the window, click on the Multiple Displays drop-down list and select one of the items.
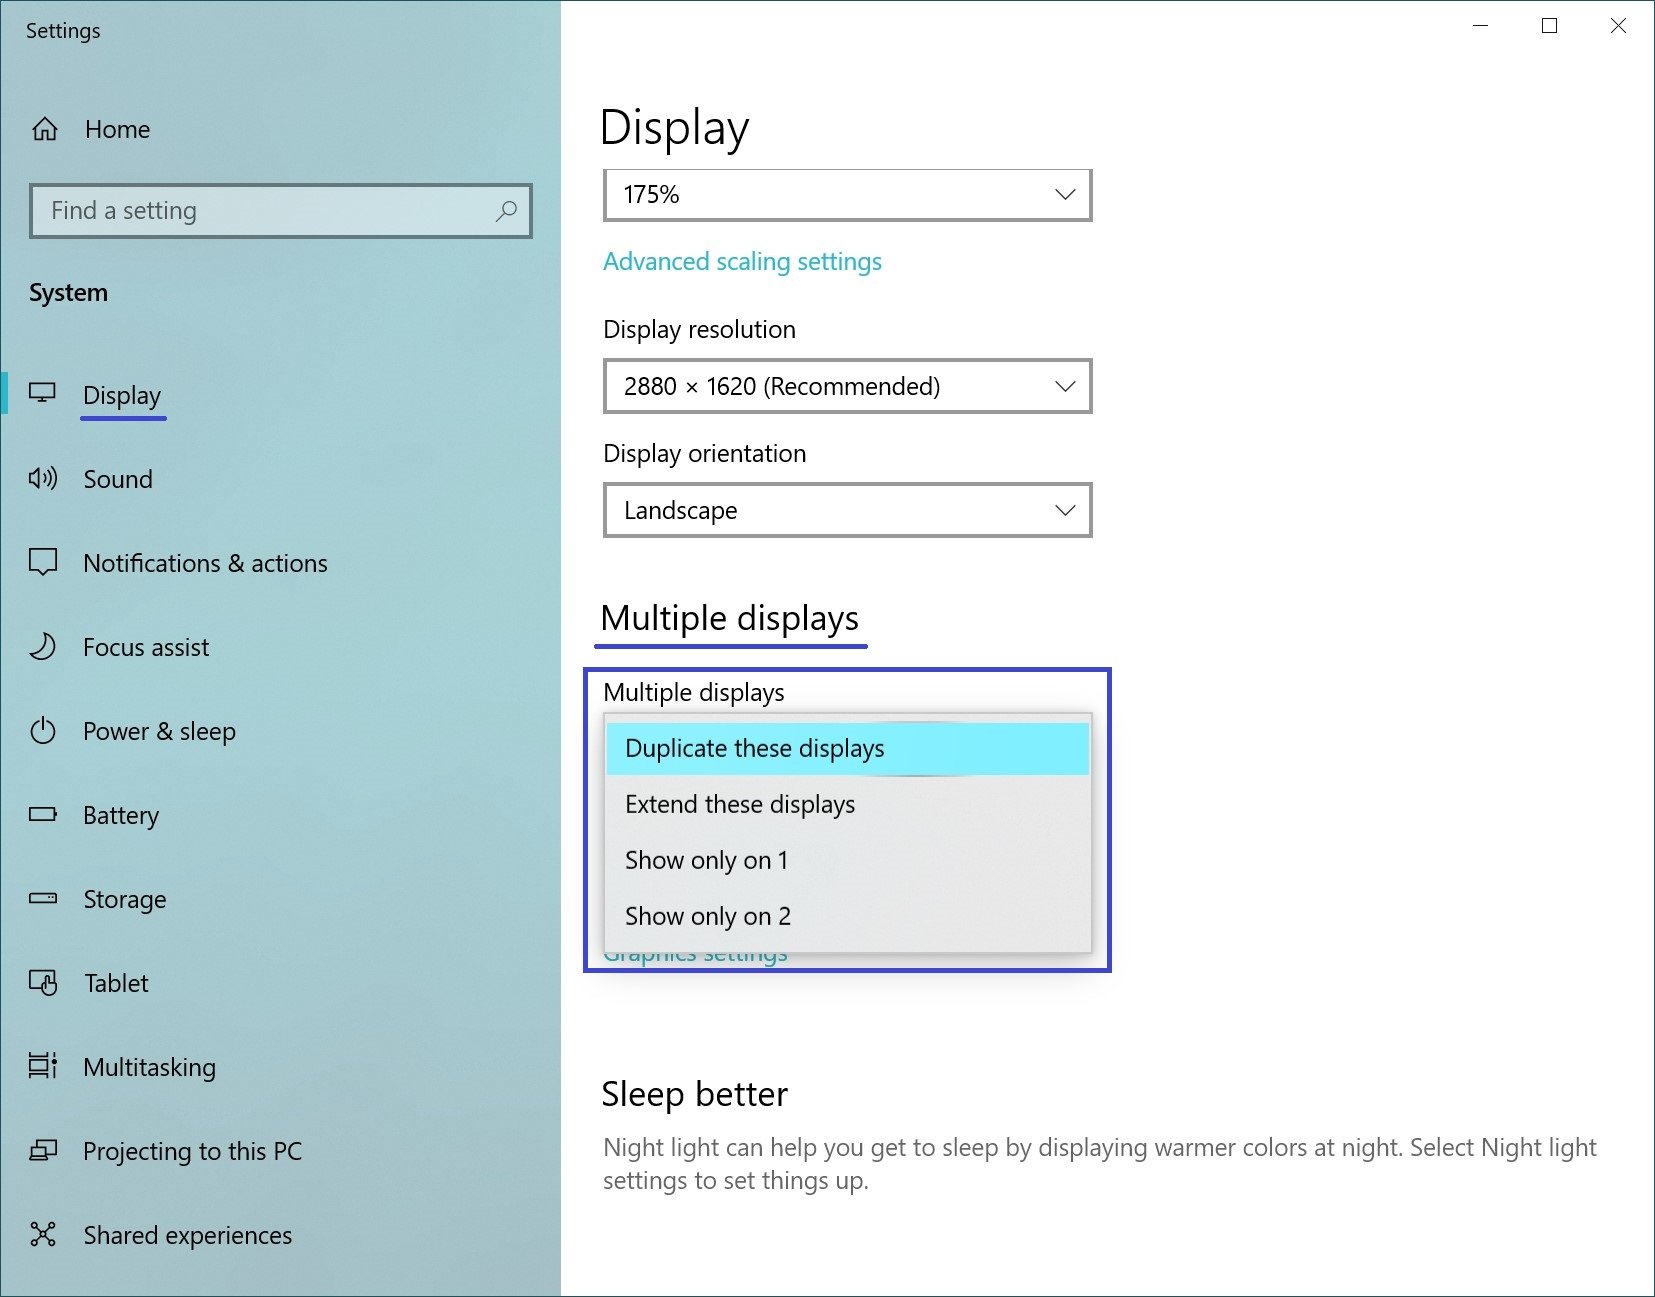
Then save the selected parameter.
Customizing the display settings
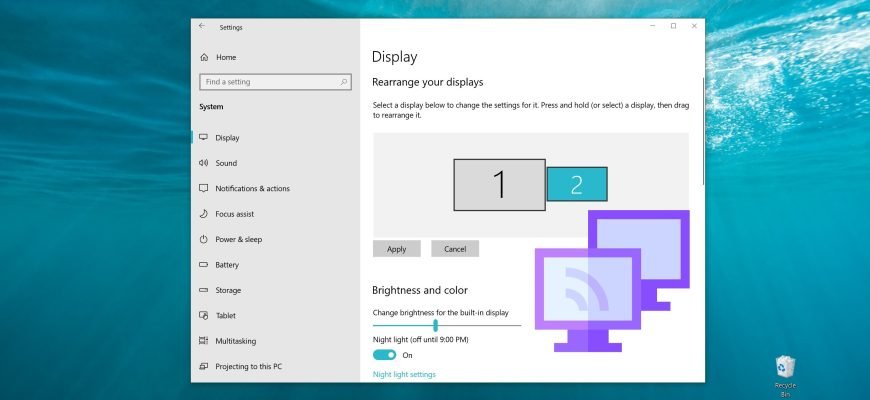
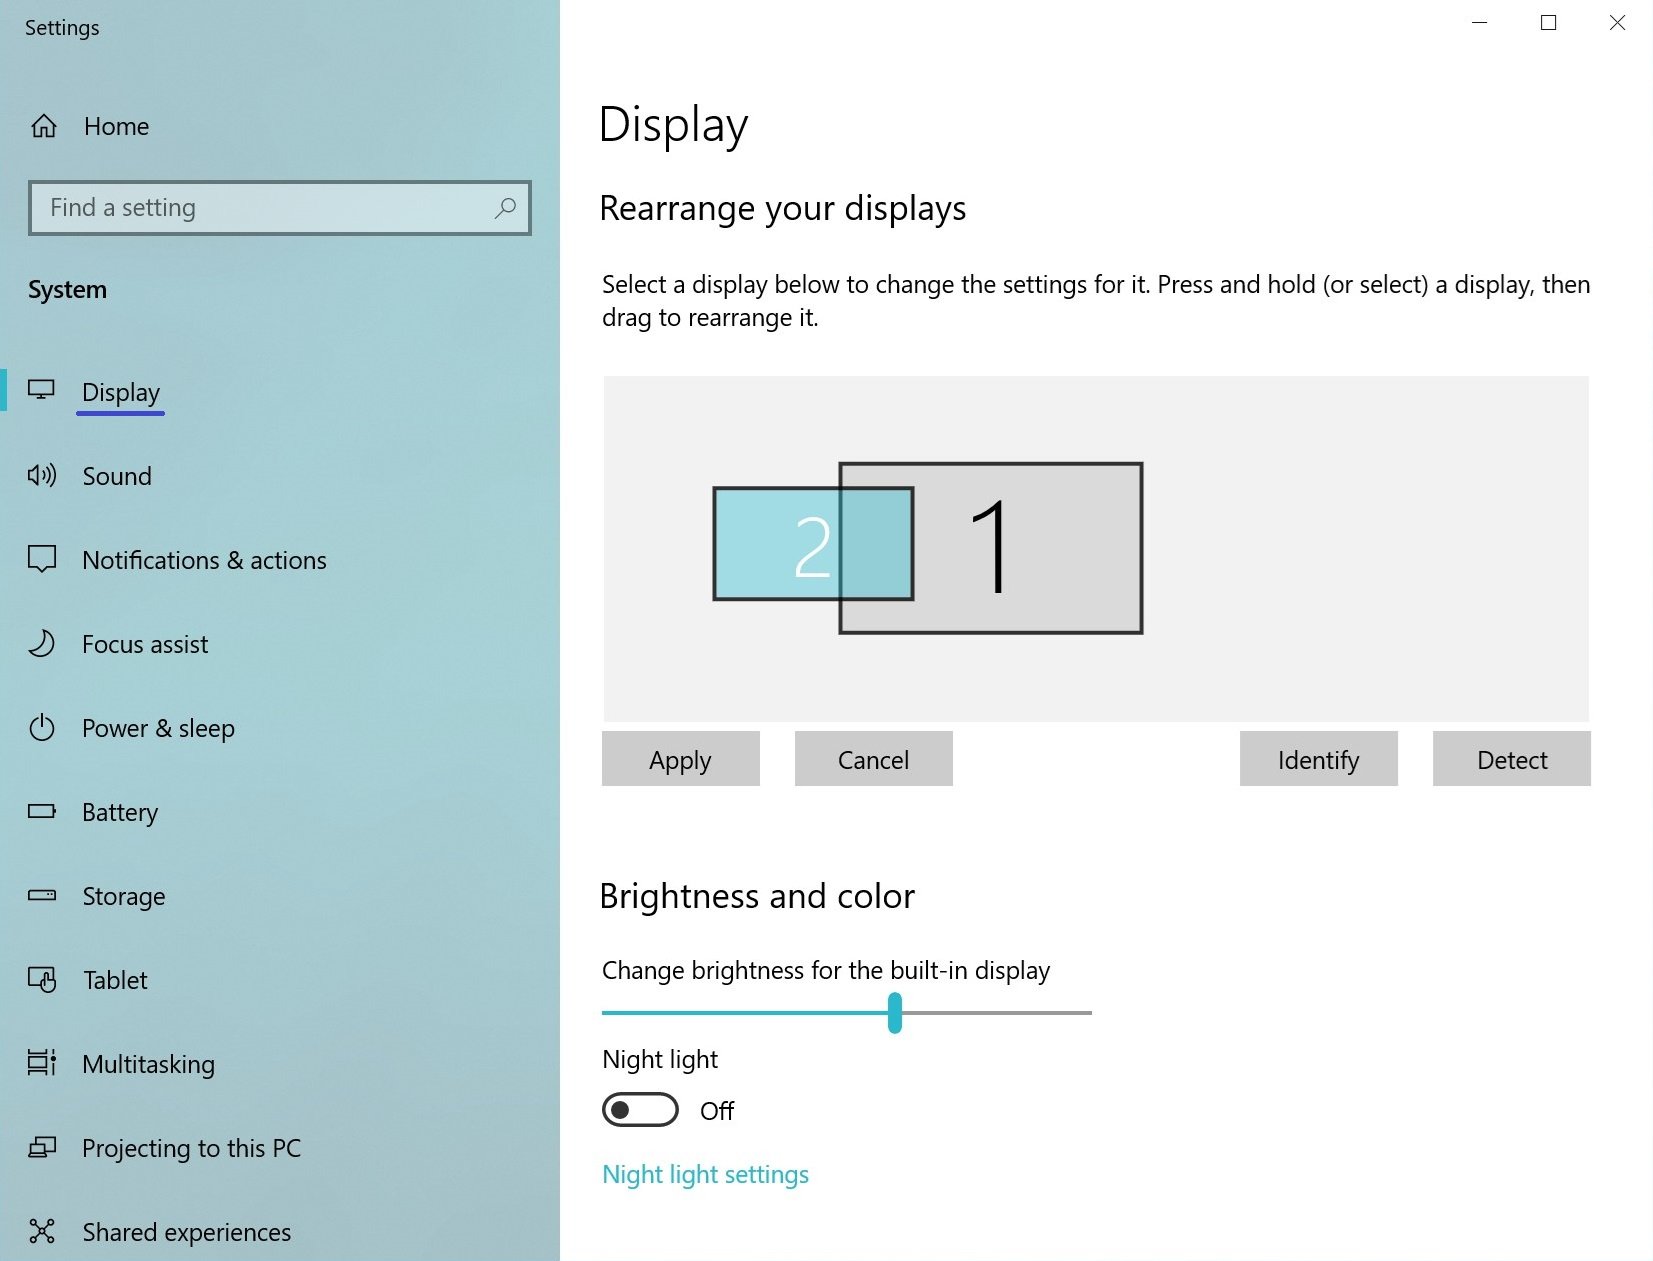
Setting up and managing displays with Windows is very simple, to do this, successively open: Windows Settings ➯ System ➯ Display, or right-click in an empty area of the desktop and in the context menu that appears, select Display settings.
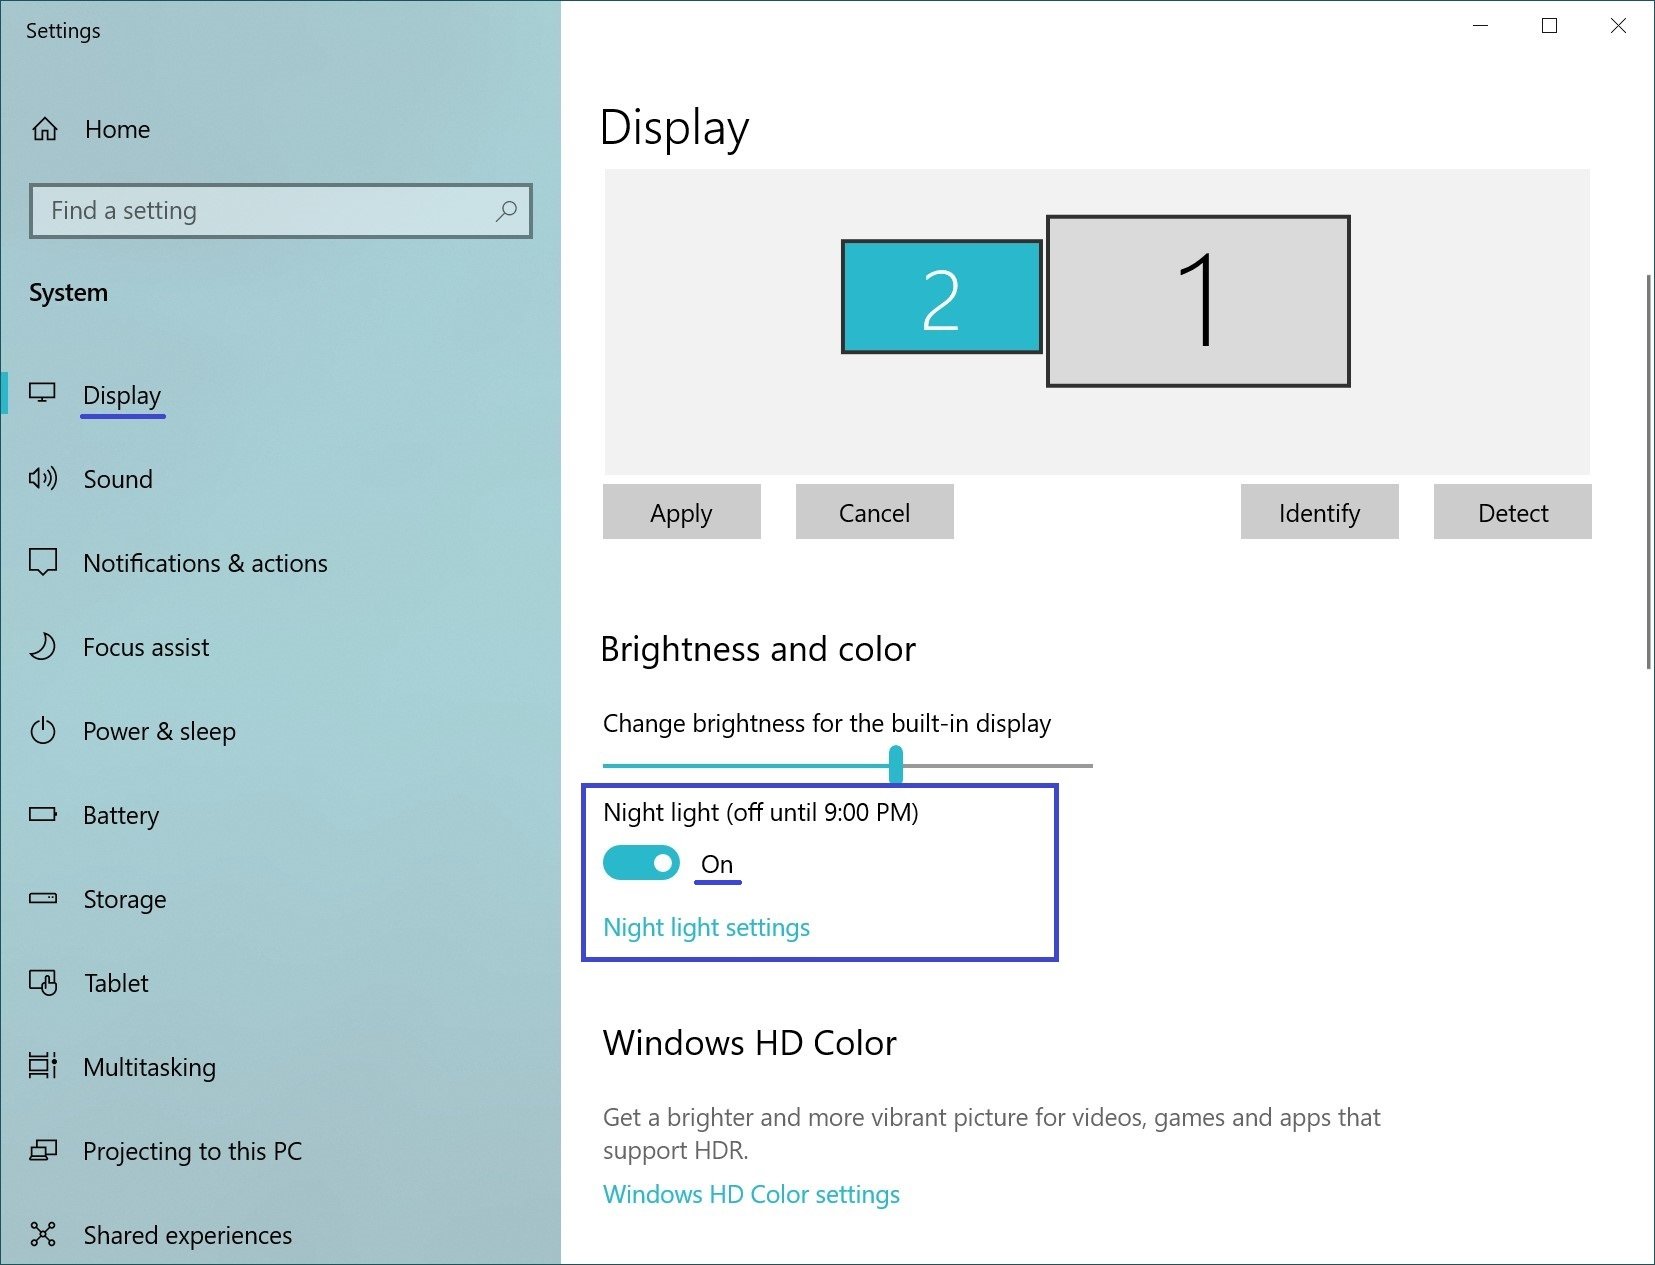
Each of the monitors is represented by a small rectangular thumbnail.
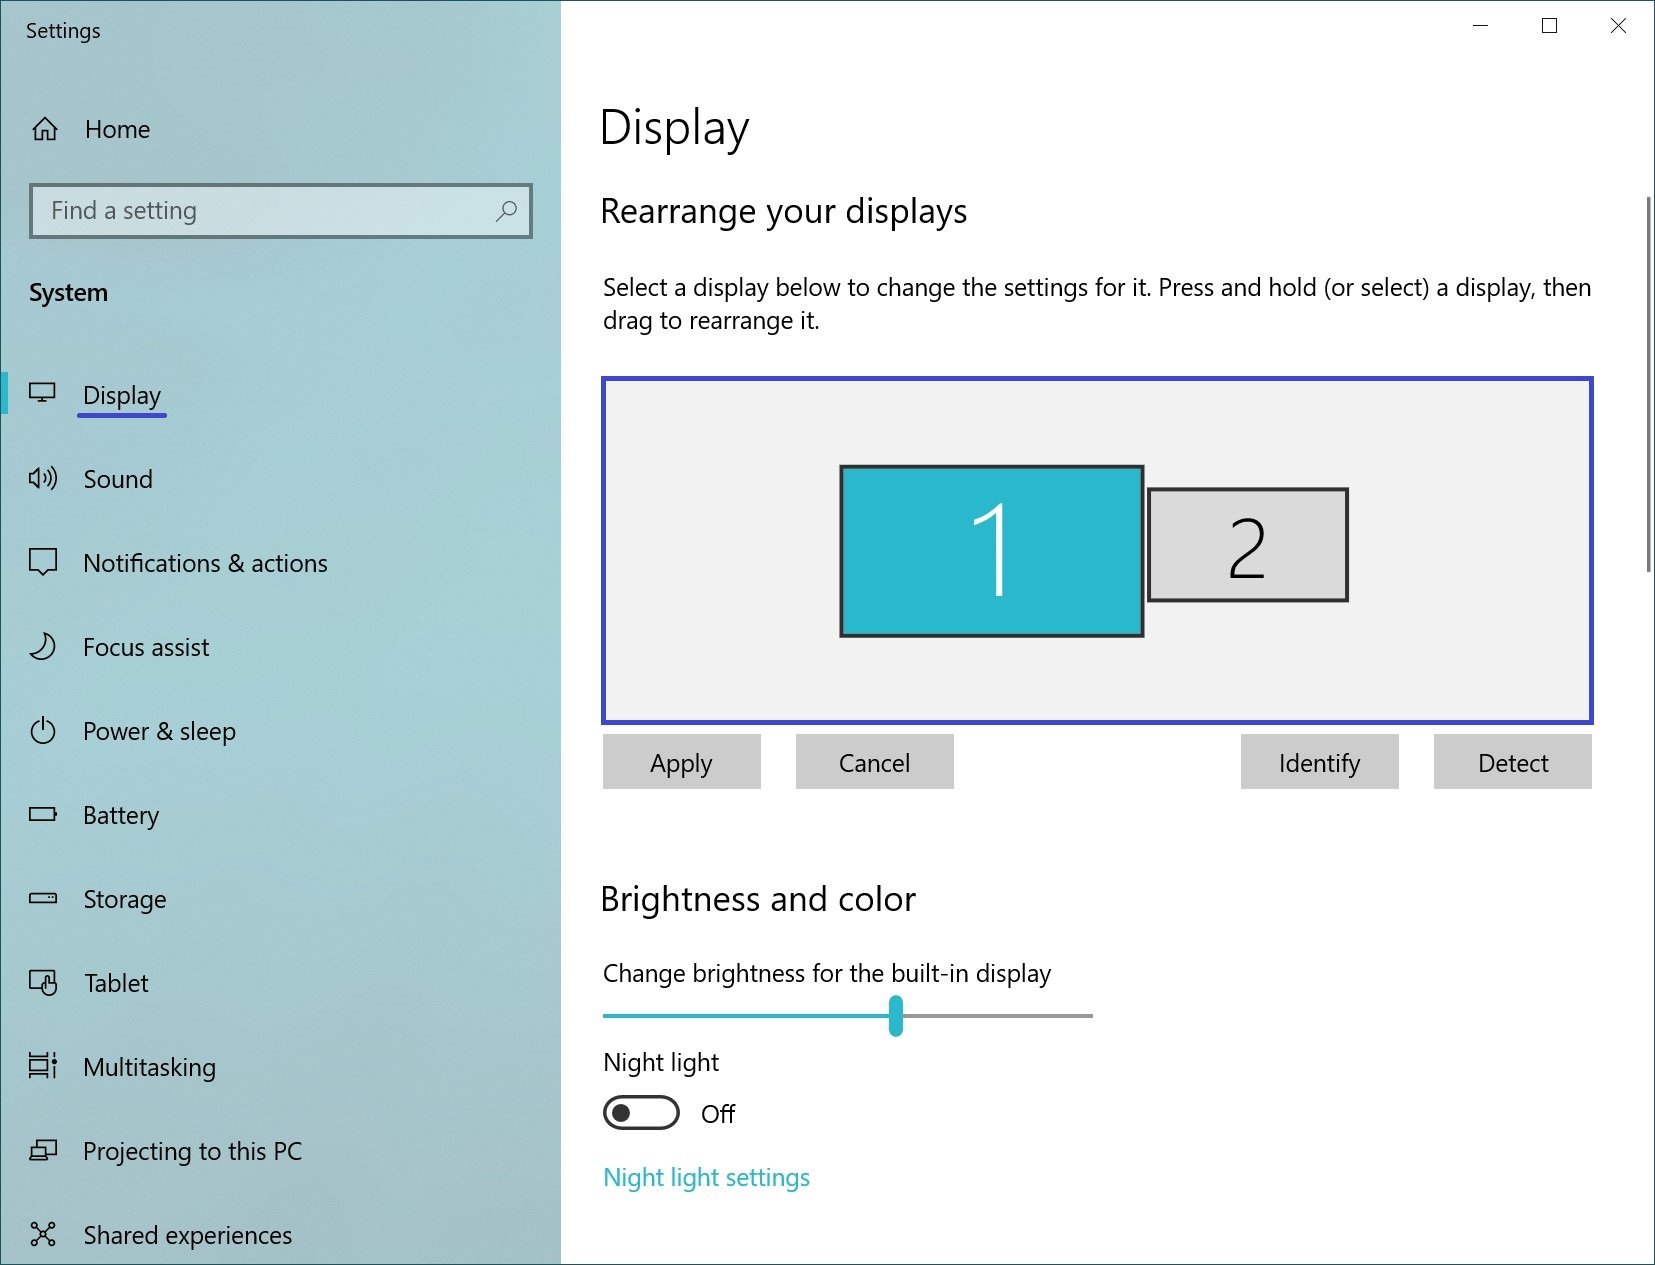
Drag the thumbnails on the screen so that their mutual arrangement follows the configuration of the monitors on your desk.
Here you can activate or deactivate the Night light function
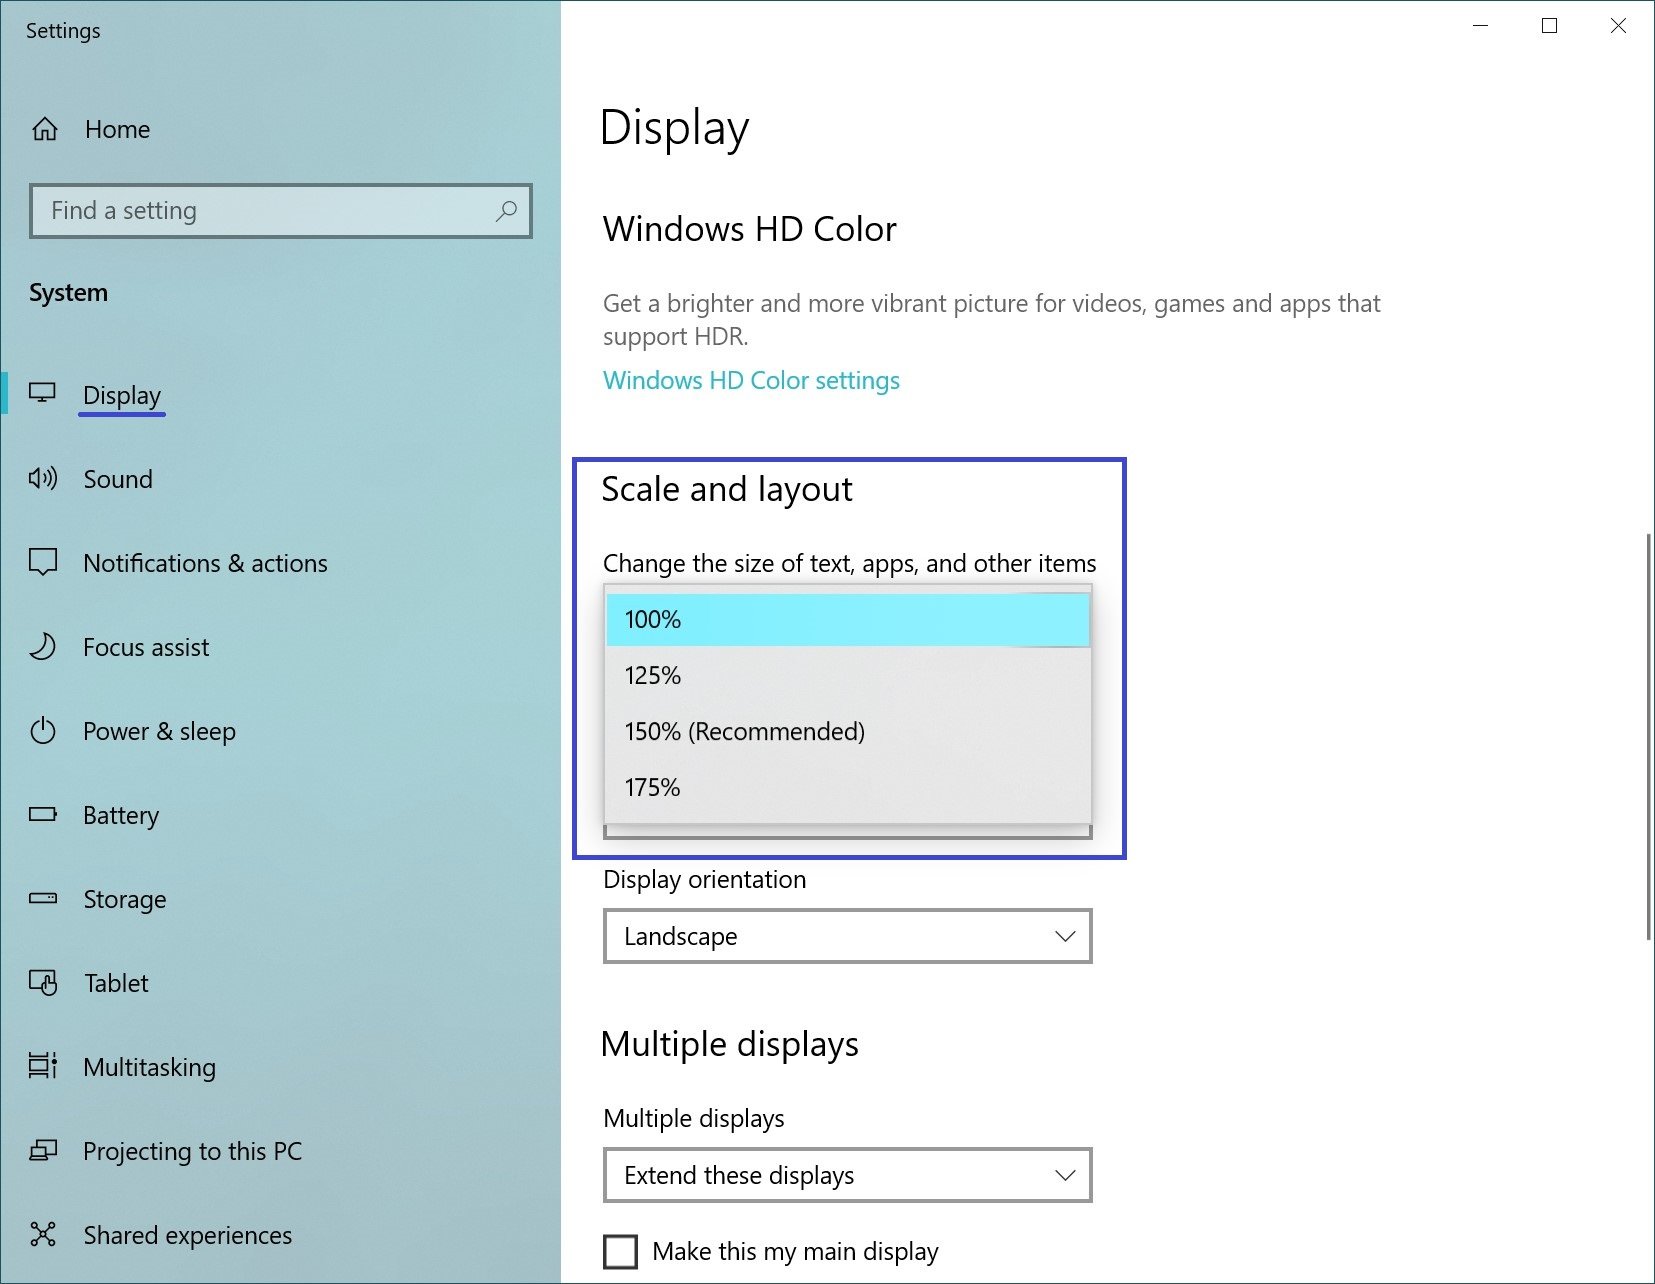
Use zoom to enlarge text and other content. (This is suitable for higher resolutions or for people with vision problems).
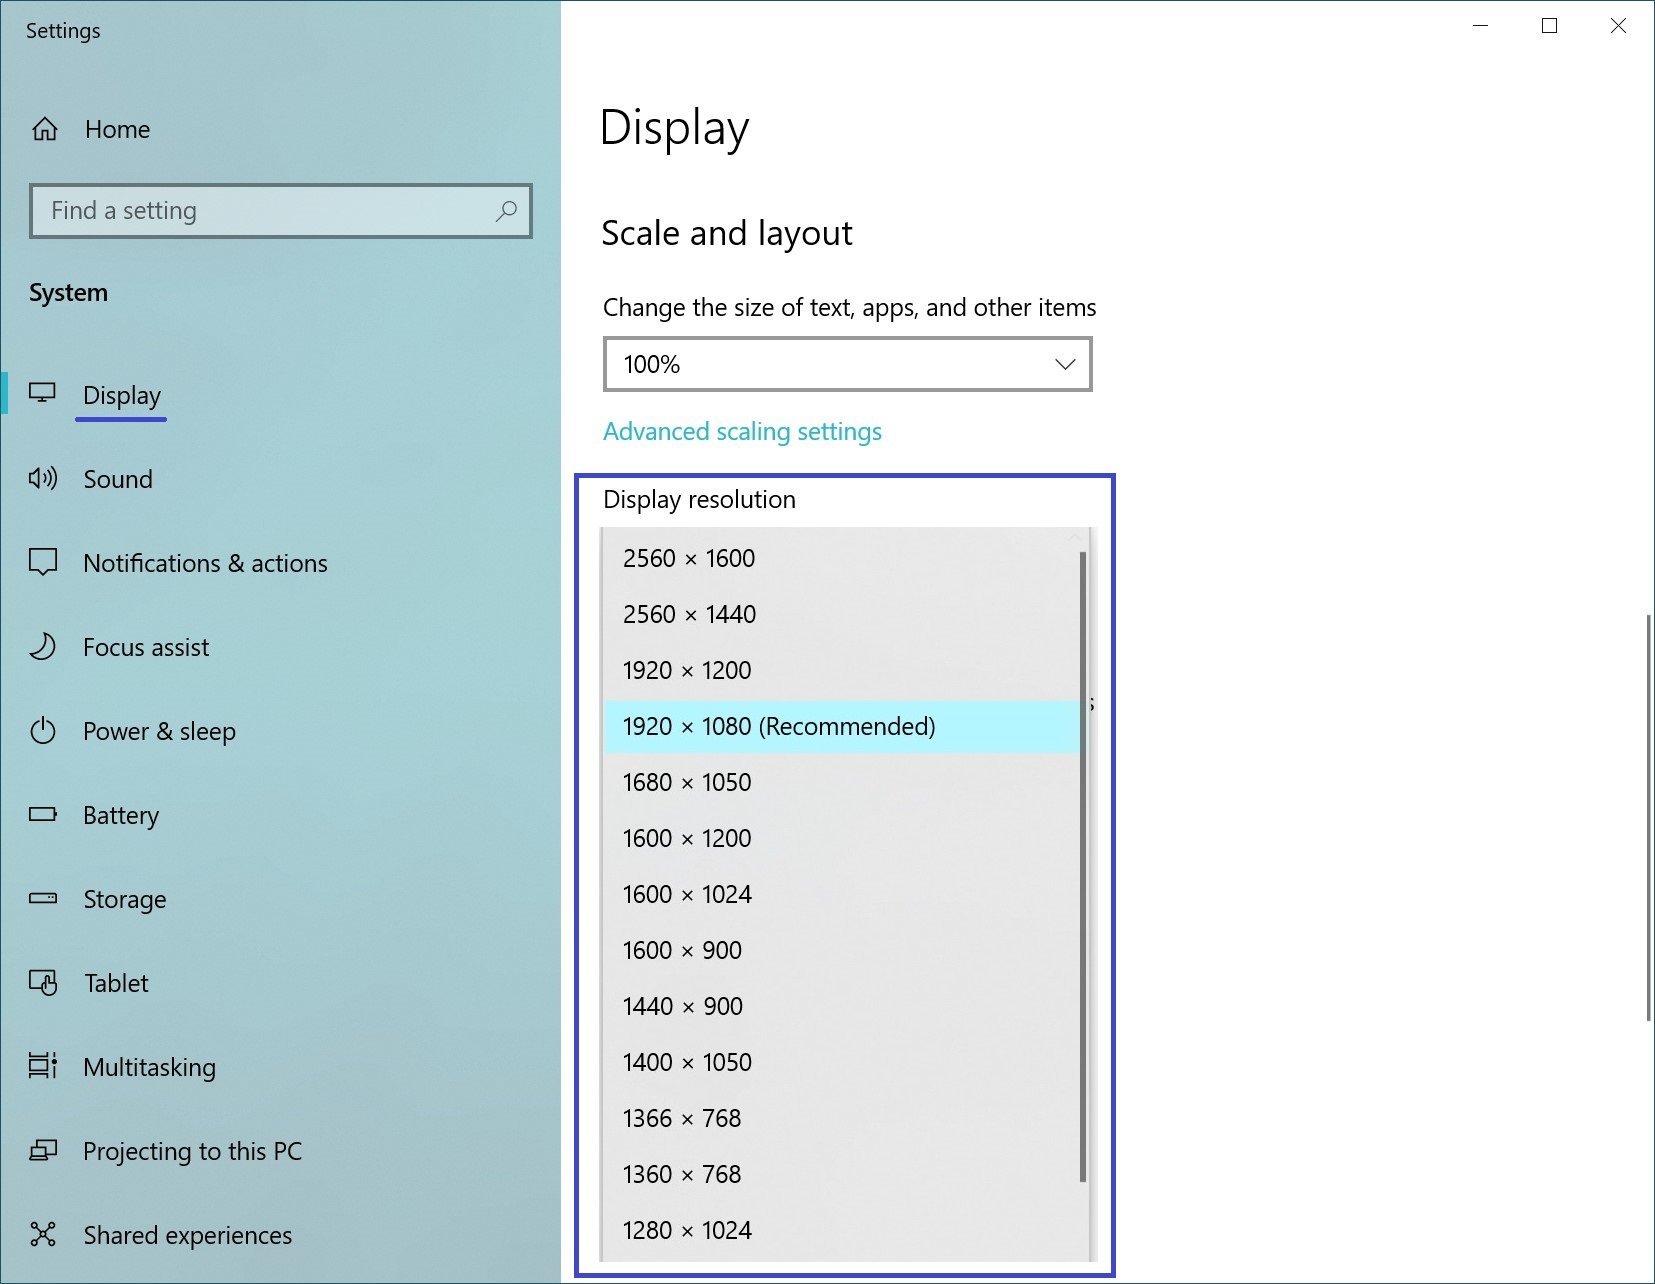
You can also change the resolution of the desktop.
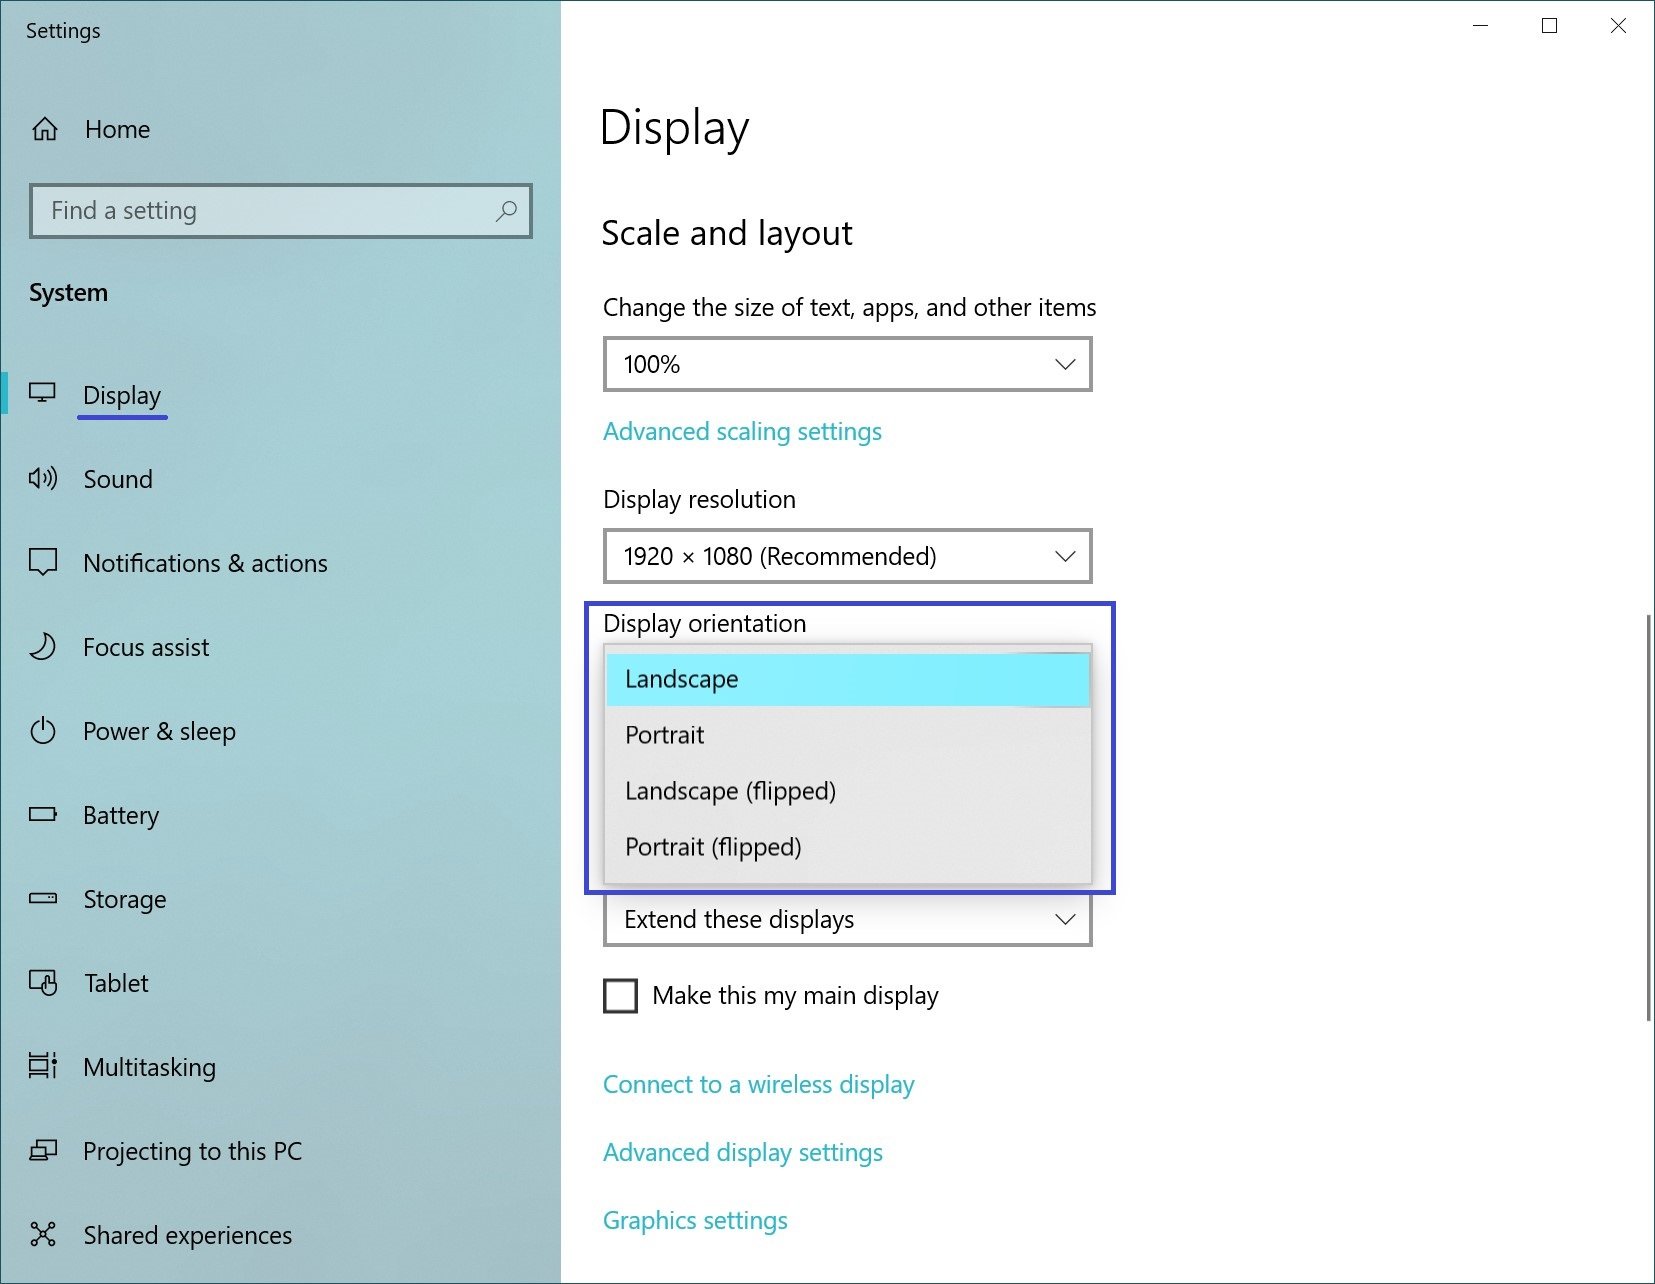
Select landscape or portrait orientation to change the selected screen orientation.
The multiple display option allows you to switch display modes (as described in the section above).
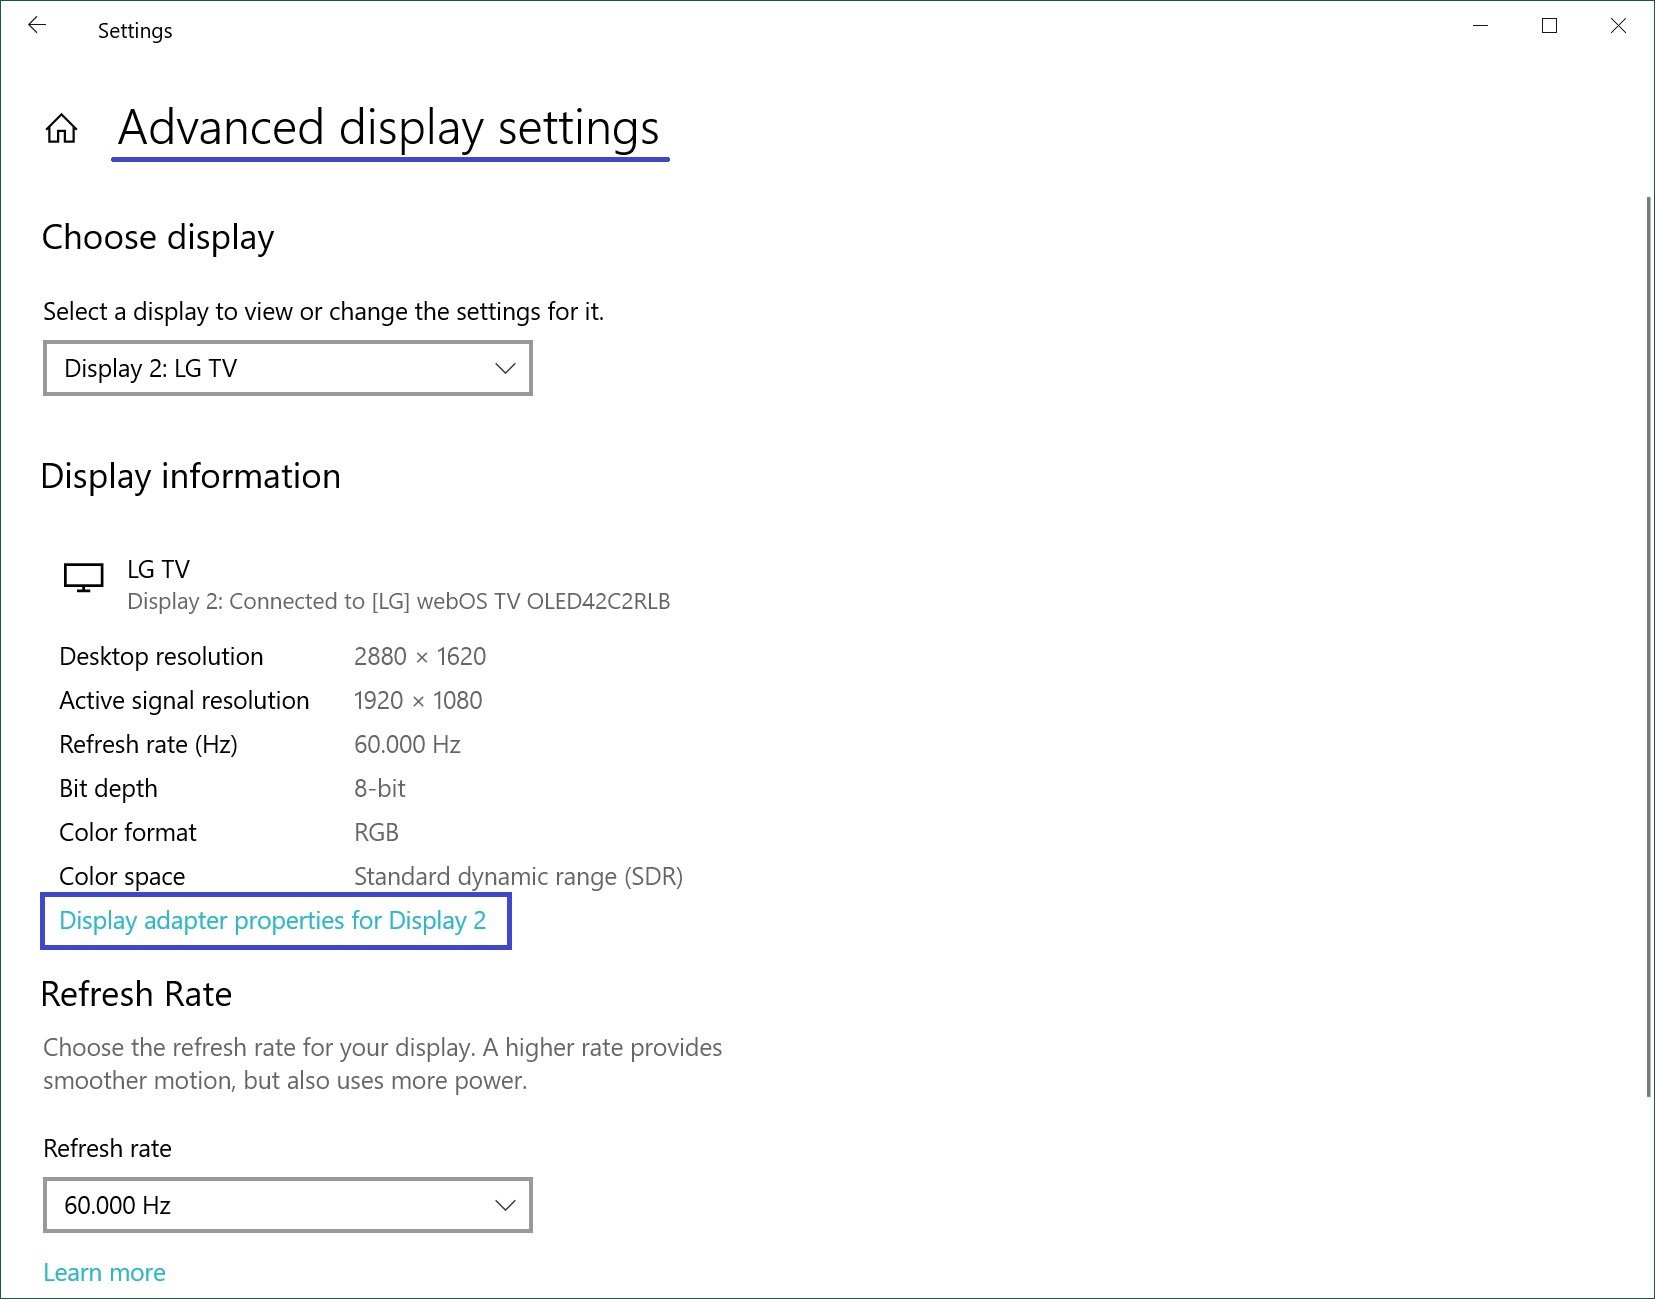
In Advanced display settings, you can view general information about the connected displays as well as the video adapter properties for the display by clicking on the corresponding link.
Taskbar settings
When you connect a second monitor, the taskbar appears on all displays by default. You can remove the taskbar from one of the monitors altogether or leave only the icons of applications running on that monitor on each of the panels.
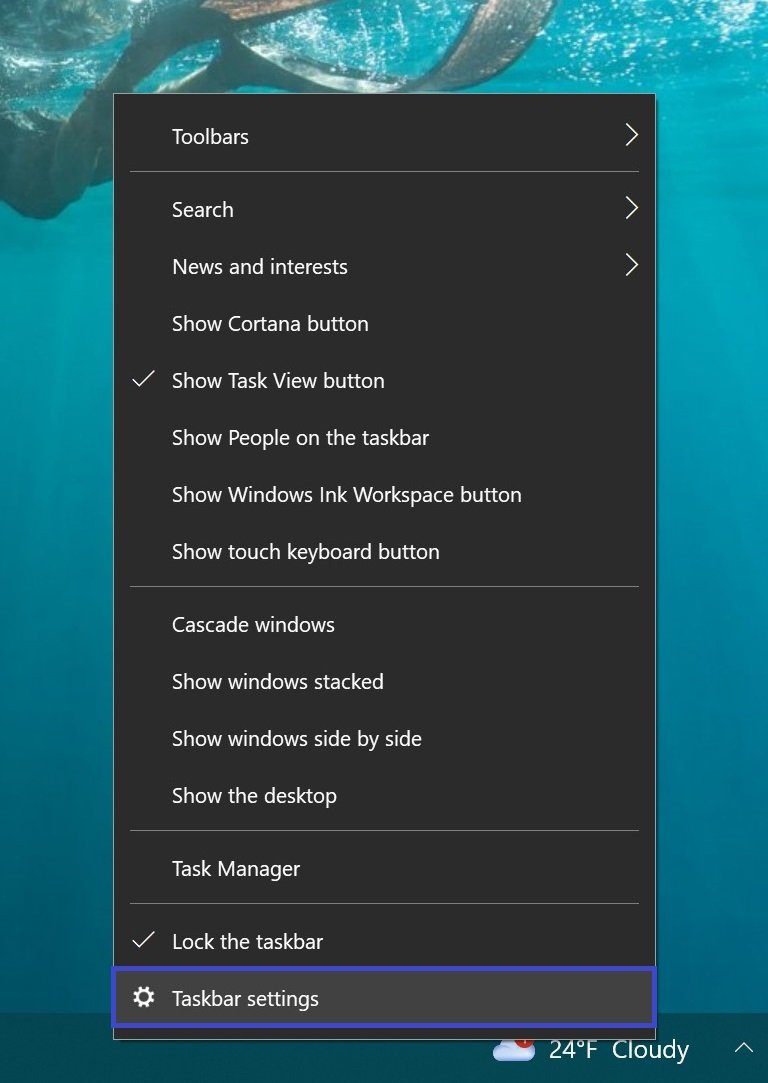
To customize the taskbar, sequentially open: Windows Settings ➯ Personalization ➯ Taskbar, or right-click in an empty area of the taskbar and select Taskbar settings in the context menu that appears.
To display the taskbar only on the main monitor, under Multiple displays, set the Show taskbar on all displays switch to Off.
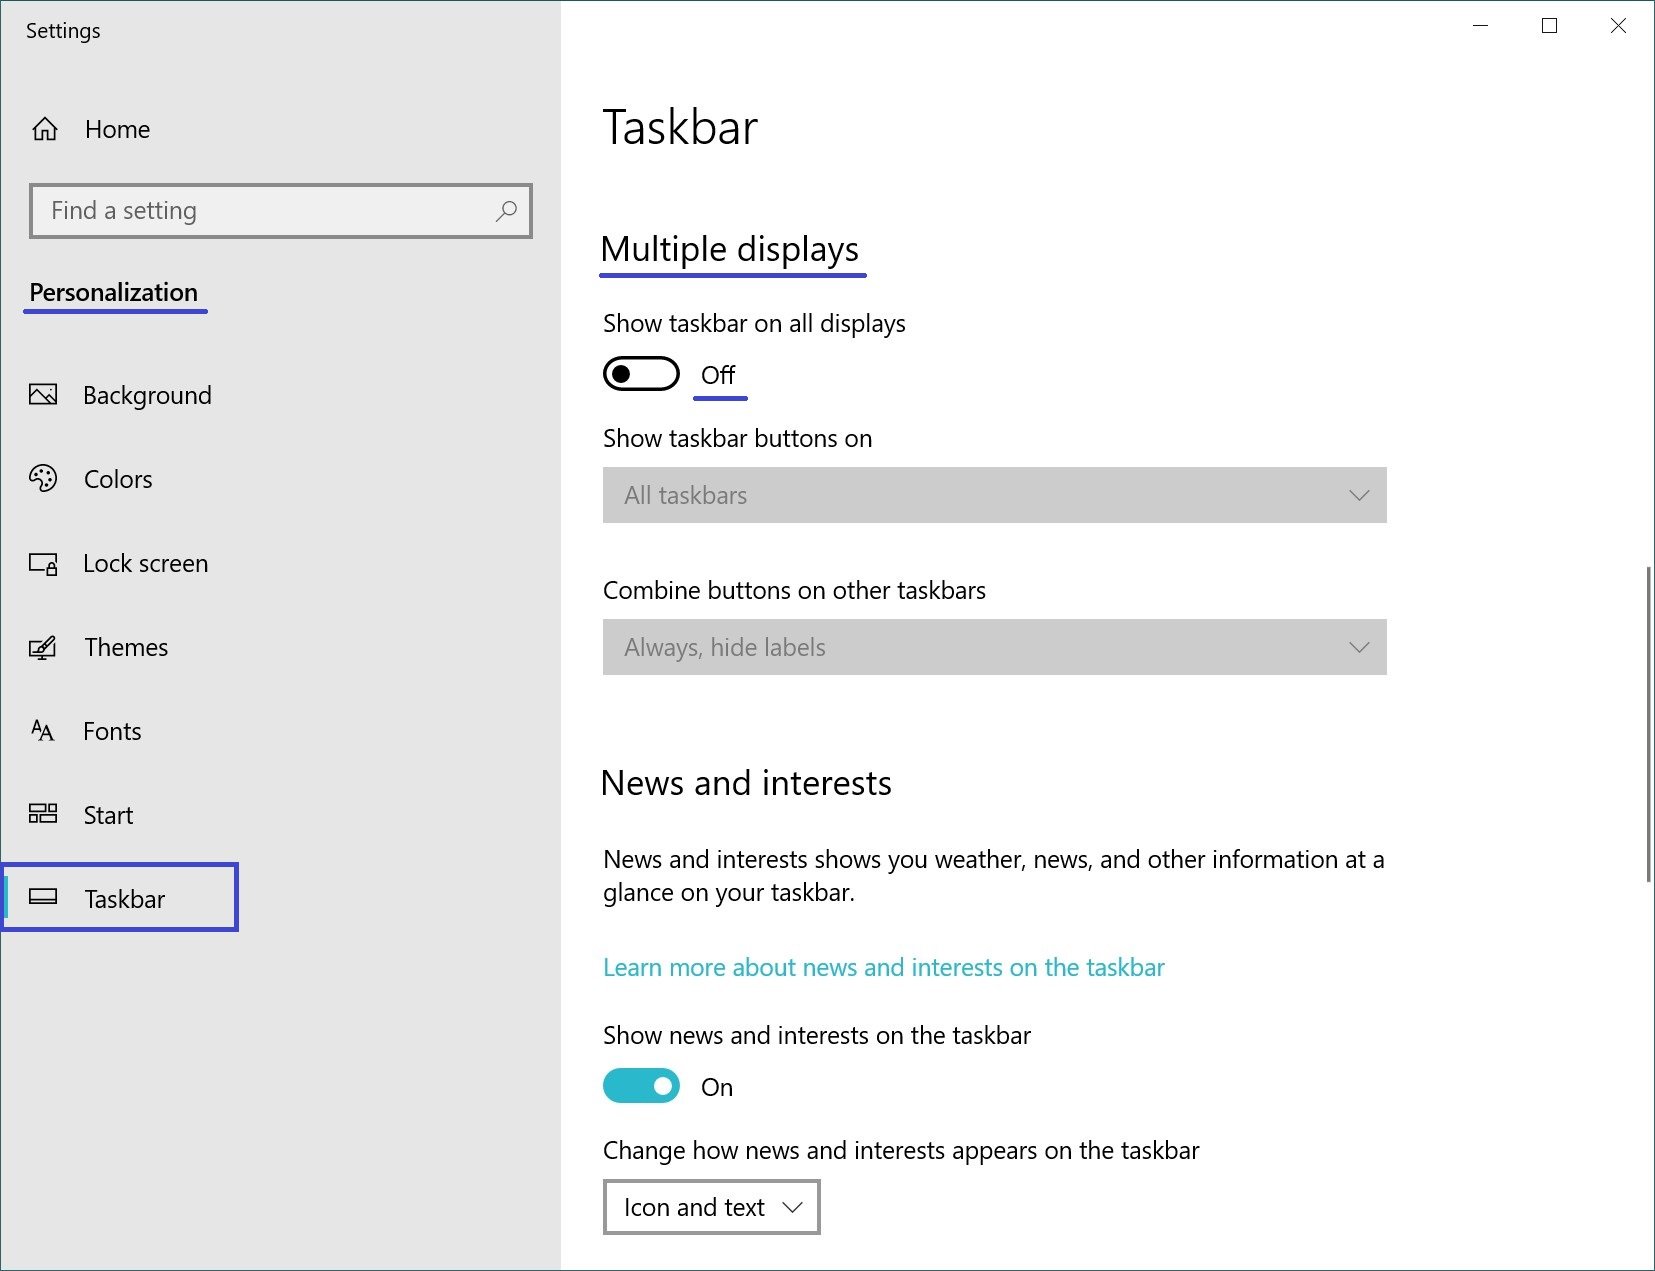
If you prefer the default configuration where each monitor has its own taskbar, you can set the behavior of these taskbars using the Show taskbar buttons drop-down list:
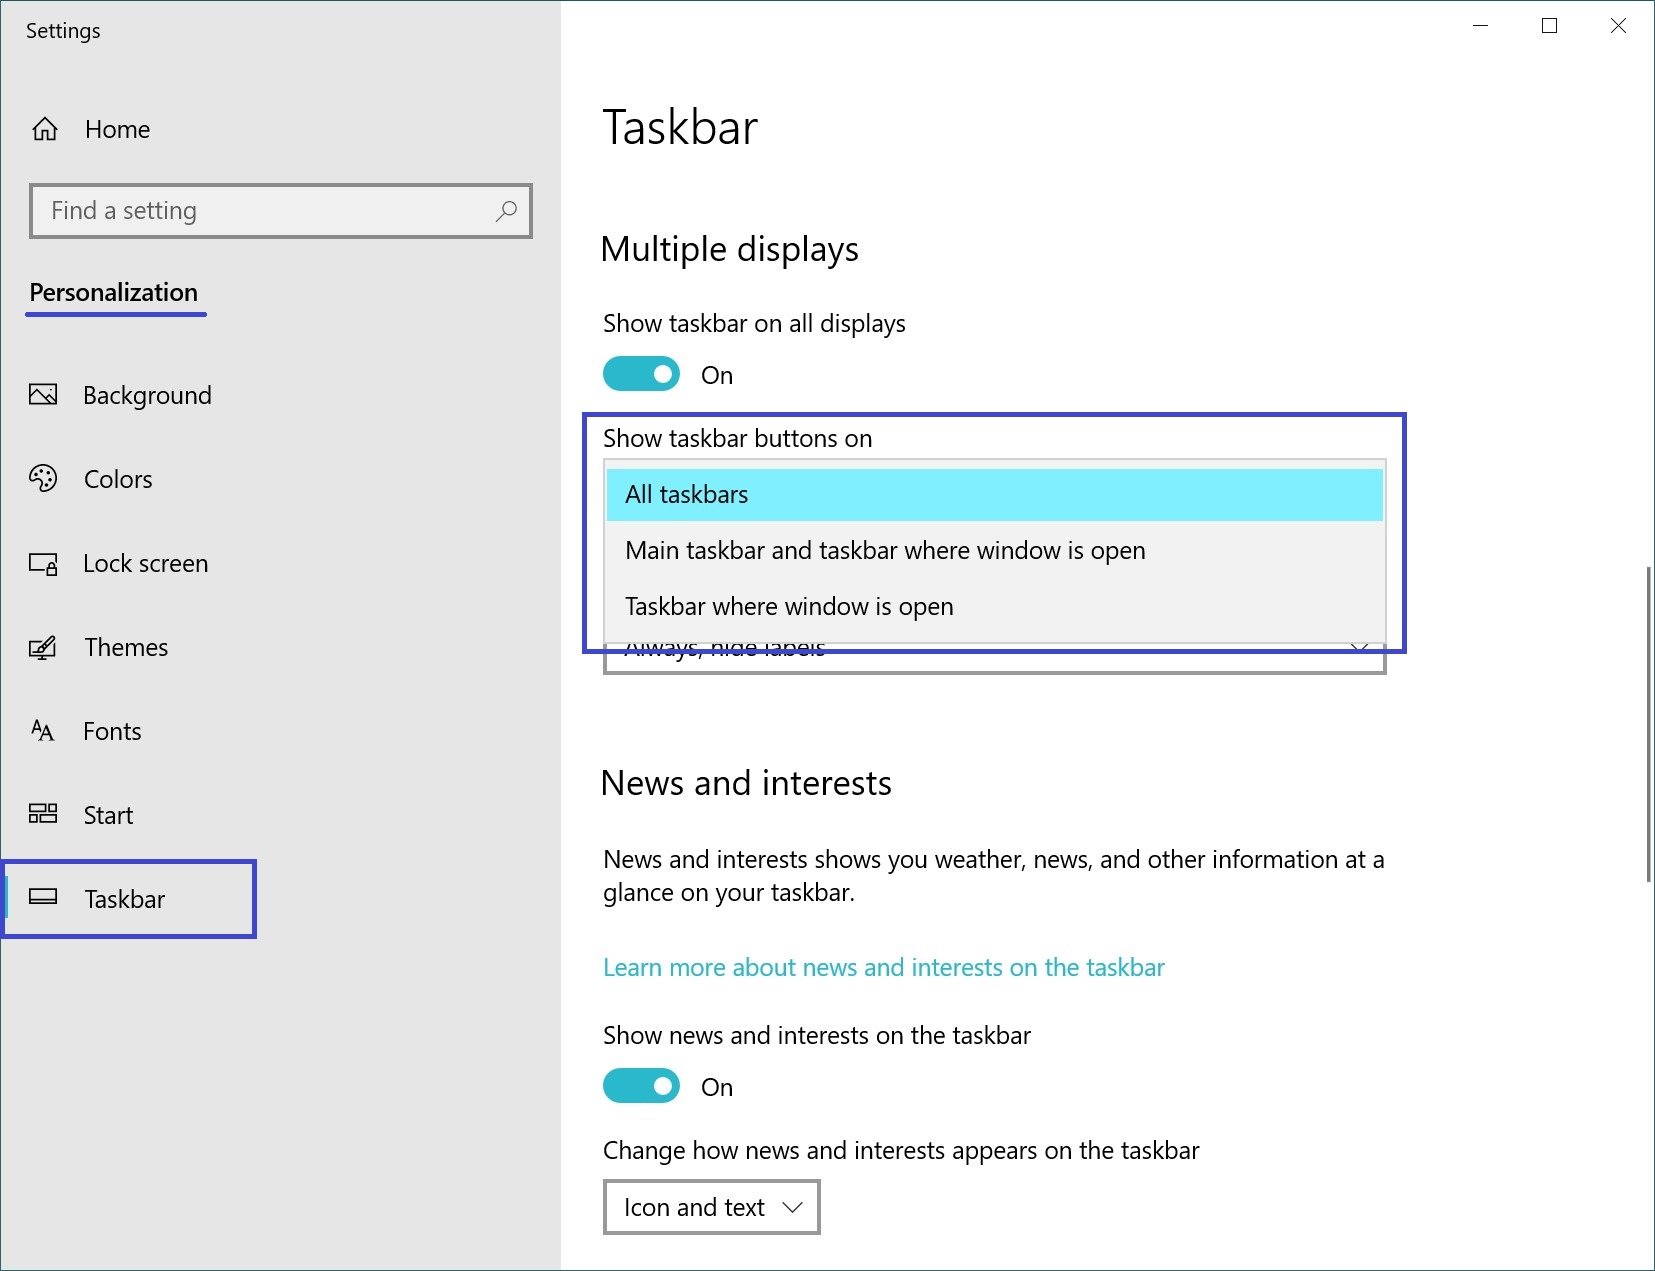
All taskbars – Suggested default mode where the same panel is present on both monitors.
Main taskbar and the taskbar where window is open – In this case, the taskbar on the main monitor contains the icons of all running applications, while on the second monitor it contains only the icons of applications that are running on that monitor. For example, you have Microsoft Edge and Word running on the main monitor, and PowerPoint and Excel on the second monitor. The taskbar on the primary monitor will contain icons for Microsoft Edge, Word, PowerPoint, and Excel. On the second monitor, only PowerPoint and Excel icons will appear.
Taskbar where window is open – In this mode, the taskbar on each monitor will contain only the icons of the applications running on that monitor. As a result, if you think back to the example above, the taskbar on the first monitor will contain only icons for Microsoft Edge and Word, and the taskbar on the second monitor will contain icons for PowerPoint and Excel.
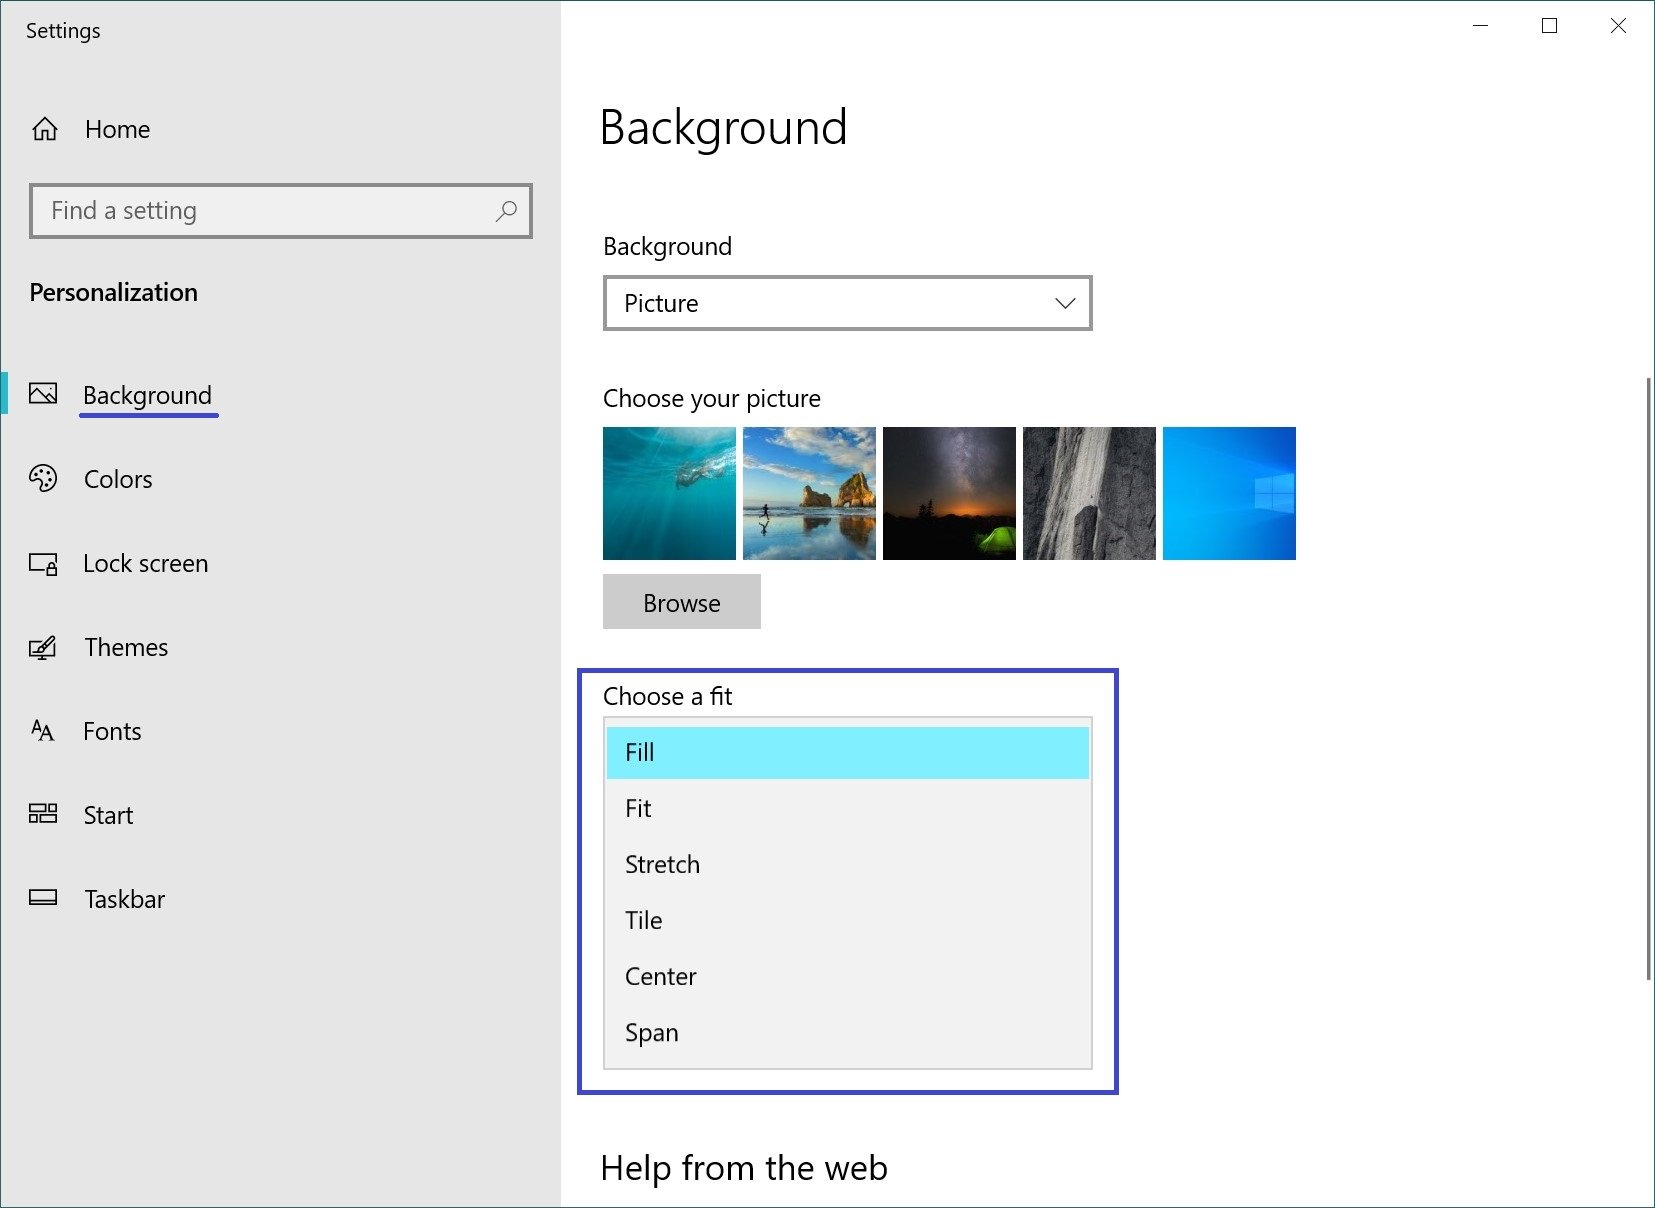
Background settings on monitors
With a second monitor connected, you can personalize your desktops.
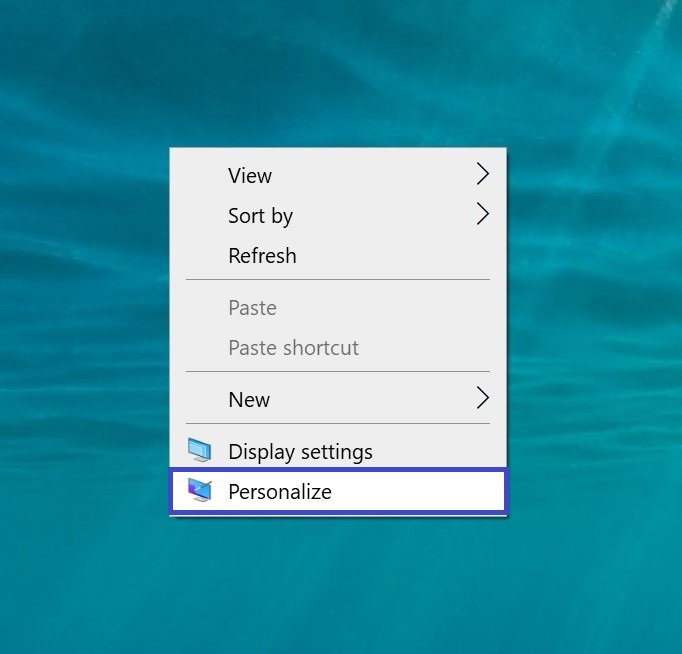
To customize the screen design settings, successively open: Windows Settings ➯ Personalization ➯ Background, or right-click in an empty area of the desktop and select Personalize in the context menu that appears
Then in the right part of the window select a suitable background and right-click on it, in the context menu that appears select one of the menu items, for example Set for monitor 1.
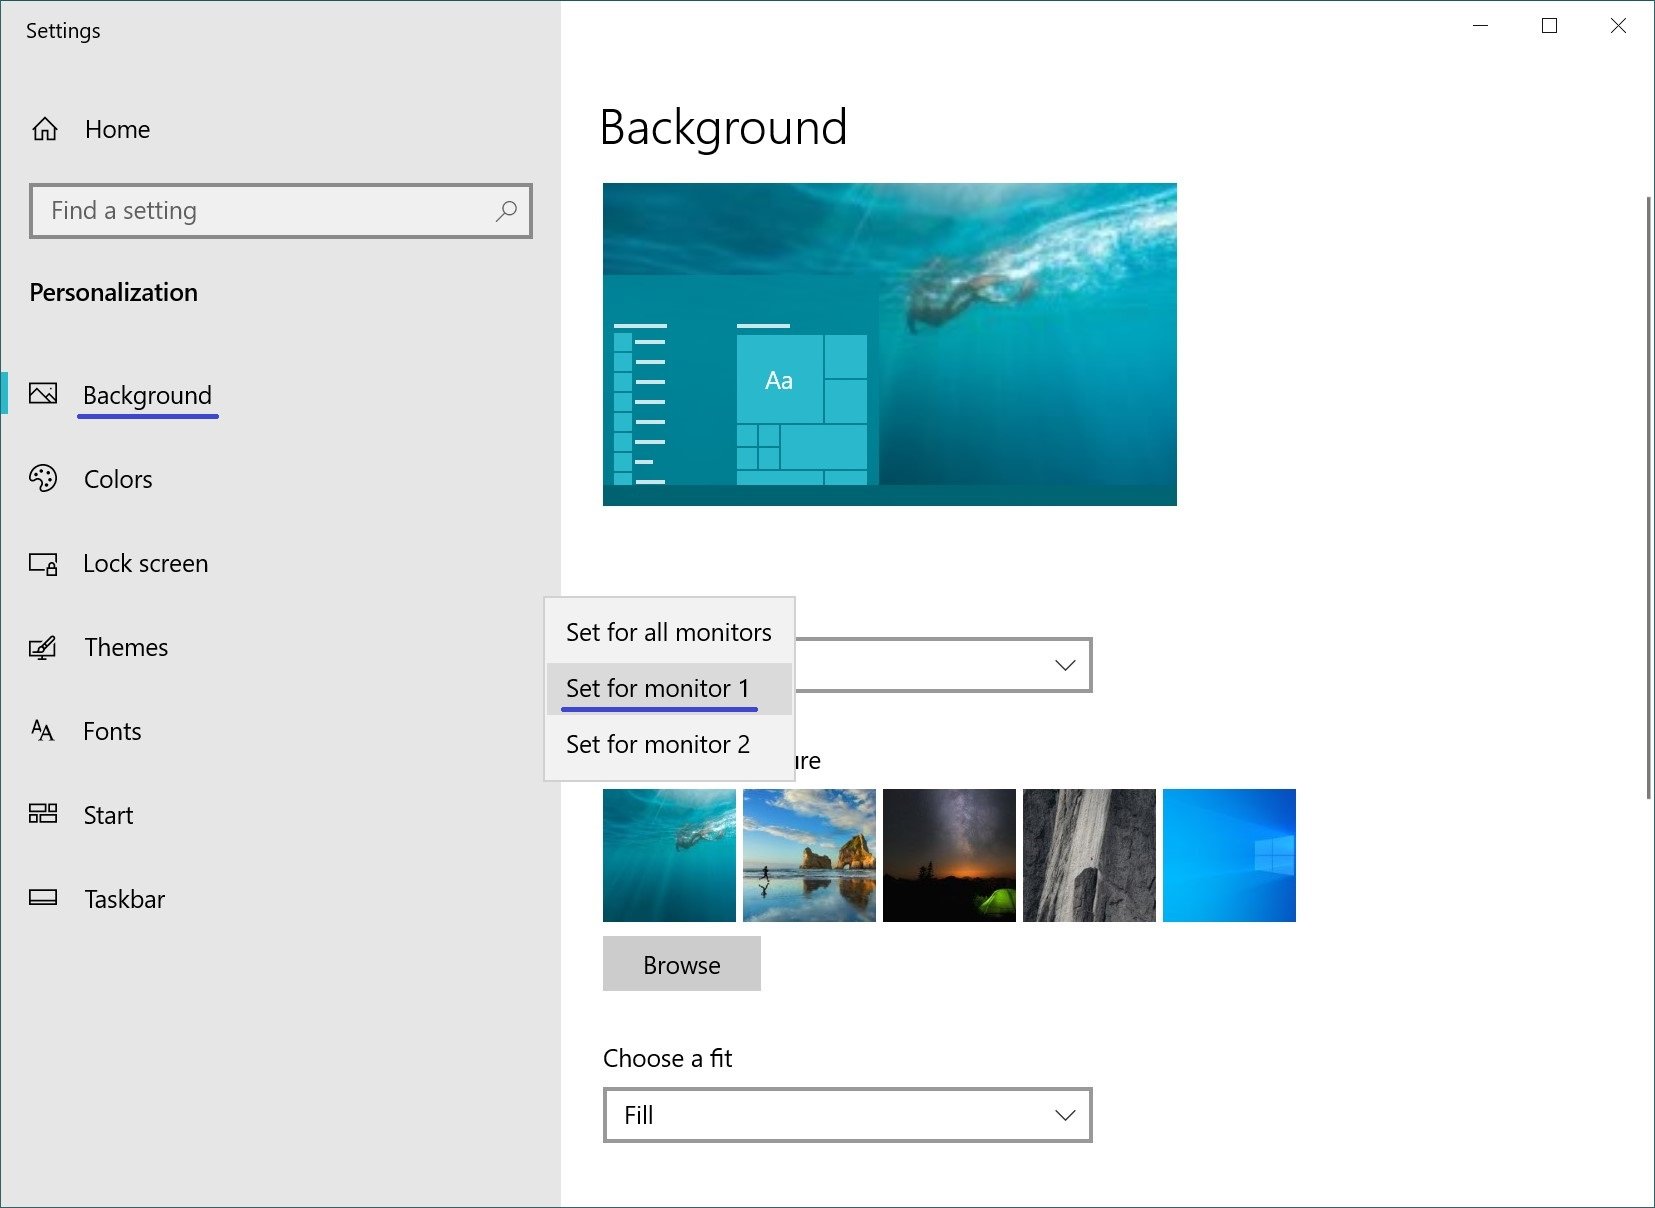
Select the background for the second monitor in the same way.
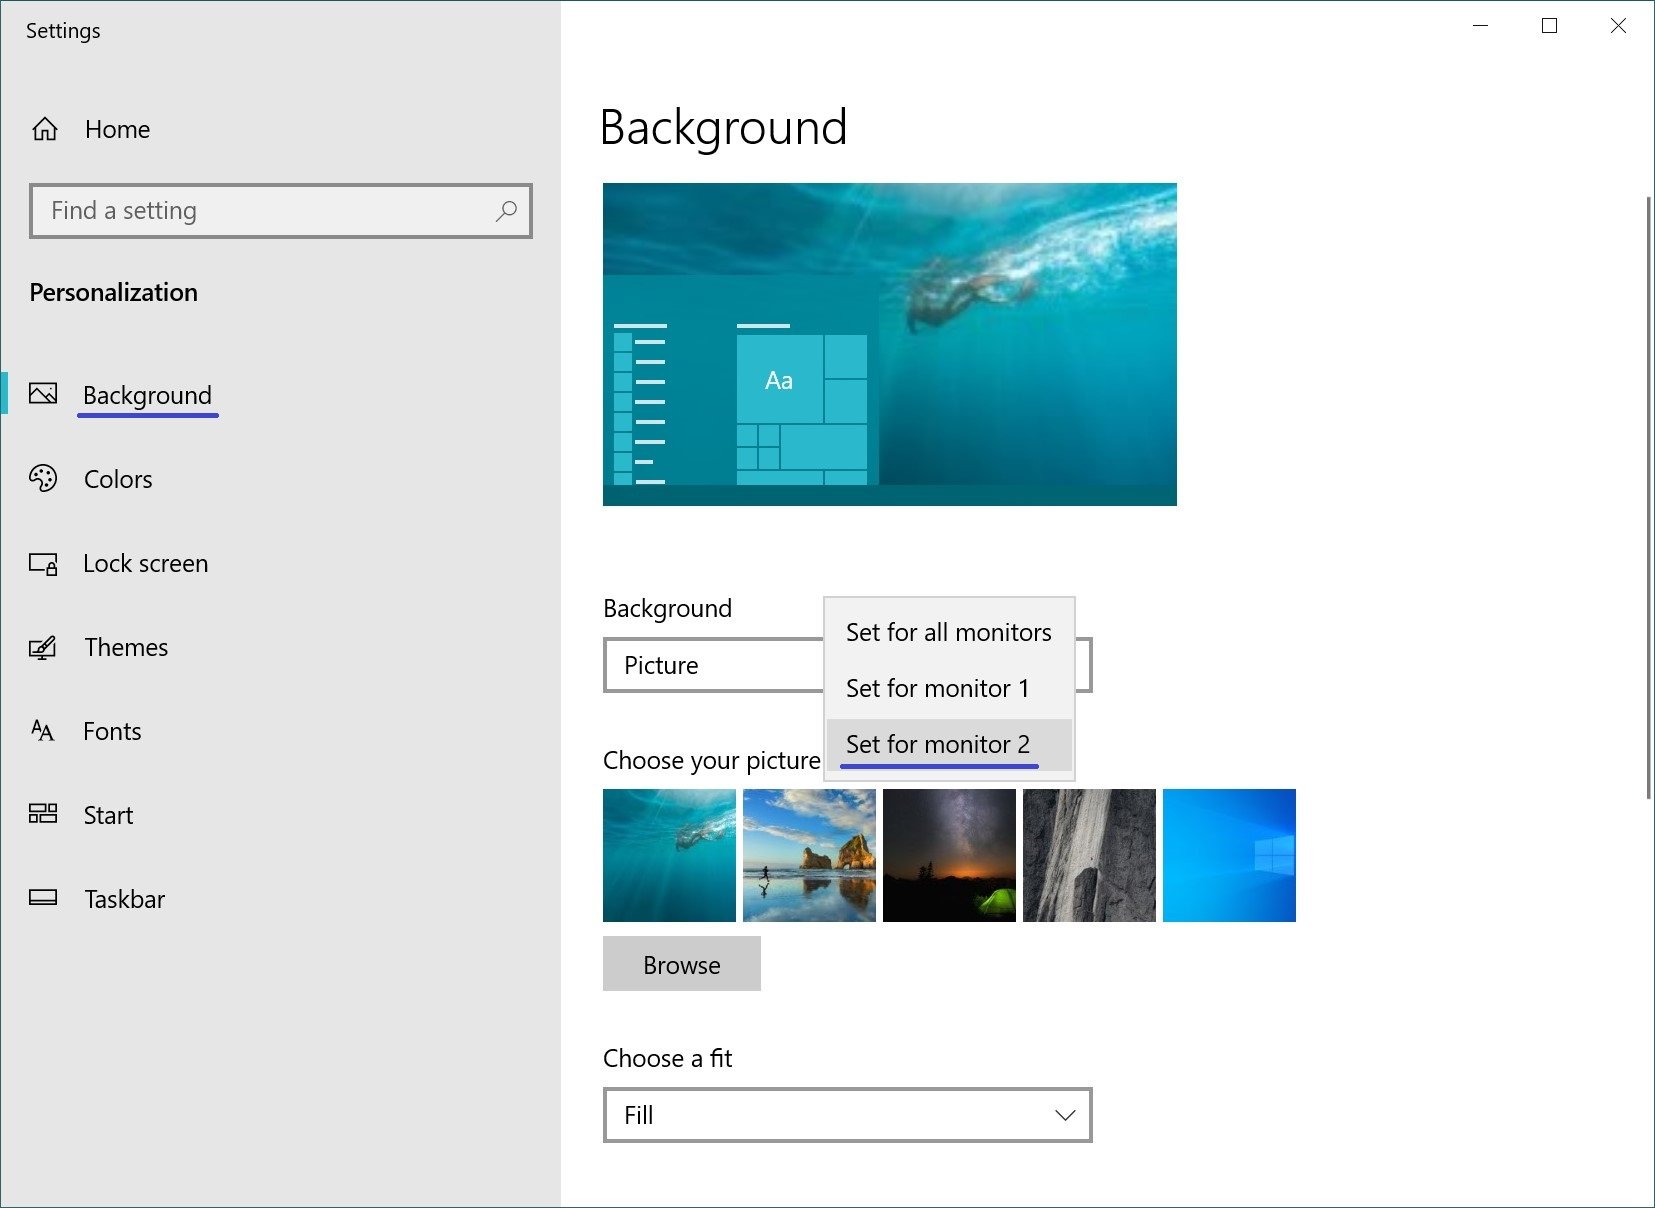
You can also select the position of the background image from the Choose a fit drop-down list.