The default audio output device is the device that the operating system uses to play audio.
If you have several audio devices connected to your computer or laptop, such as speakers, headphones, Bluetooth headsets or other audio devices, you may need to disable one or more of them. This can be done in various ways, which are discussed later in this article.
- How to enable or disable sound output device in the Settings app (Device Properties)
- How to enable or disable sound output device in the Settings app (Manage Sound Devices)
- How to enable or disable an audio output device in the Device Manager
- How to enable or disable sound output device in playback devices
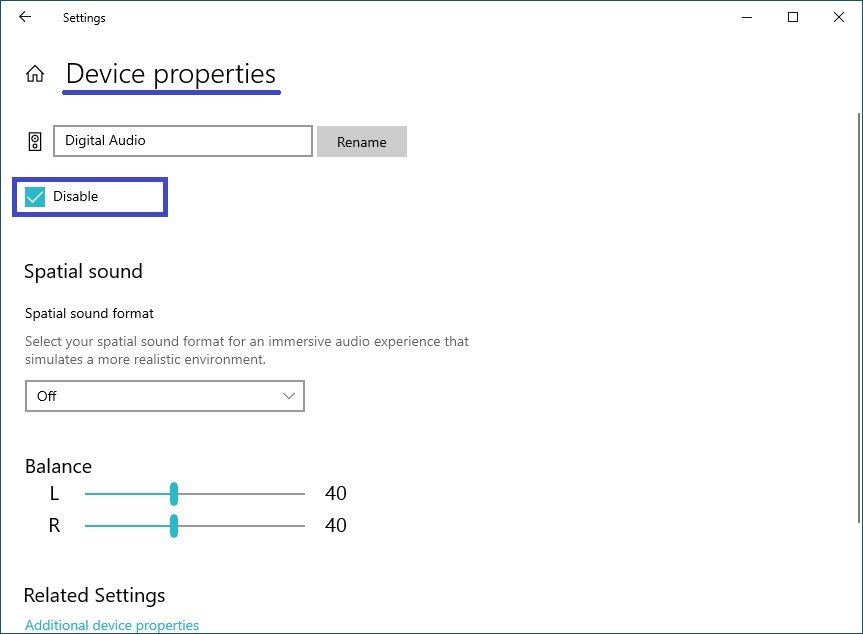
How to enable or disable sound output device in the Settings app (Device Properties)
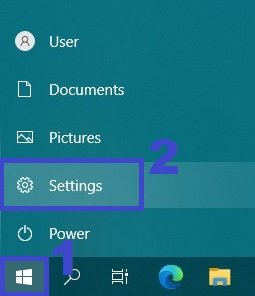
To enable or disable the audio output device in this way, click the Start button on the taskbar and then select Settings or press Win+I.
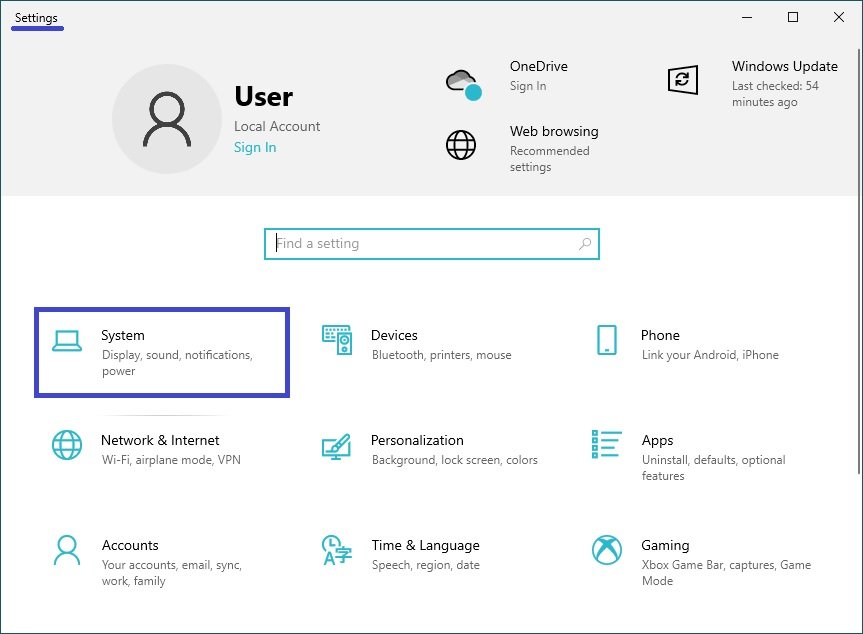
In the Settings window that opens, select System.
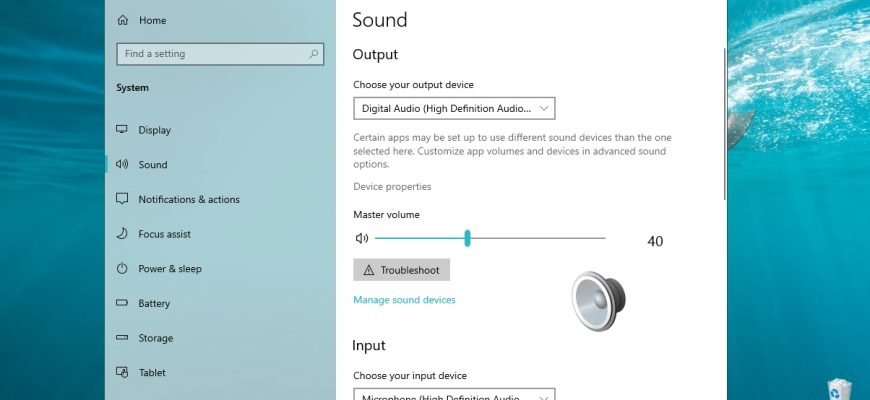
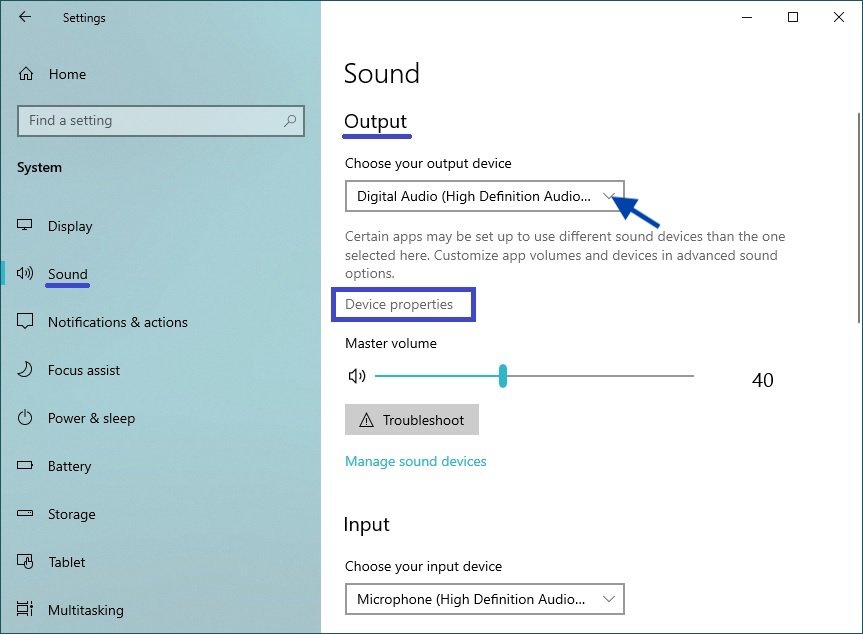
Then select the Sound tab, and in the right part of the window in the “Output” section, select the necessary output device from the drop-down list and click on the Device properties link.
In the Device Properties window, check (to disable the device) or uncheck (to enable the device) the Disable option.
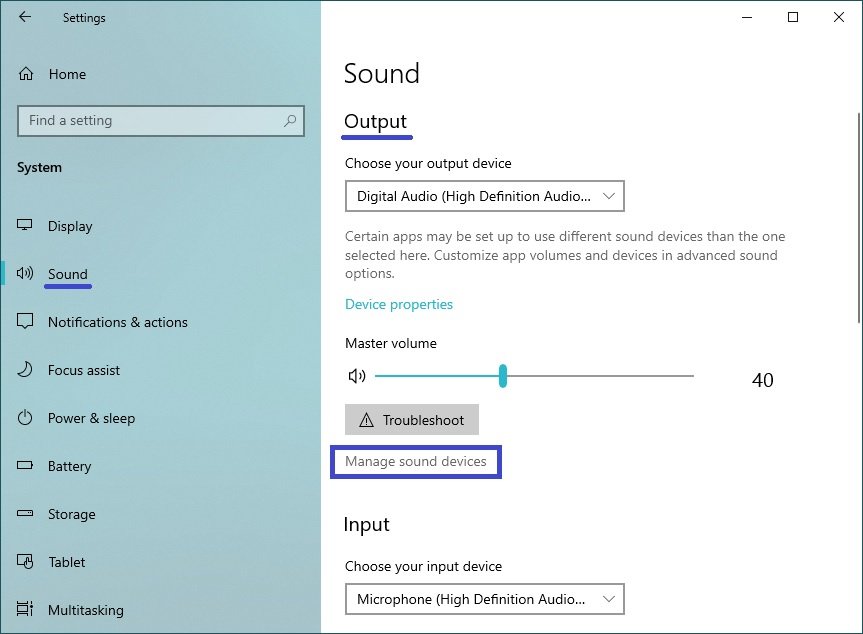
How to enable or disable sound output device in the Settings app (Manage Sound Devices)
This method also allows you to enable or disable the sound output device by clicking the Start button on the taskbar and then selecting Settings or pressing Win+I.

In the Settings window that opens, select System.
Then select the Sound tab, and on the right side of the window in the Output section, click the Manage sound devices link.
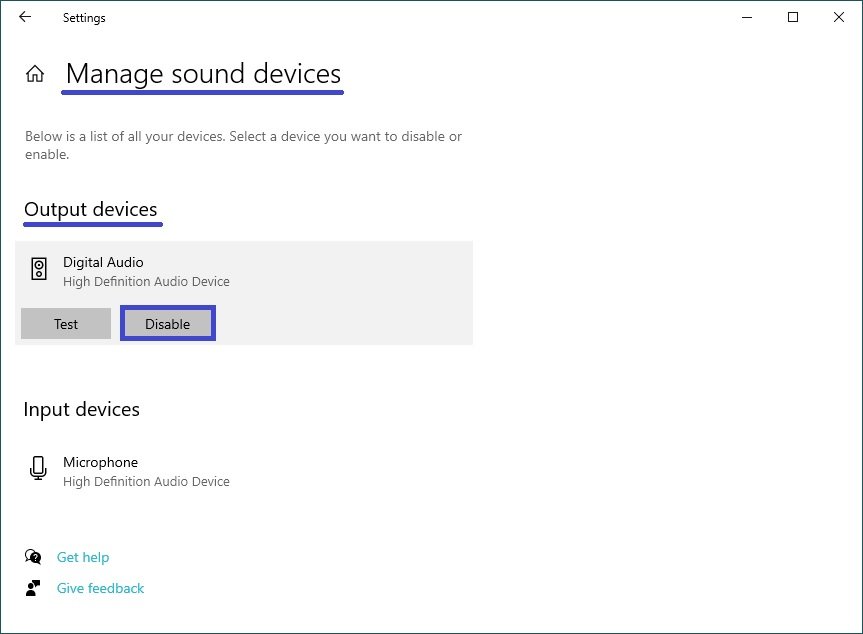
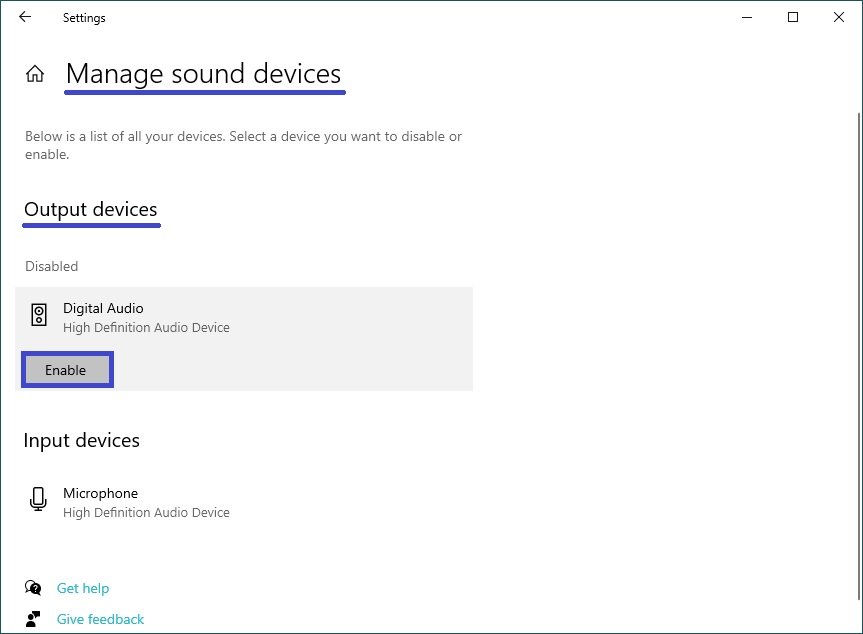
In the “Manage sound devices” window, select the device you want to enable or disable and click the Disable or Enable button (see screenshots below).
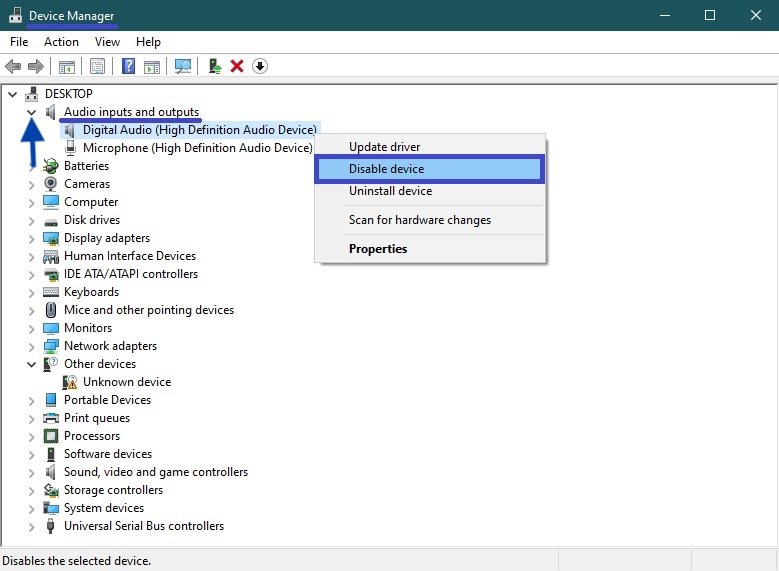
How to enable or disable an audio output device in the Device Manager
To disable an audio output device, open the Device Manager and expand the Audio inputs and outputs node, then right-click on the device you want to disable and select Disable device in the context menu that appears.
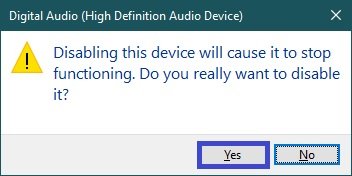
In the window that appears, confirm that you want to turn off the device by clicking Yes.
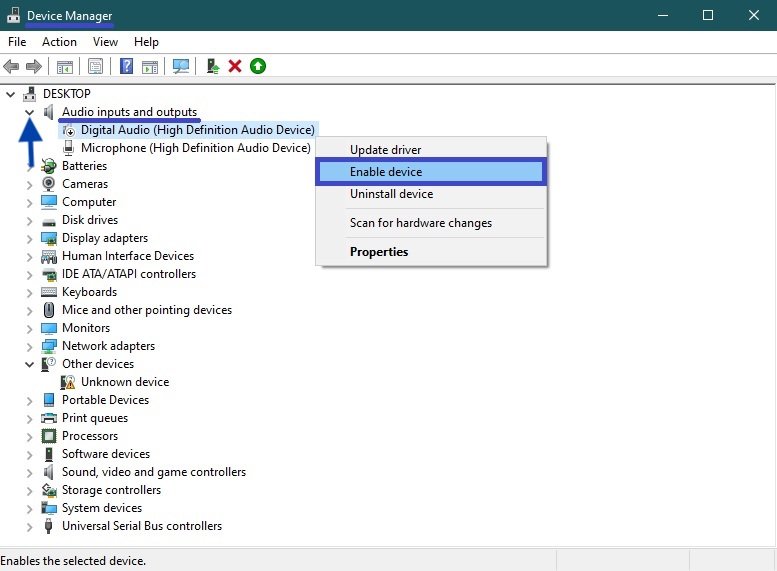
To enable an audio output device, open the Device Manager and expand the Audio inputs and outputs node, then right-click on the device you want to disable and select Enable device in the context menu that appears.
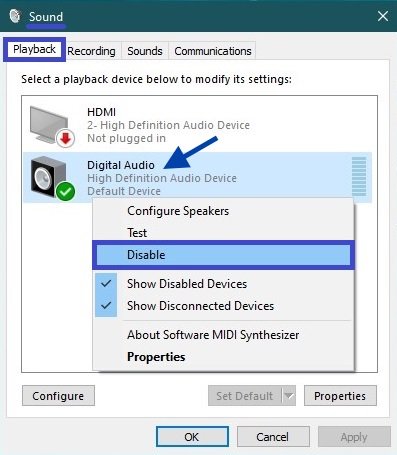
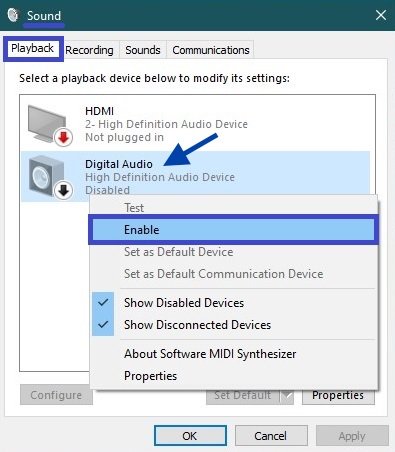
How to enable or disable sound output device in playback devices
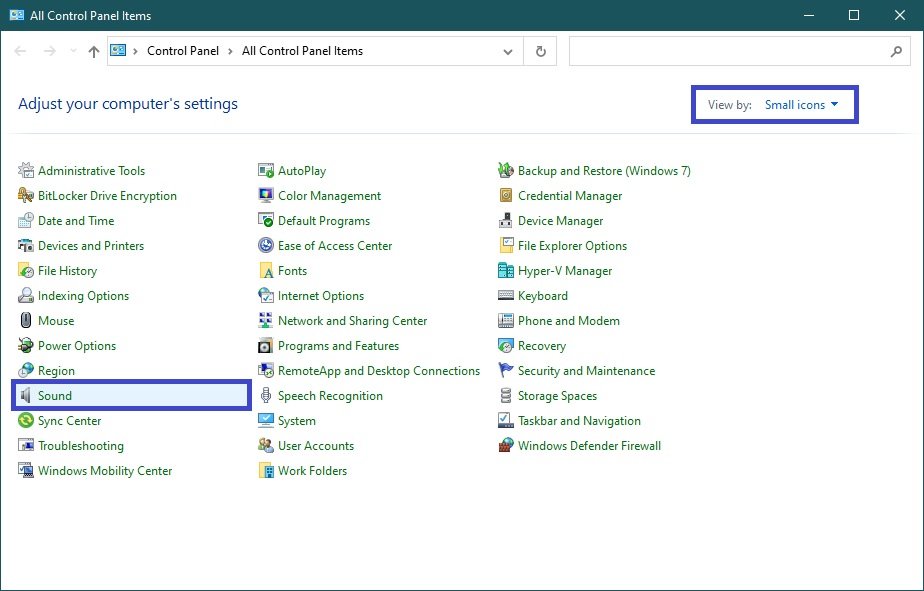
To disable the audio output device, open the Classic Control Panel, select Small icons from the View by: drop-down list, and then select Sound.
Then on the Playback tab select and right-click on the device you want to disconnect and select Disable from the context menu that appears.
To enable an audio output device, on the Playback tab select and right-click on the device you want to enable and choose Enable from the context menu that appears.
You can also open the “Sound” applet of the Classic Control Panel using the Run window, to do this in the Run window, type (copy and paste) control mmsys.cpl,,0 and click OK.
Using the steps discussed above, you can enable or disable the sound output device in Windows 10 operating system.


