The Snipping Tool is a built-in screen capture tool in Windows 11 and 10. Despite its convenience, some users may wish to uninstall this app, for example, due to security concerns or to free up space. This guide covers several methods to uninstall the Snipping Tool using Windows’ built-in tools.
Uninstalling via Settings
In Windows 11 and Windows 10, the Snipping Tool is displayed as a standalone app, and you can uninstall it through the system settings.
- Open Settings (press the Win + I keys or select Settings in the Start menu).
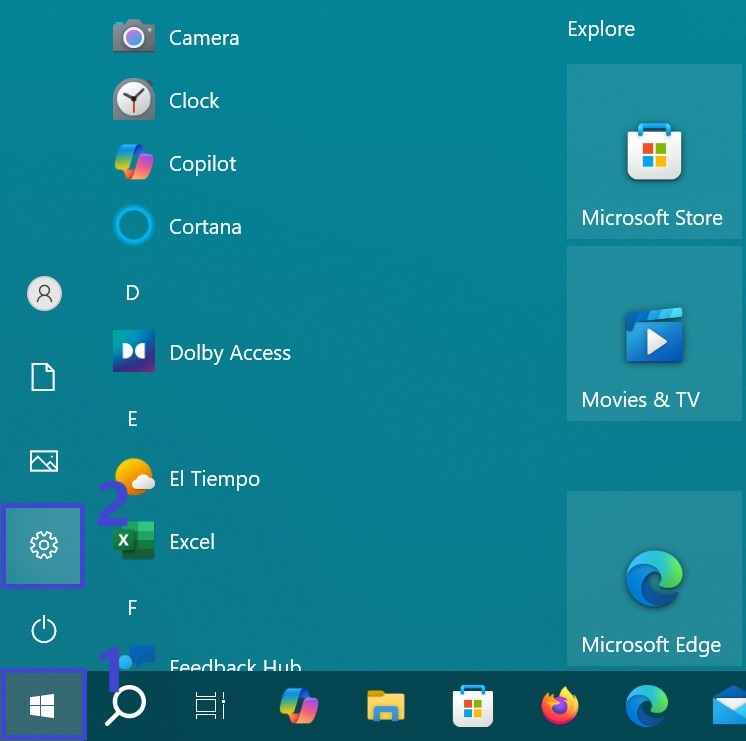
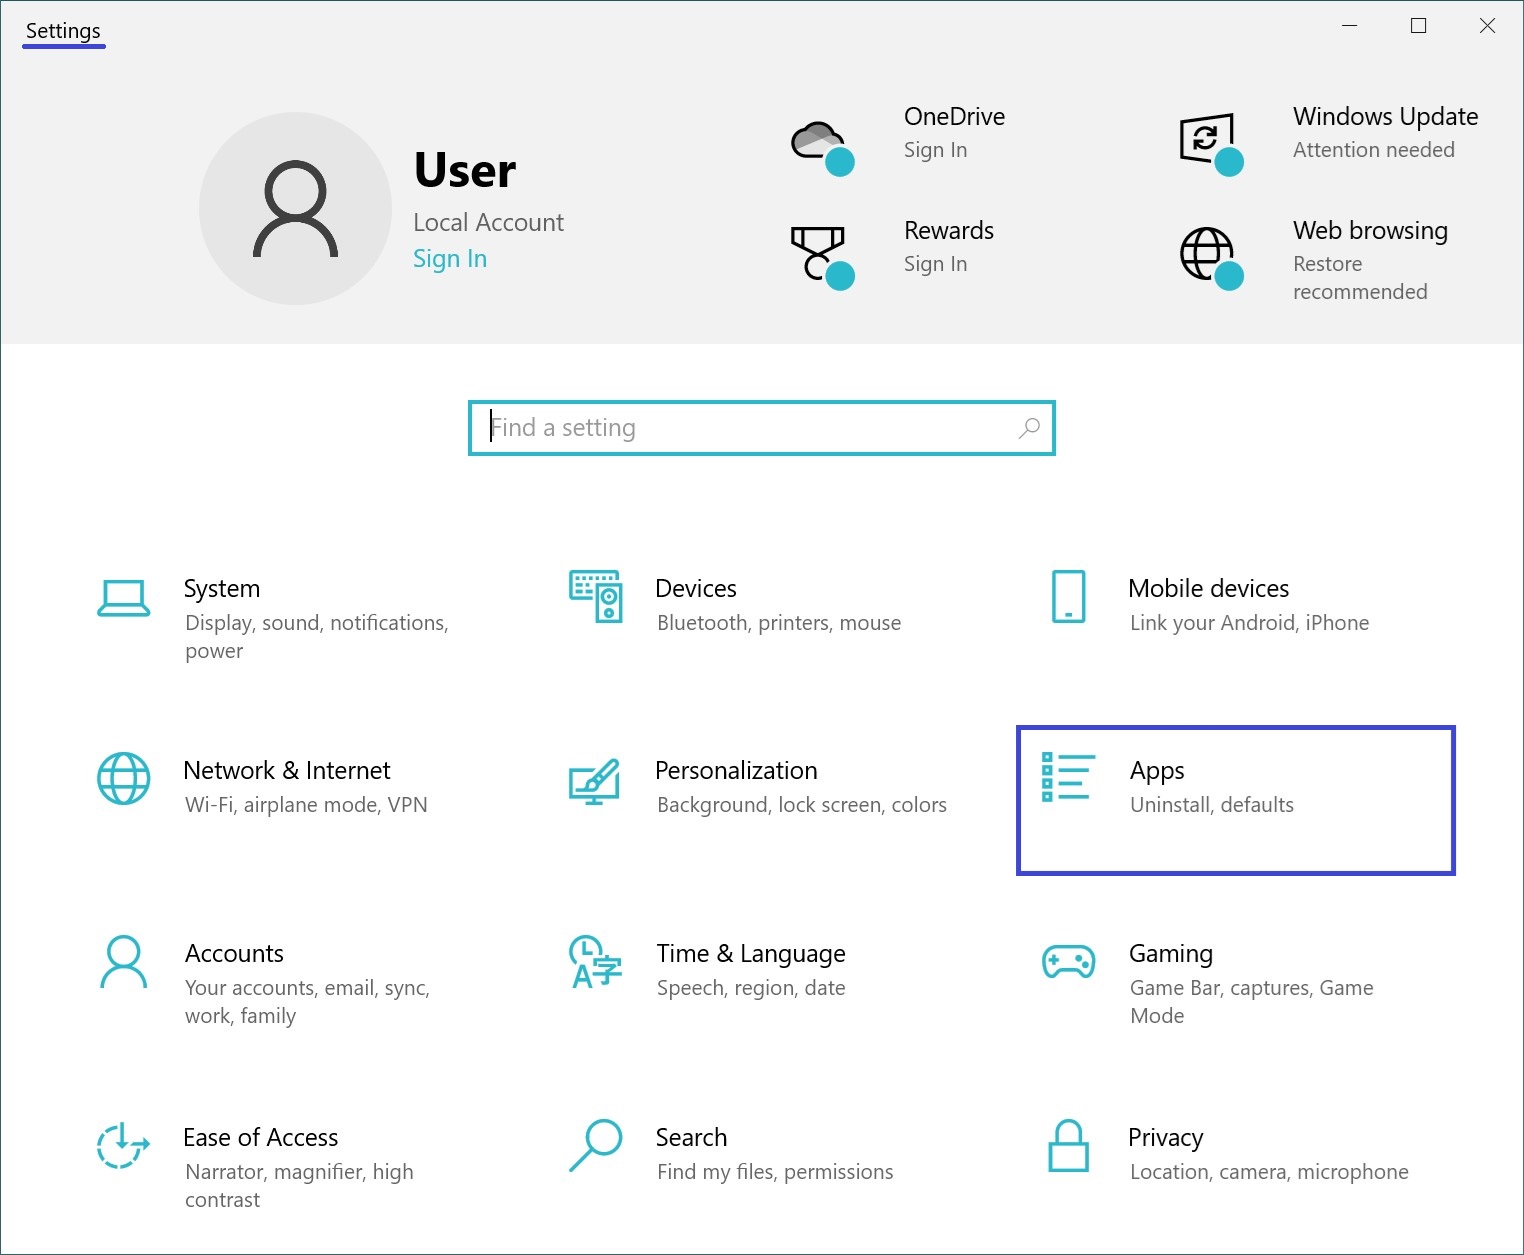
- In the Windows Settings window, choose Apps.
- Open the “Apps & features” section. Find and select “Snip and Sketch” from the list on the right.
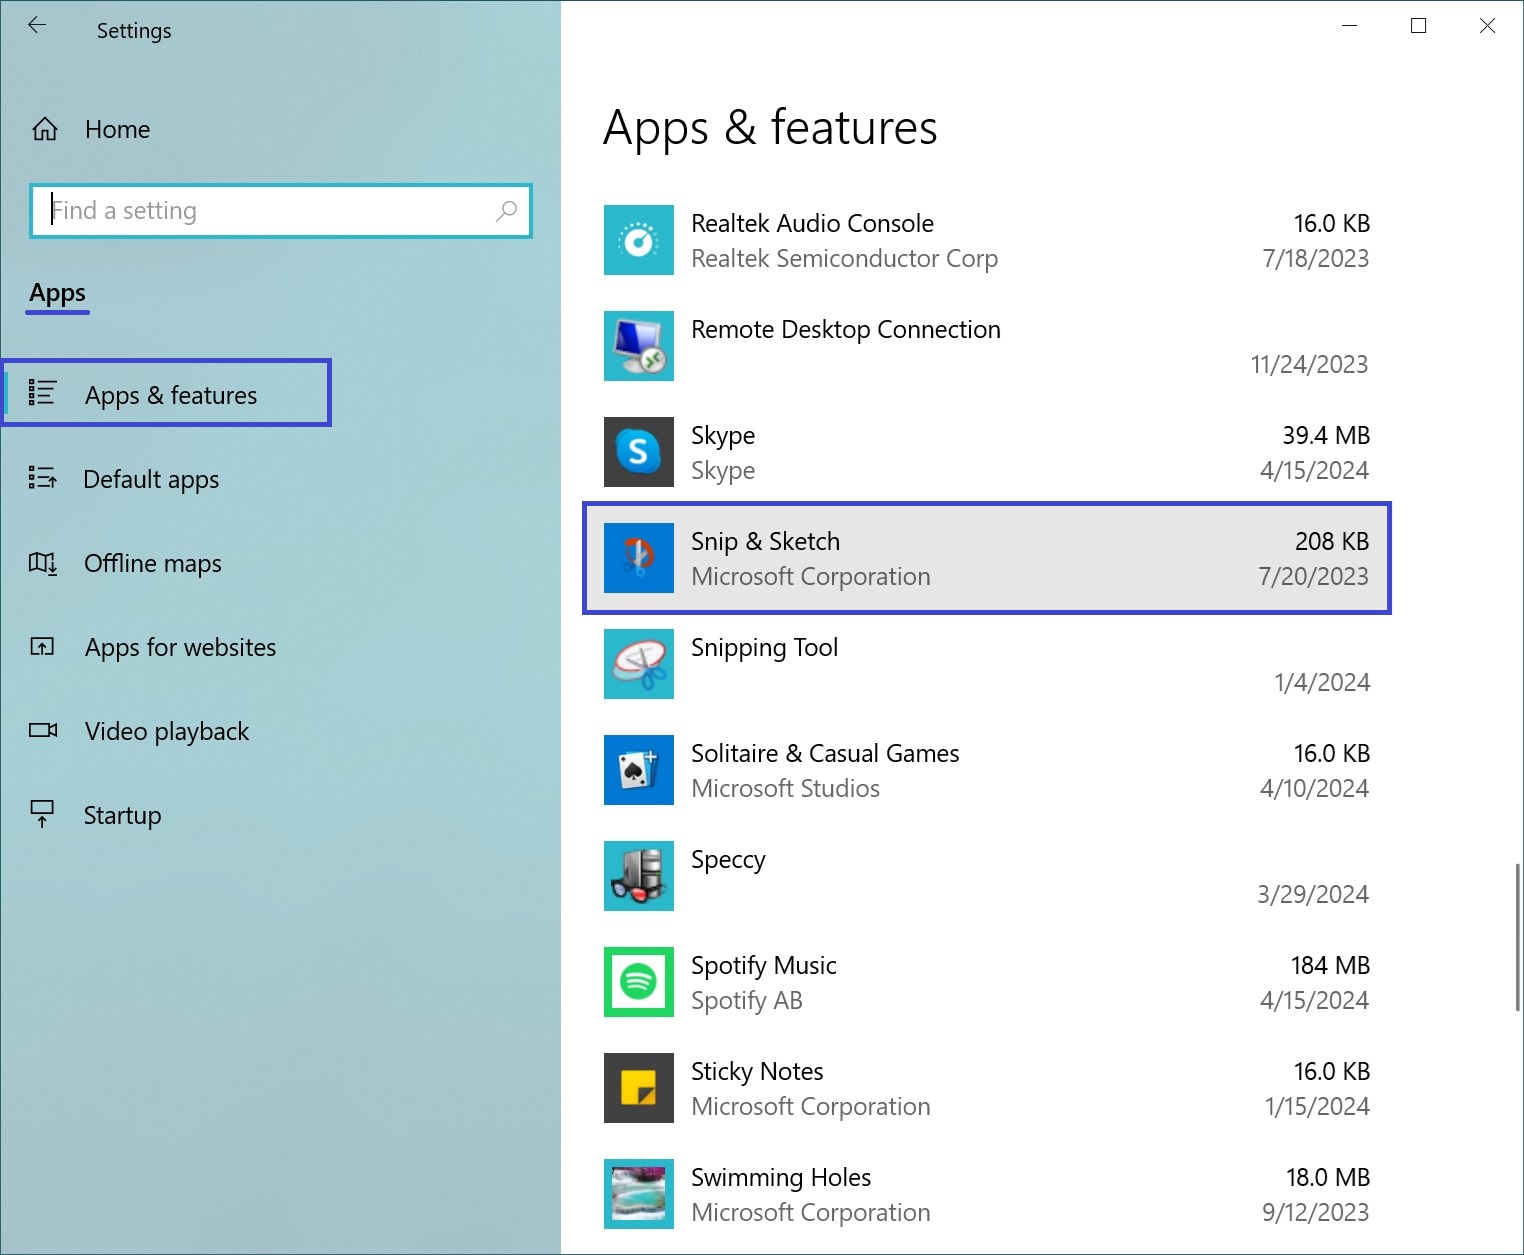
- Click on the app name. You’ll see two options: Modify and Uninstall. Click “Uninstall” and confirm the action.
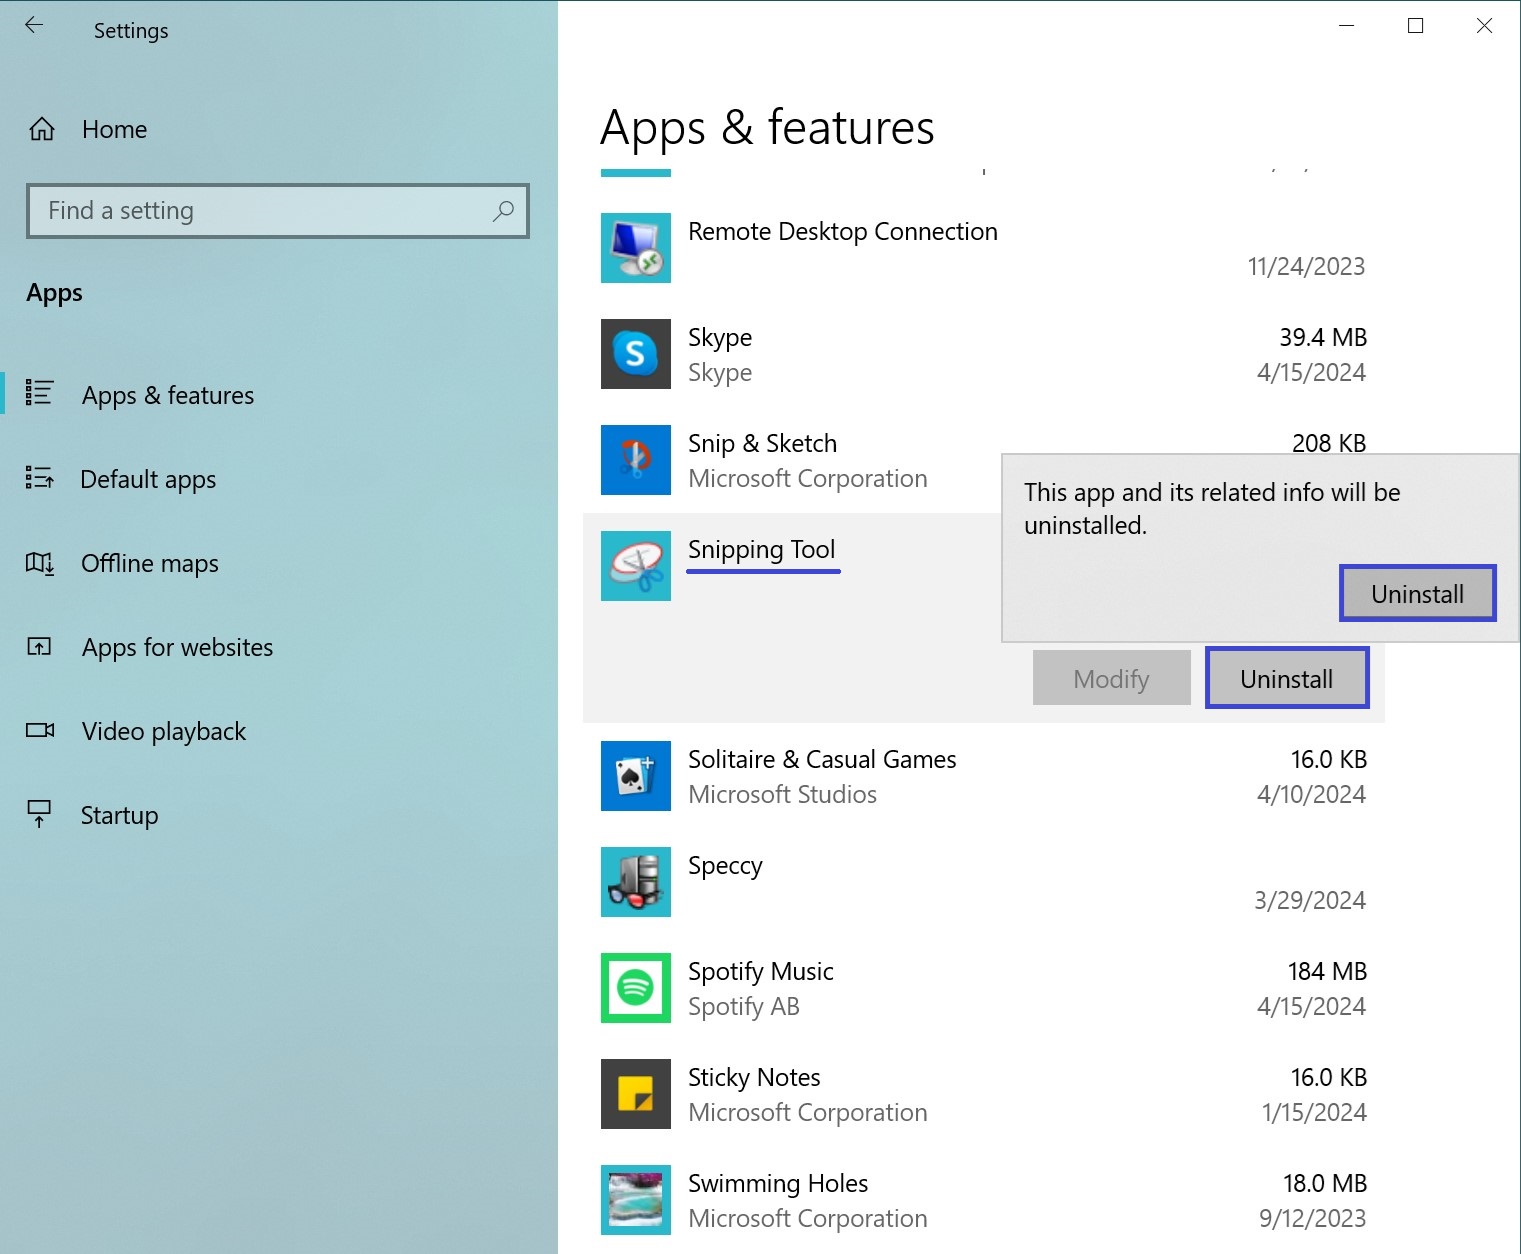
The app will be removed from your system.
In most cases, the steps above should be enough to uninstall the unwanted app. If this method doesn’t work or isn’t convenient, we’ll outline alternative methods below.
Uninstalling via Terminal or PowerShell
Using Windows Terminal or PowerShell, you can remove built-in apps, including the Snipping Tool, with just a few commands.
- Open Windows Terminal or PowerShell with administrator privileges. To do this, press Win + X (depending on your OS version, you can open Terminal or PowerShell from the context menu).

- Copy and paste the following command into the window:
get-appxpackage *ScreenSketch* | remove-appxpackage
- Press Enter.
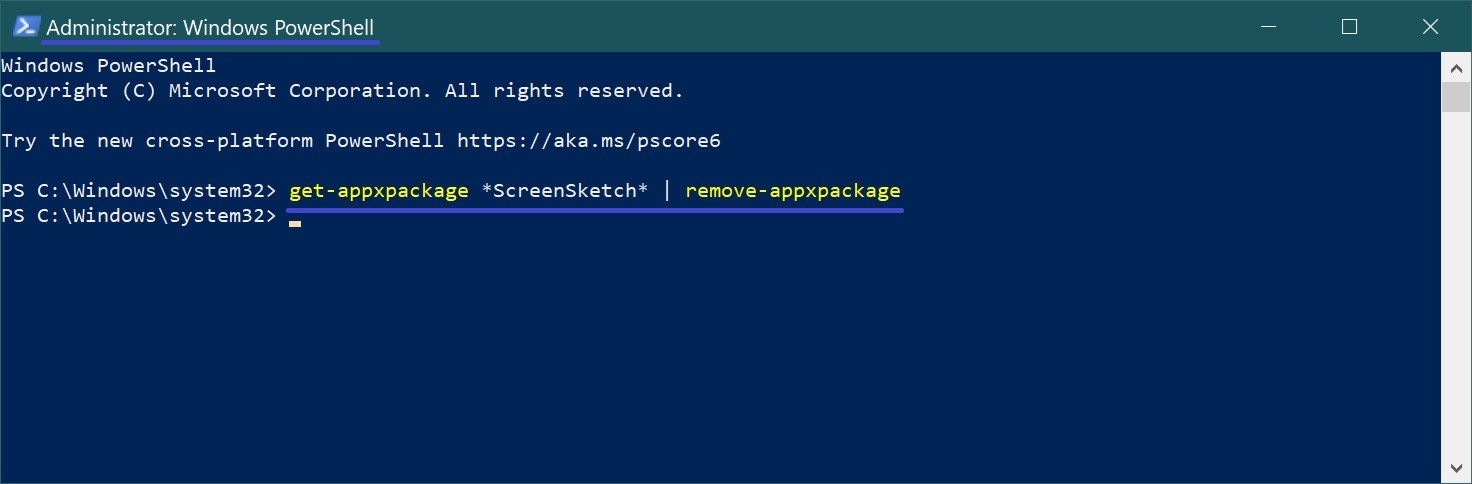
After the operation is complete, the Snipping Tool will be removed from your system.
Uninstalling via Command Prompt
You can use the Command Prompt to remove built-in Windows apps, including the Snipping Tool.
- Launch Command Prompt with administrator rights and enter the following command:
powershell -command “Get-AppxPackage *Microsoft.ScreenSketch* | Remove-AppxPackage”
- Press Enter.
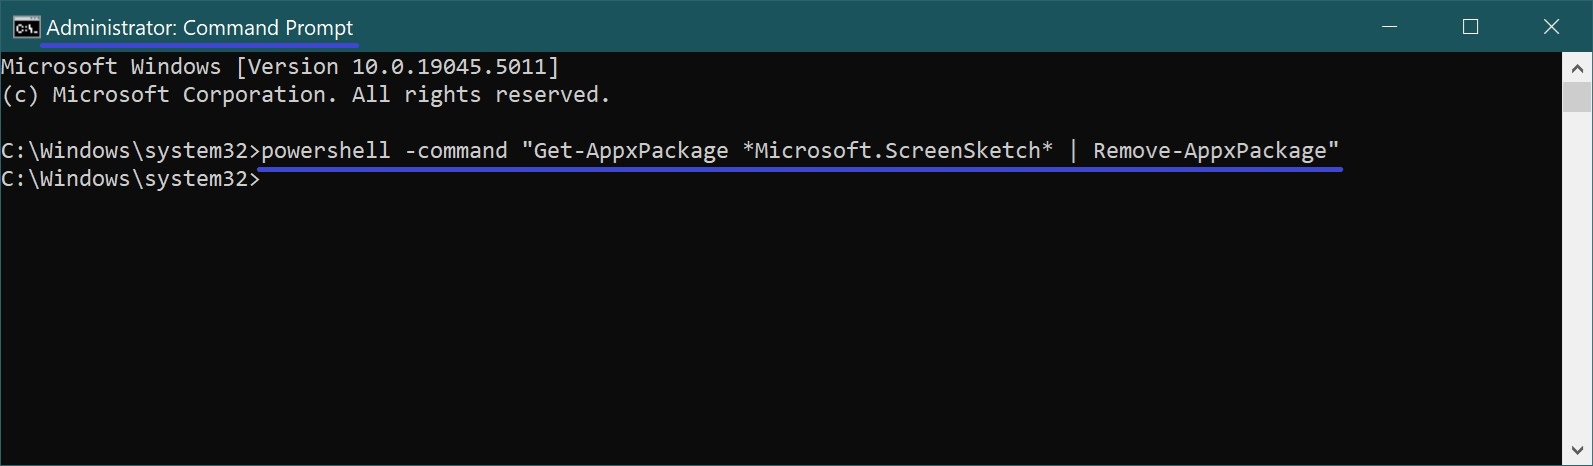
The app will then be uninstalled.
Useful Tip: How to Restore the Snipping Tool
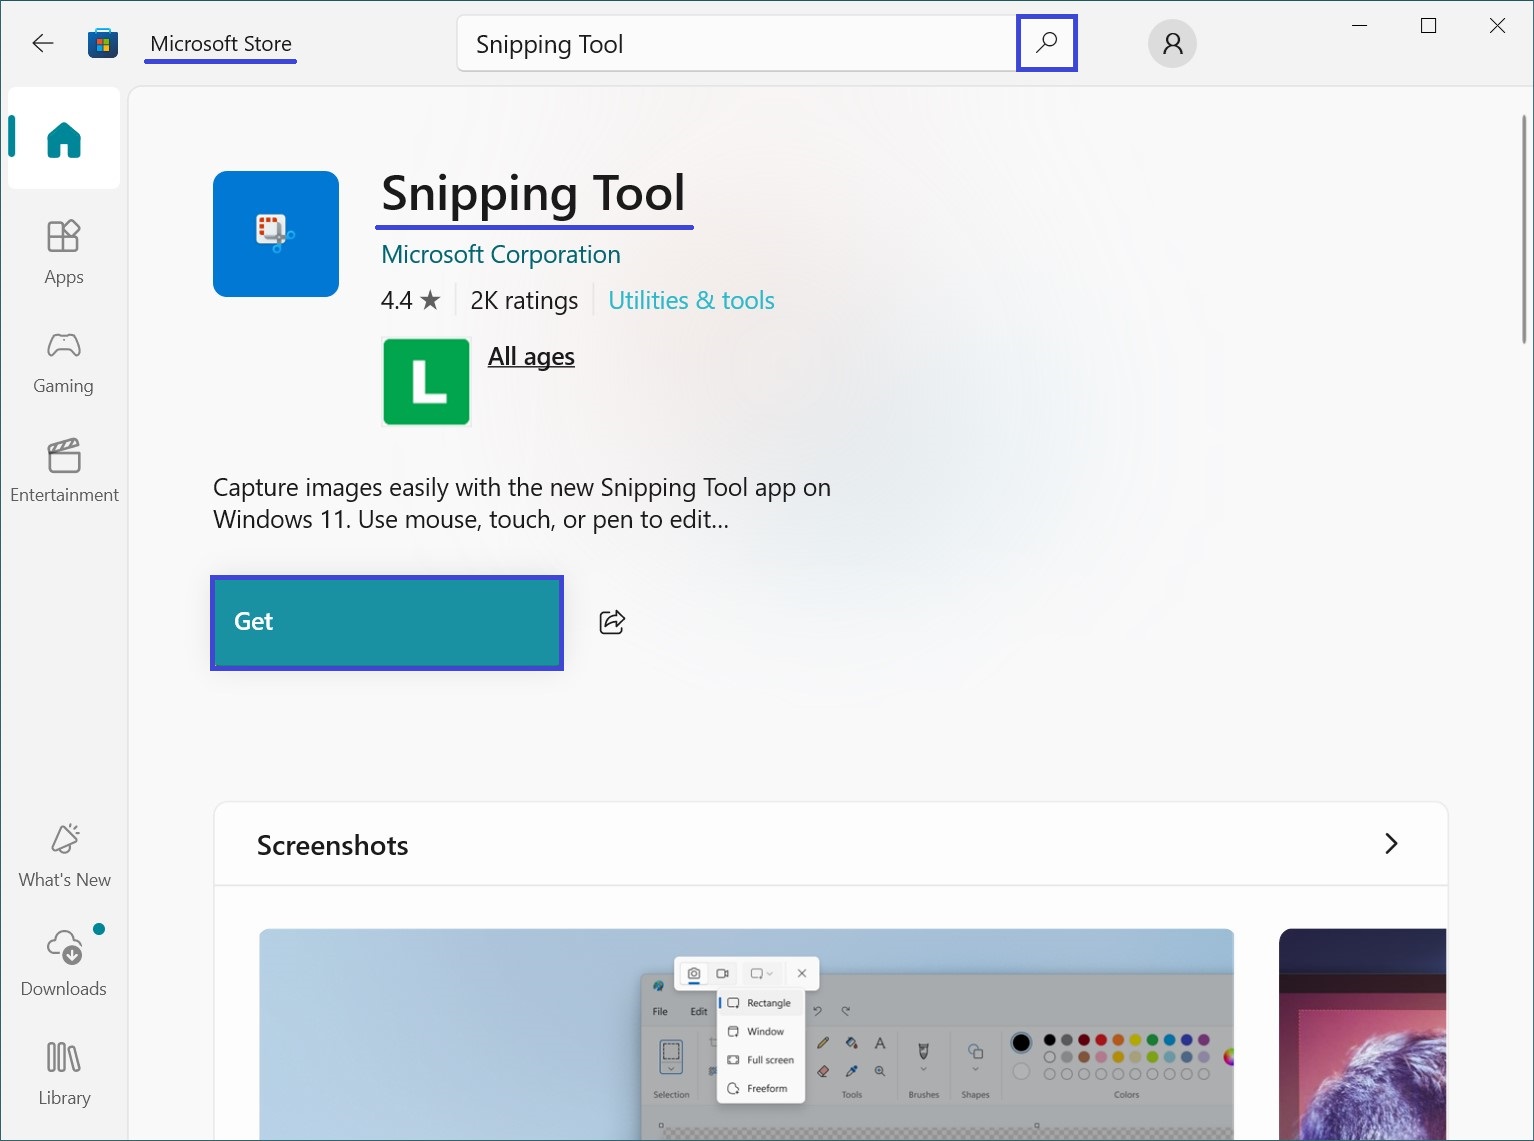
If you need the Snipping Tool for work but previously removed it, don’t worry—you can reinstall it at any time by downloading it from the official Microsoft Store. Open the store, search for “Snipping Tool”, and click “Get”. After installation, you can start editing images right away!
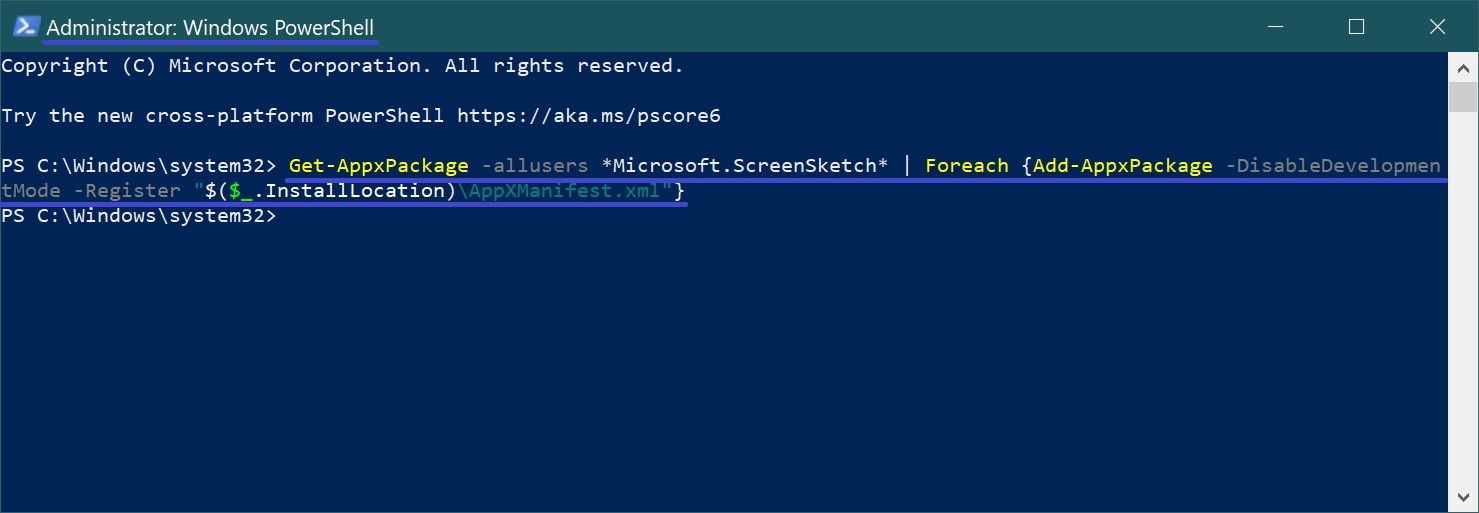
Another easy way to restore the Snipping Tool is through PowerShell, run with administrator privileges. Use the following command:
Get-AppxPackage -allusers *Microsoft.ScreenSketch* | Foreach {Add-AppxPackage -DisableDevelopmentMode -Register “$($_.InstallLocation)\AppXManifest.xml”}
The Snipping Tool will be reinstalled for all users on the computer.
In this article, we aimed to provide a comprehensive overview of all the possible ways to uninstall the Snipping Tool on Windows 11 and 10. Just choose the method that is most convenient for you!