By default, the operating system assigns a manufacturer’s name and model number to the printer when you install it.
If you want a different name for the printer, you can rename the printer.
To rename a printer, you must be logged in with administrator privileges
If you rename a shared printer, existing connections to that printer from other computers will be interrupted and will have to be recreated.
How to rename a printer using Settings
To rename the printer, open Settings by clicking the Start button on the taskbar and then selecting Settings or by pressing the Win + I key combination on your keyboard.
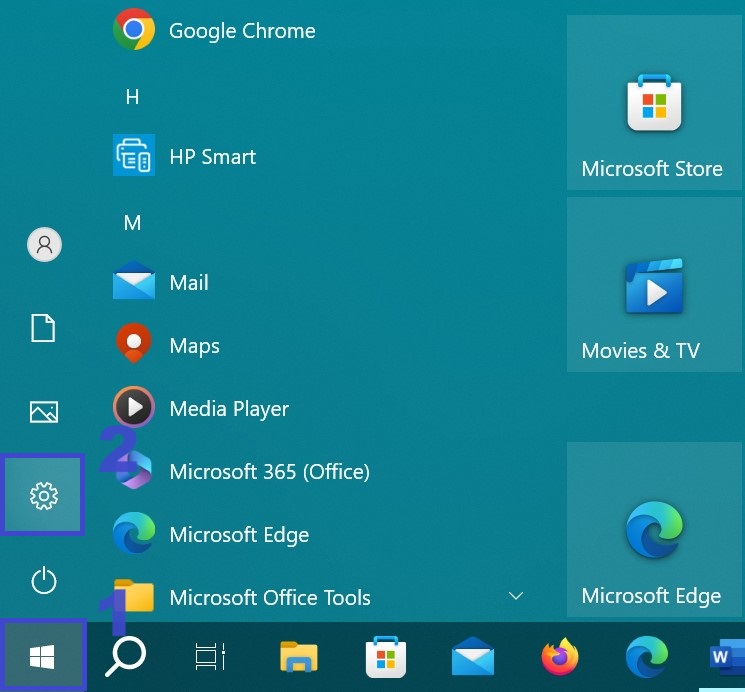
In the Settings window that opens, select Devices.

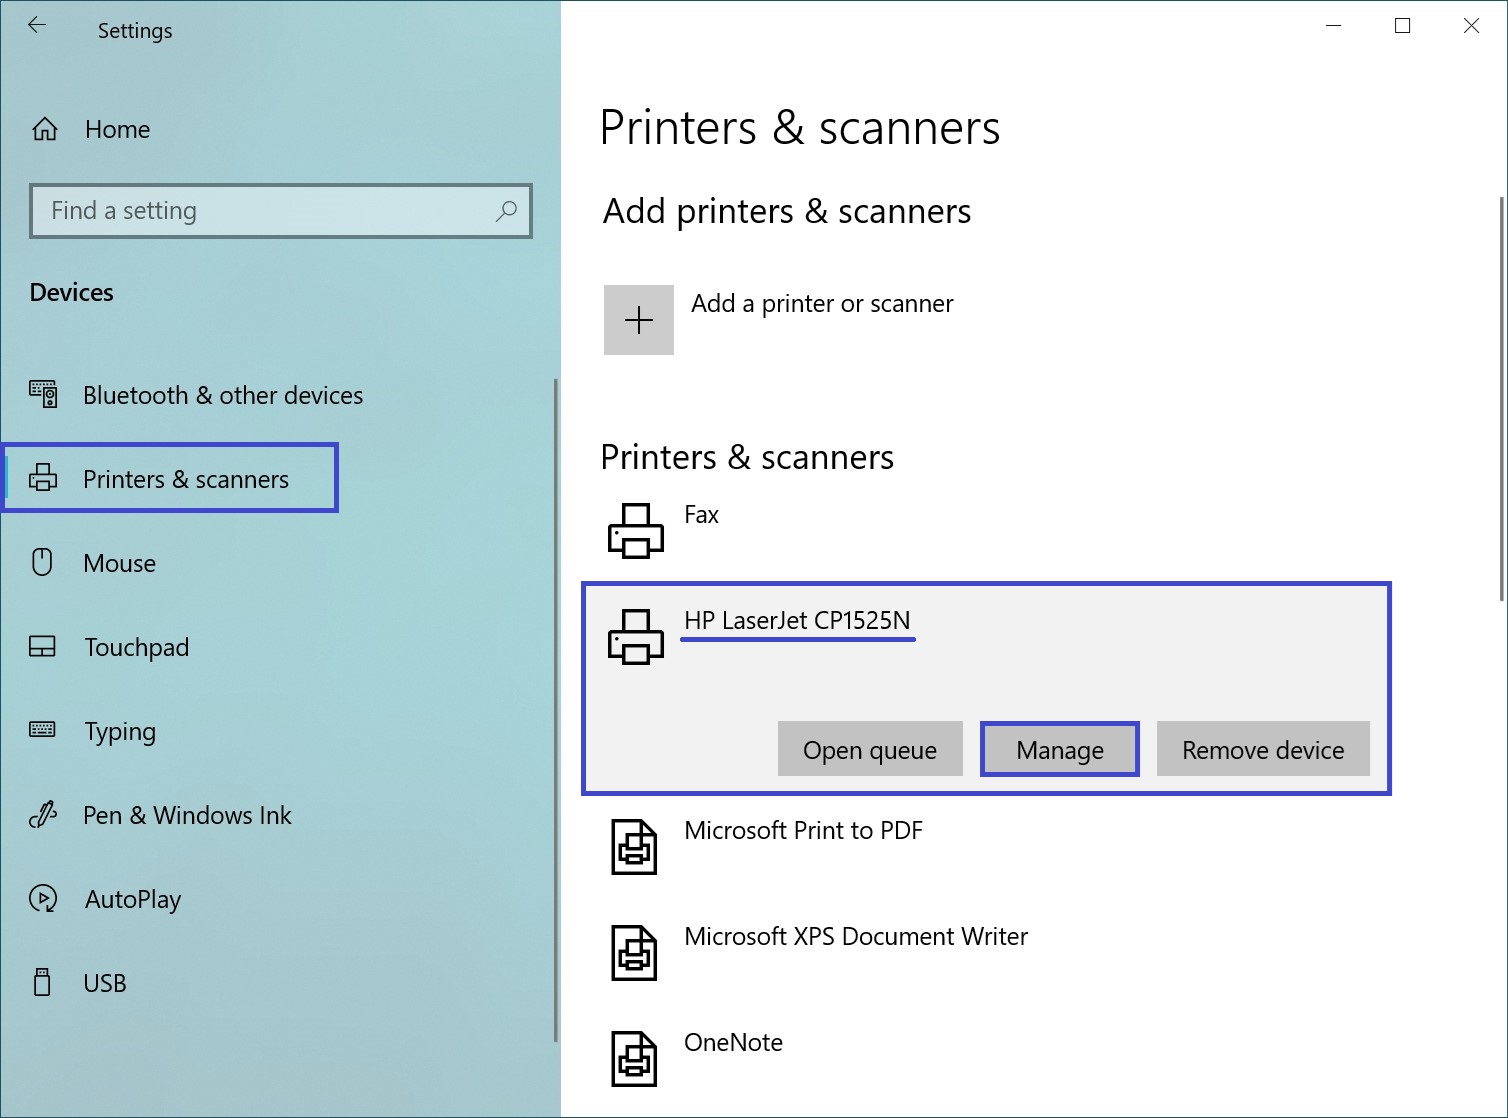
Then select the Printers and Scanners tab, and on the right side of the window, select the printer you want to rename and click Manage.
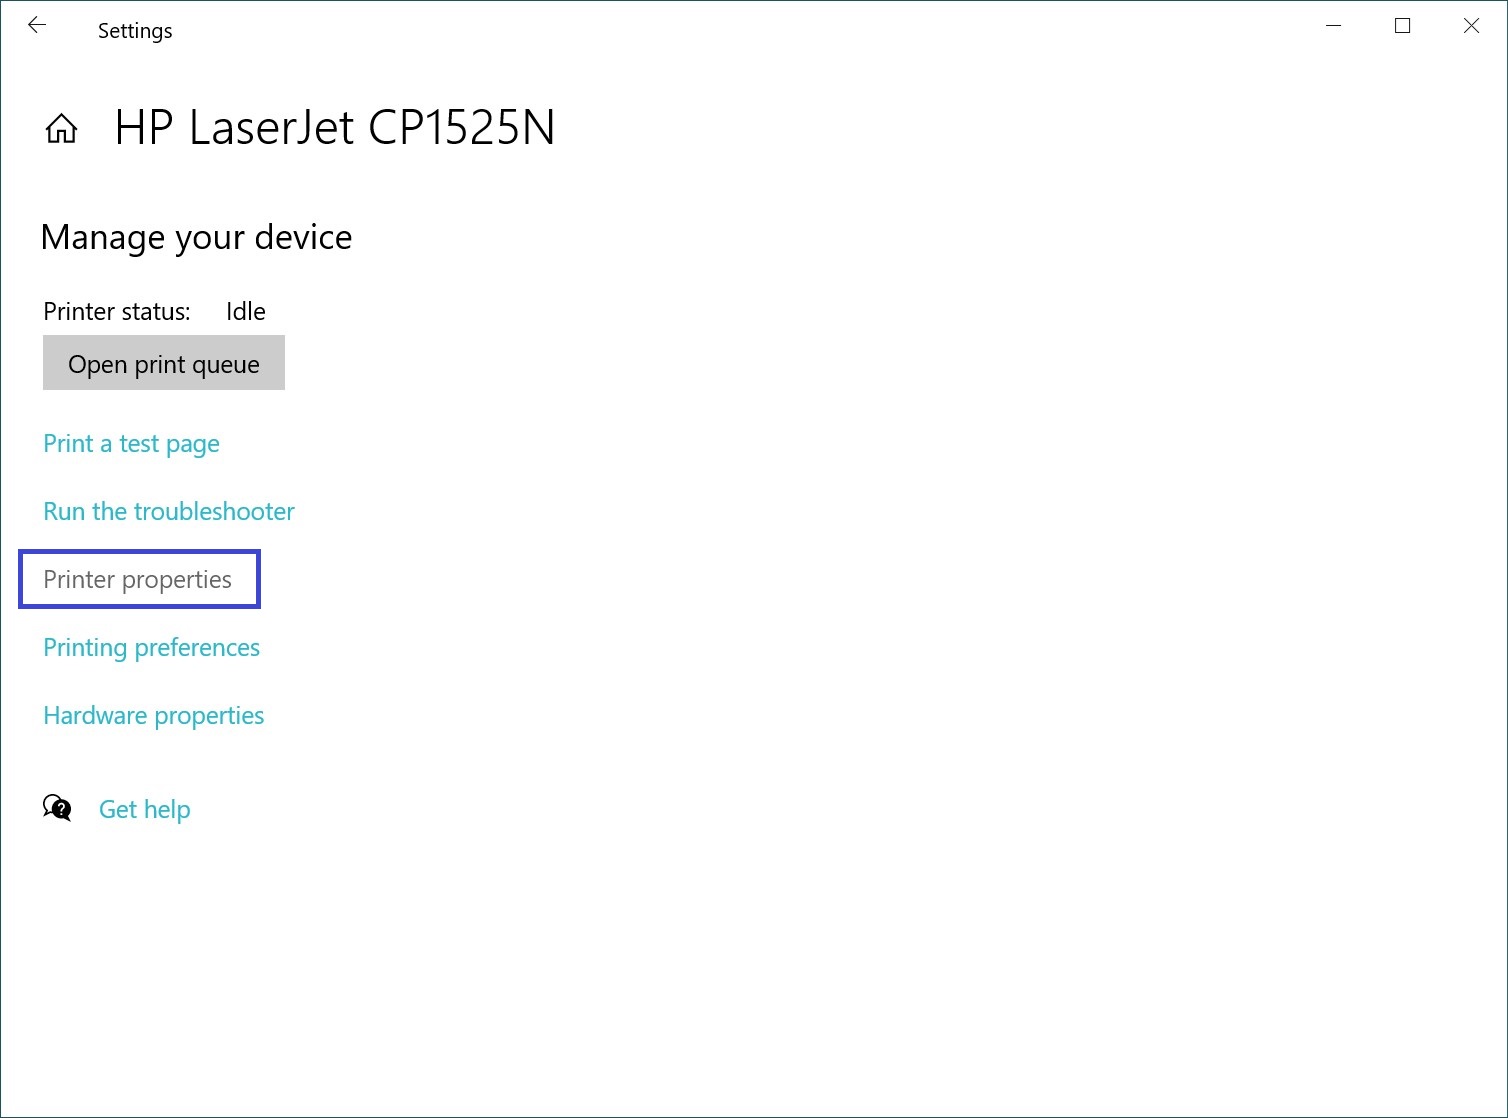
In the next window, click the Printer Properties link
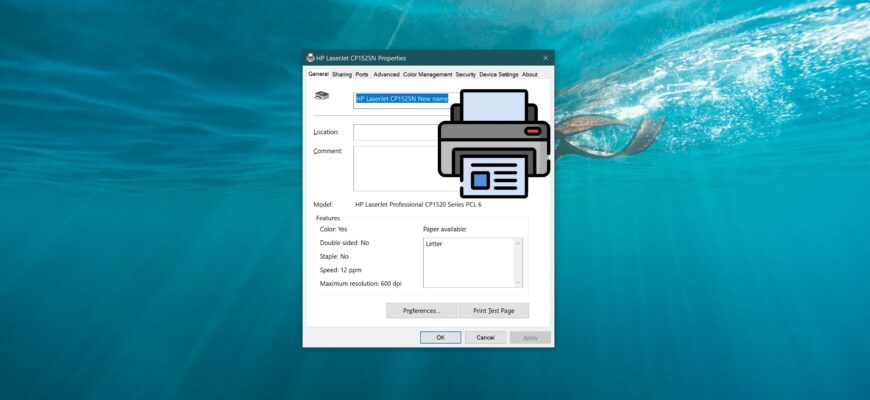
In the Printer Properties window, on the General tab, enter a new printer name in the top field and click OK.
If you are renaming a shared printer, confirm the renaming by clicking Yes.
If you rename a shared printer, any existing connections from other computers to it will be severed and will need to be recreated.
How to rename a printer using “Control Panel”
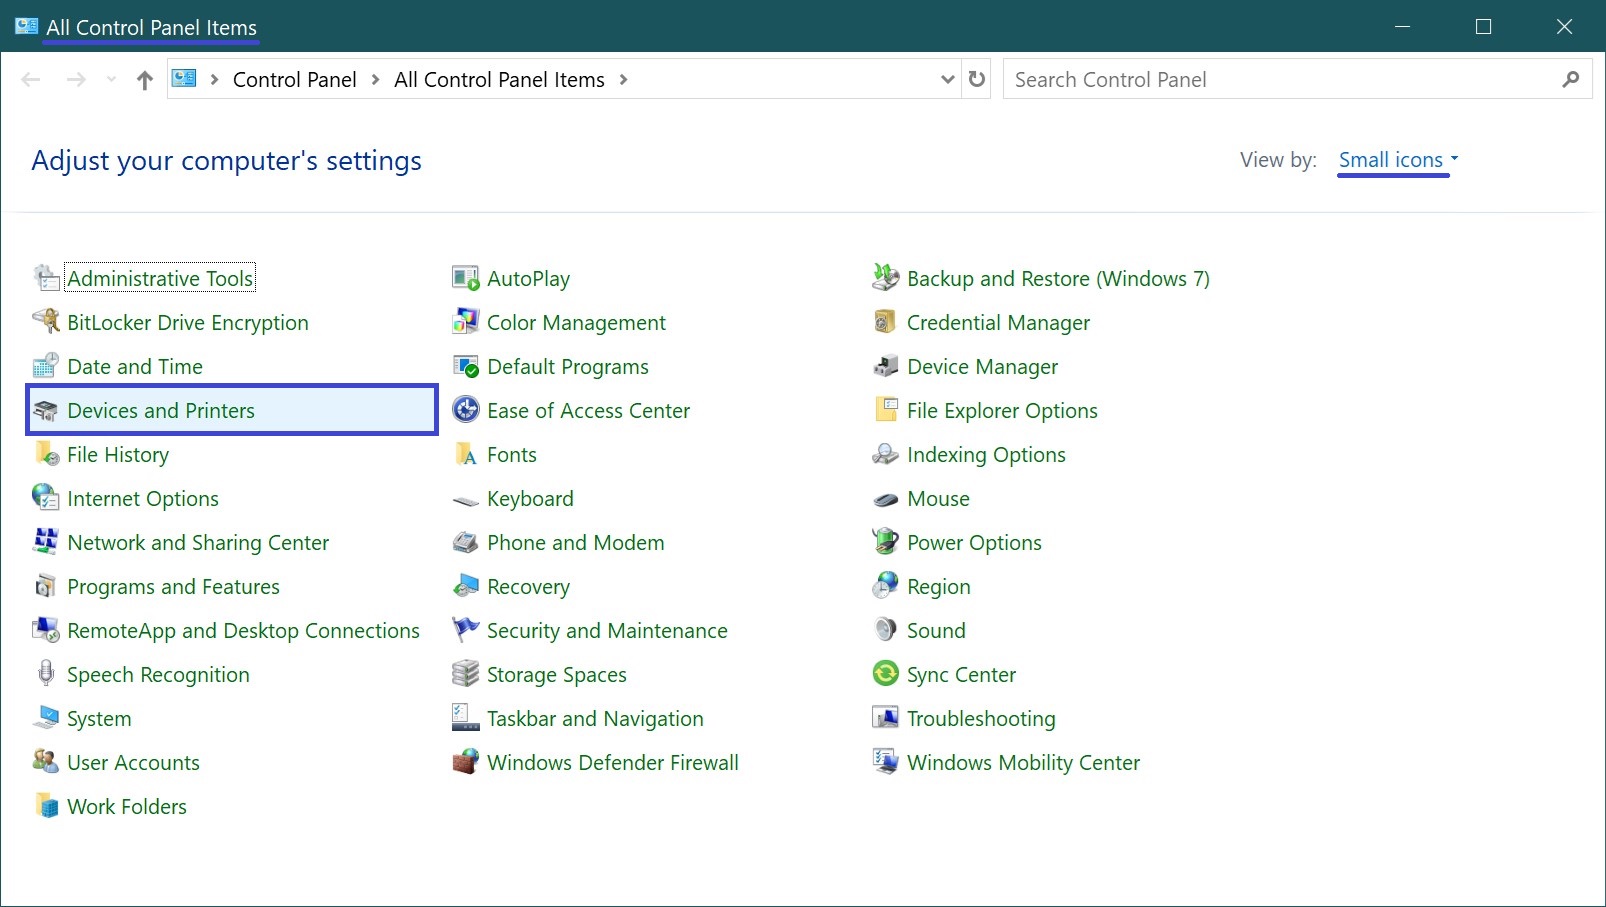
You can also rename a printer using the Classic Control Panel.
Open the Classic Control Panel, select Small Icons from the View by drop-down list, and then click Devices and Printers.
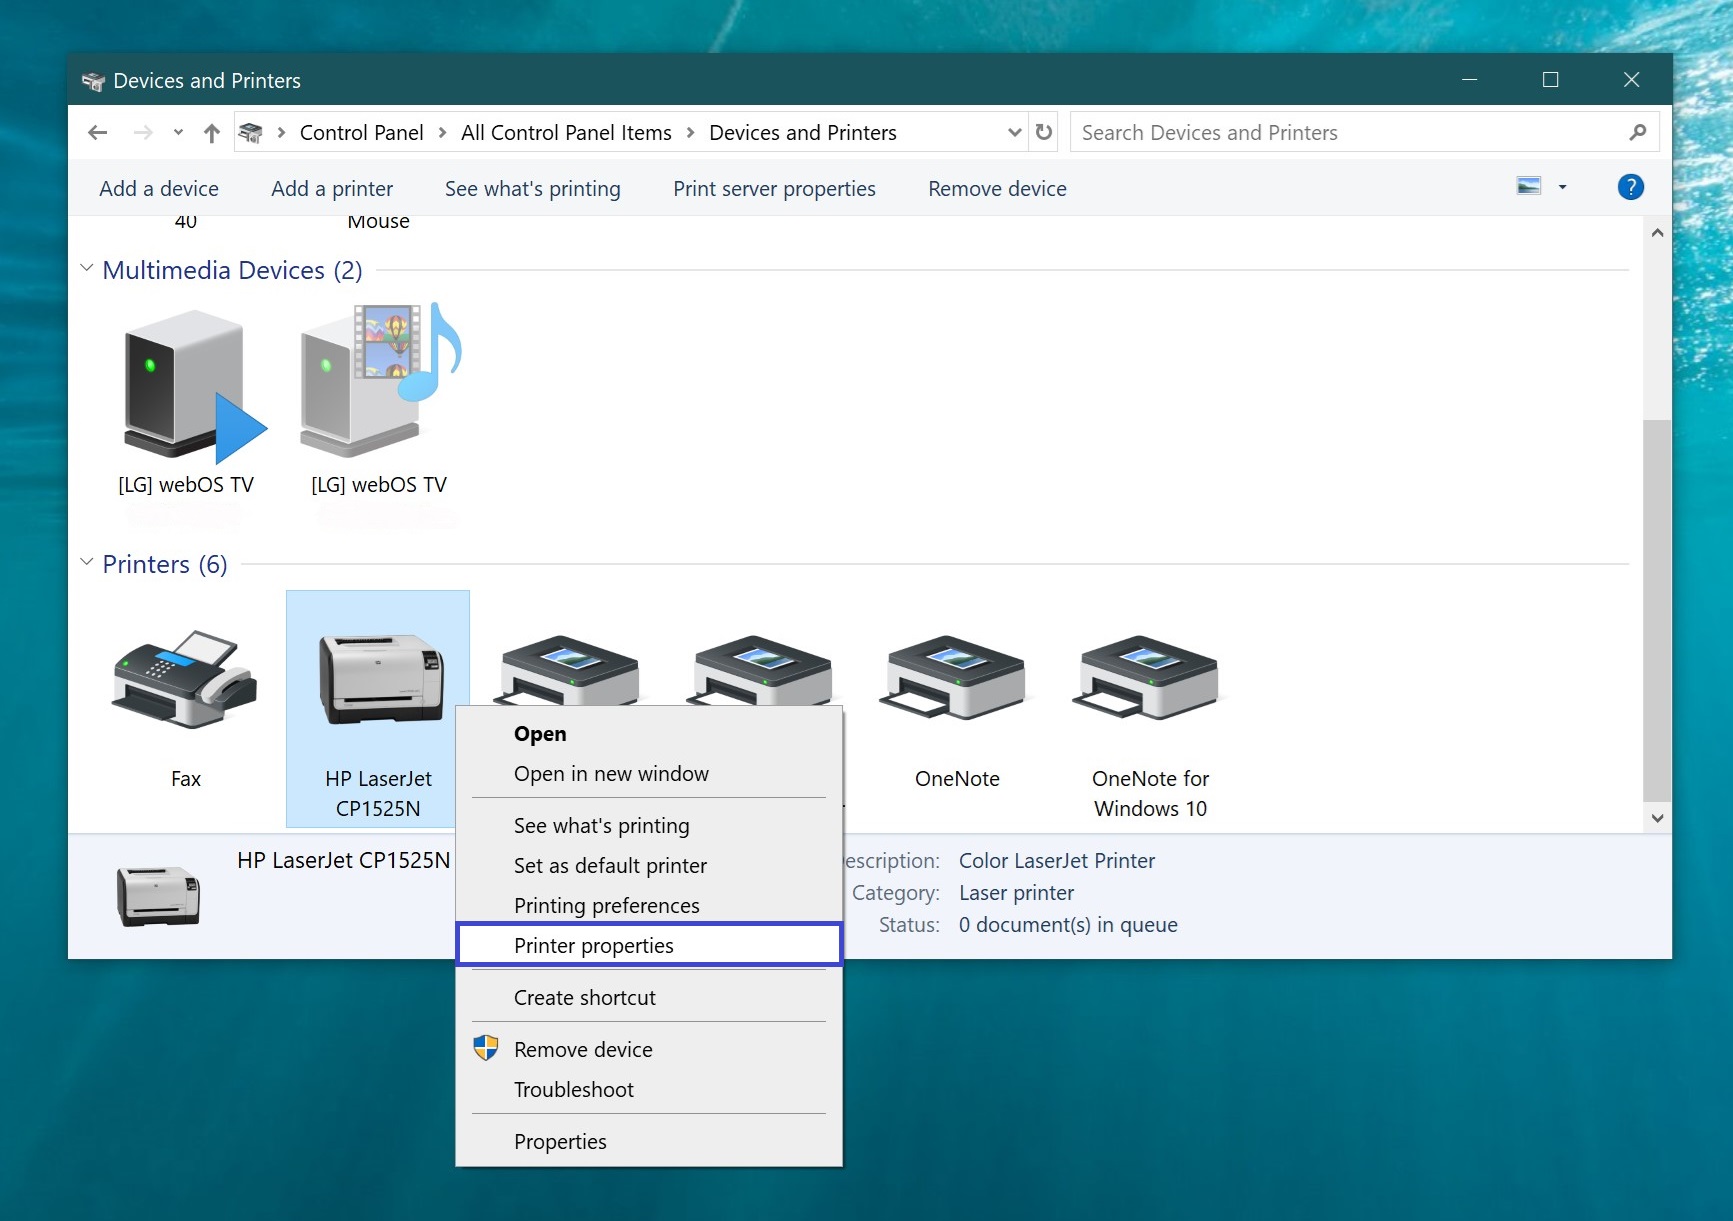
In the “Devices and Printers” window, in the Printers section, right-click on the printer you want to rename and select Printer Properties in the context menu that appears.
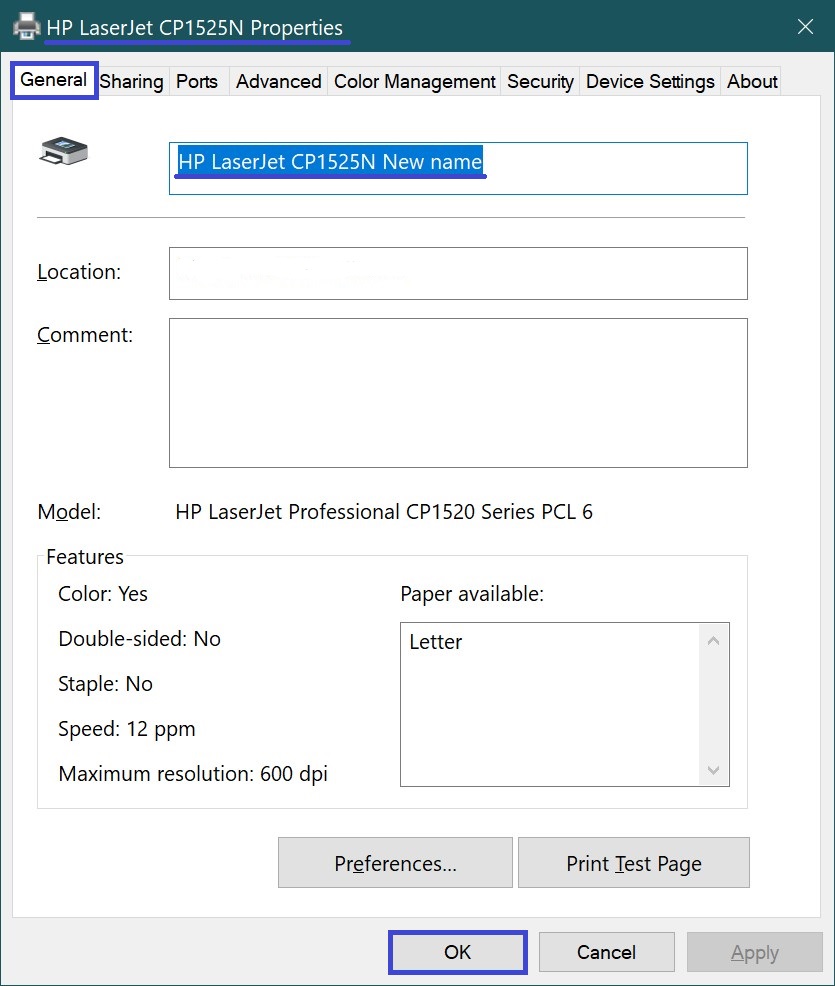
In the Printer Properties window, on the General tab, enter a new printer name in the top field and click OK.
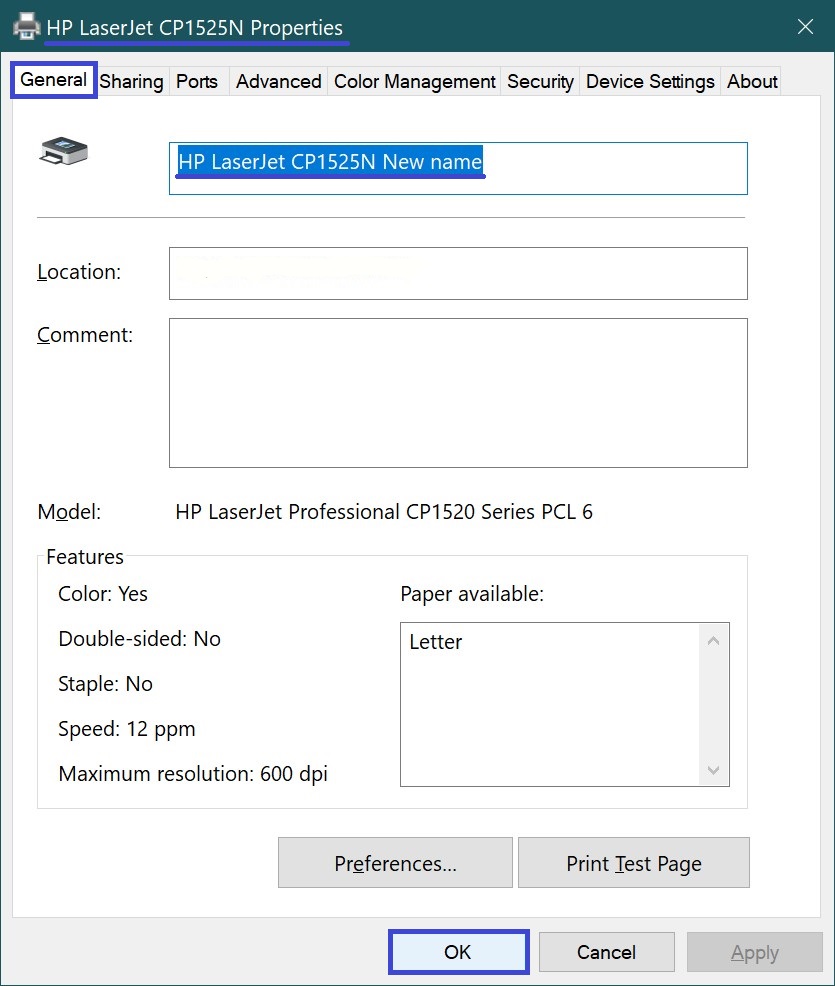
If you are renaming a shared printer, confirm the renaming by clicking Yes.
How to rename a printer in Windows PowerShell
You can also use the Windows PowerShell console to rename a printer.
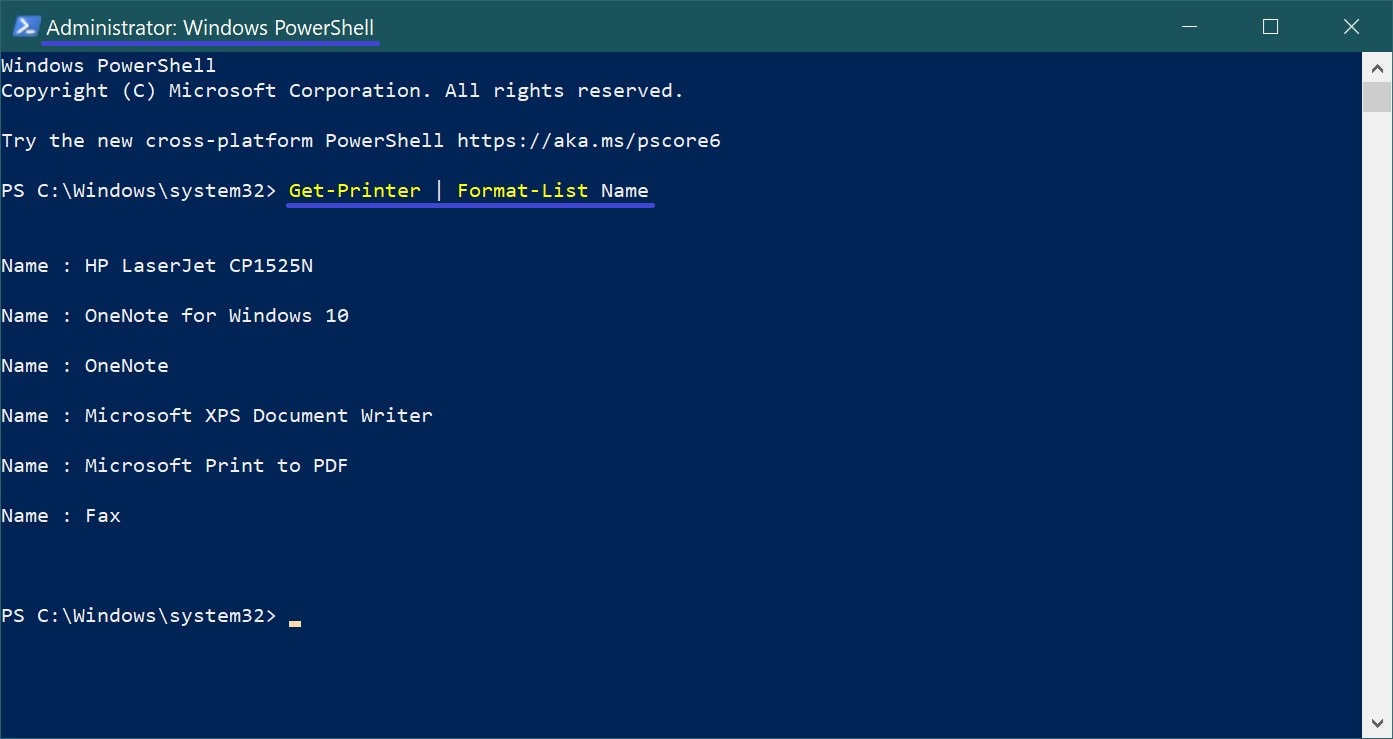
The first thing to do is to display all the names of the installed printers in the console, to do this, open the Windows PowerShell console as administrator and run the following command:
Get-Printer | Format-List Name
In this example, we will rename the printer with the name “HP LaserJet CP1525N)”.
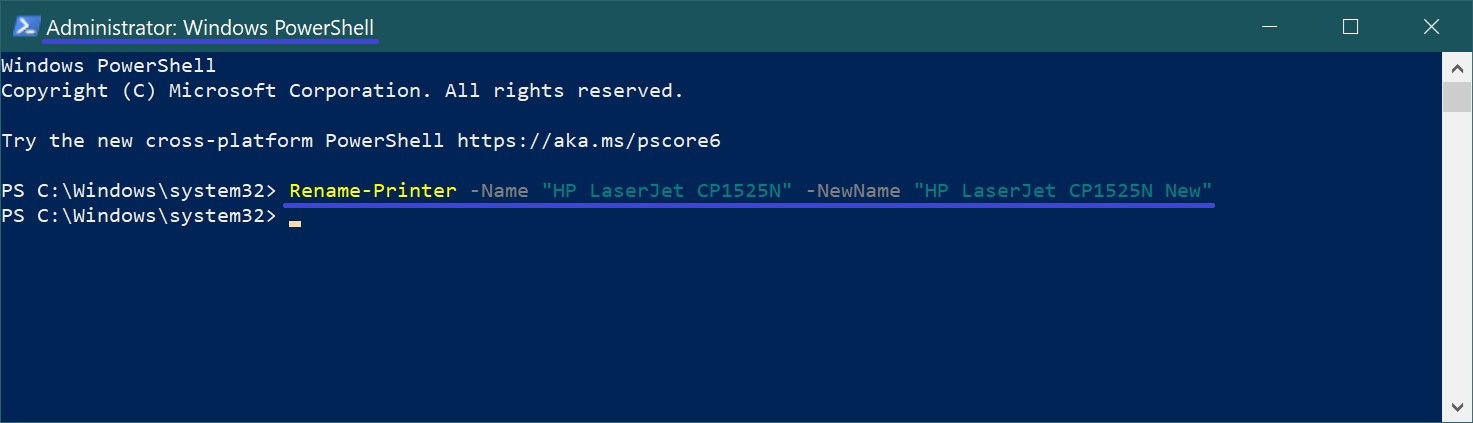
To rename the printer, execute the following command:
Rename-Printer -Name “Current_printer_name” -NewName “New_printer_name”
Replace Current_printer_name in the above command with the actual current name of the printer you want to rename (in this example, “HP LaserJet CP1525N”).
Replace New_printer_name in the above command with the new printer name (e.g. “HP LaserJet CP1525N New”).
In this example, the command is as follows:
Rename-Printer -Name “HP LaserJet CP1525N” -NewName “HP LaserJet CP1525N New”
Using the steps discussed above, you can easily rename the printer in Windows 10 operating system.


