The Windows 10 operating system allows users to customize notification settings in a very flexible way. You can change the settings at any time to customize the notification display time. For example, you can increase the display time (default 5 seconds) if you find it insufficient.
How to set notification display time in the Windows Settings application
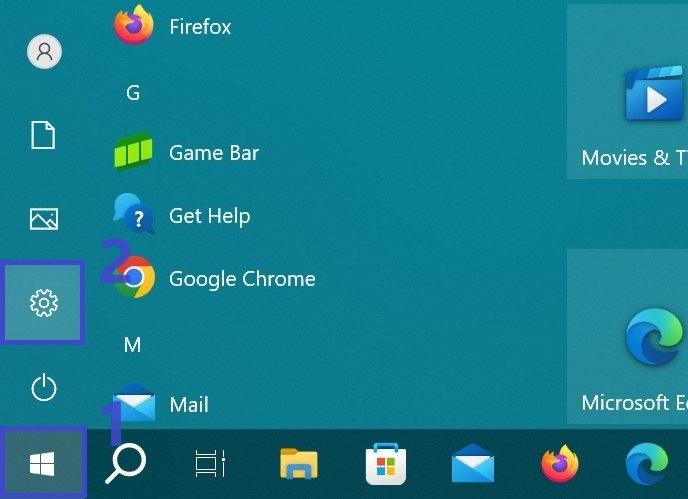
To change the notification display time, click the Start button on the taskbar and select Settings or press the Win+I keyboard shortcut.
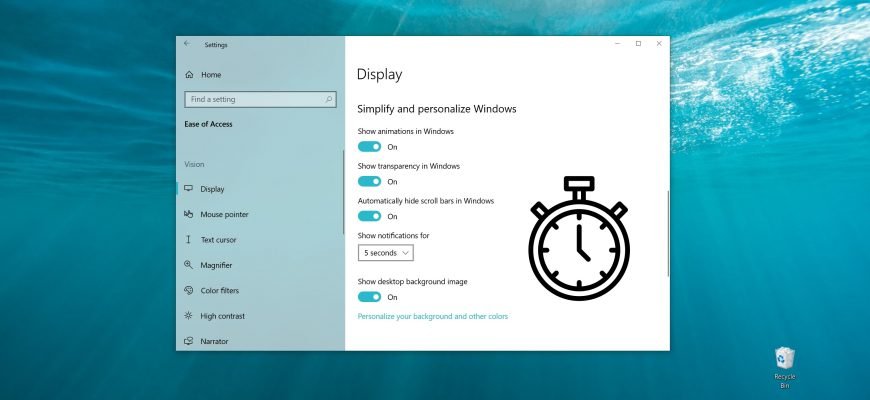
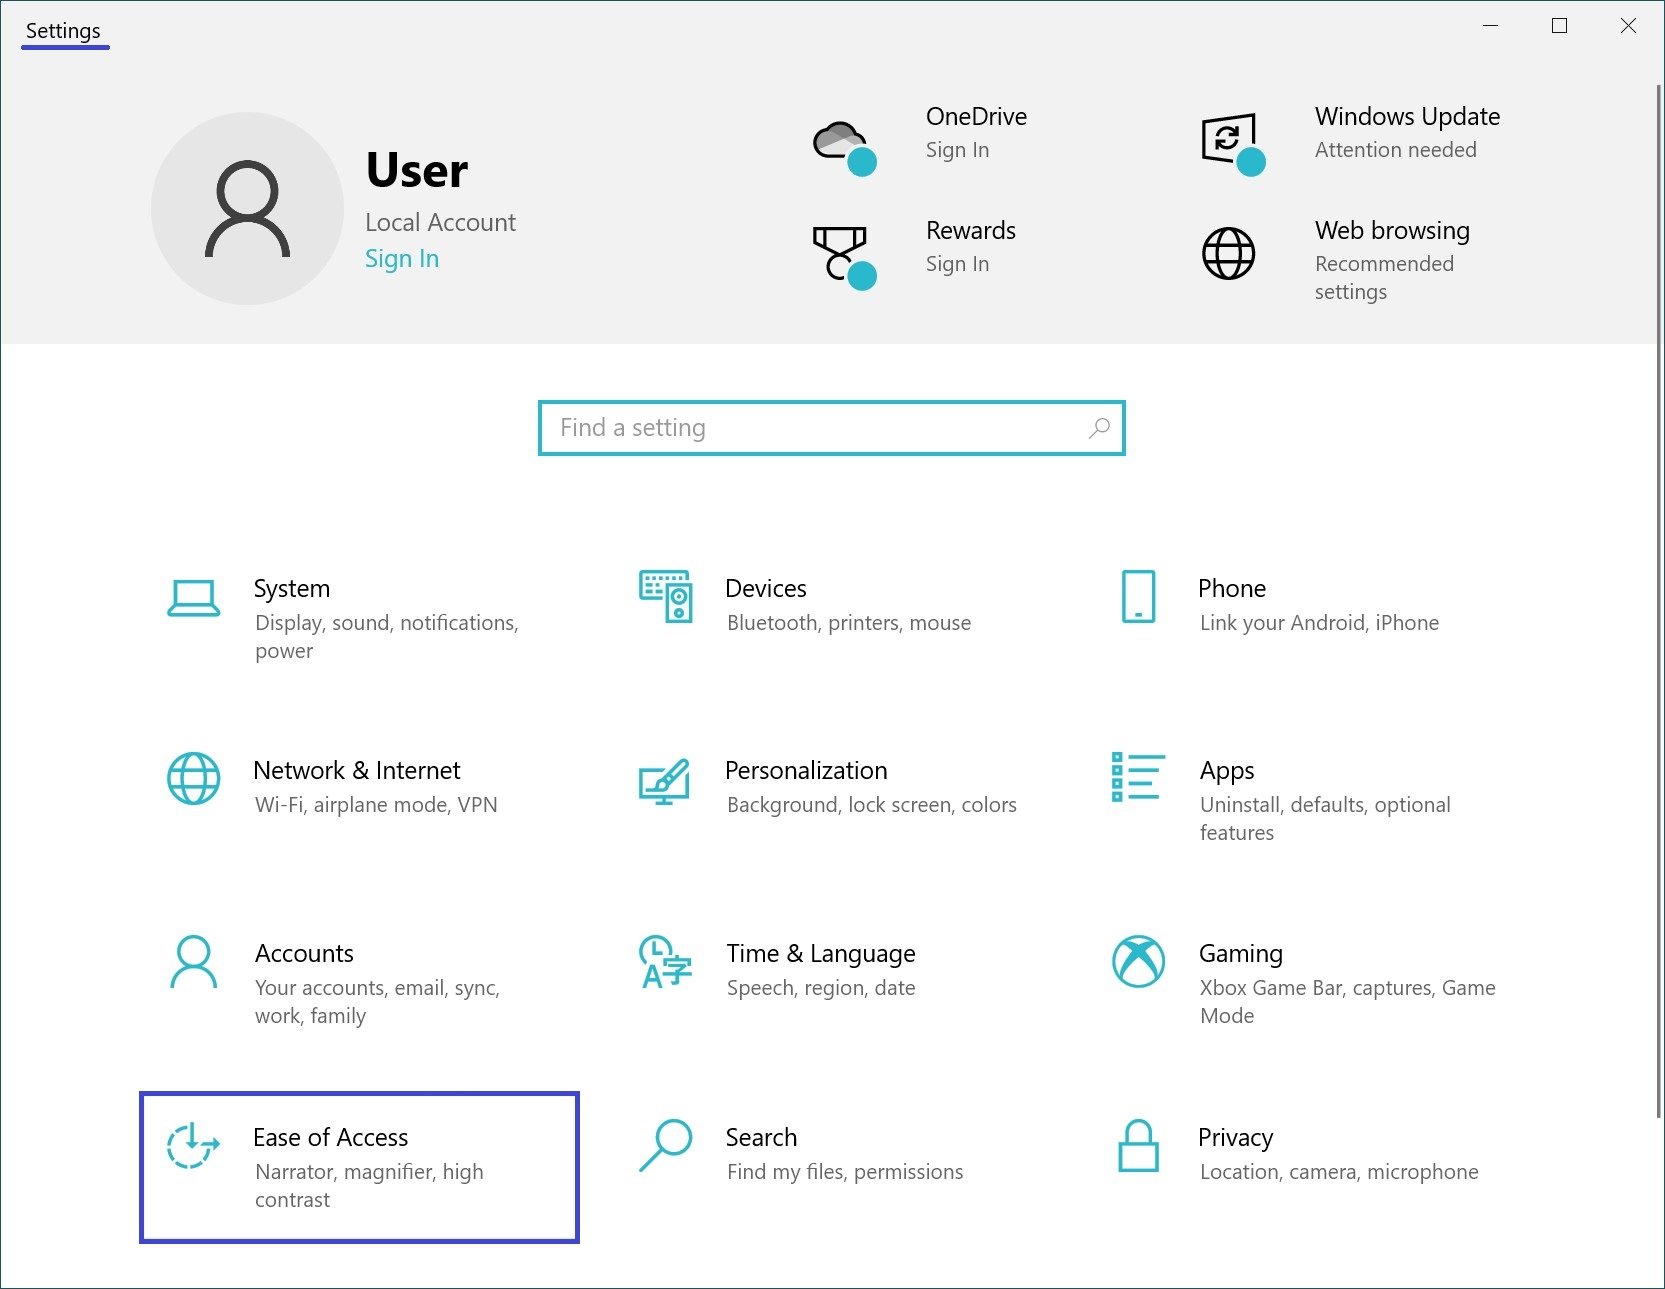
In the Windows Settings window that opens, select the Ease of Access category.
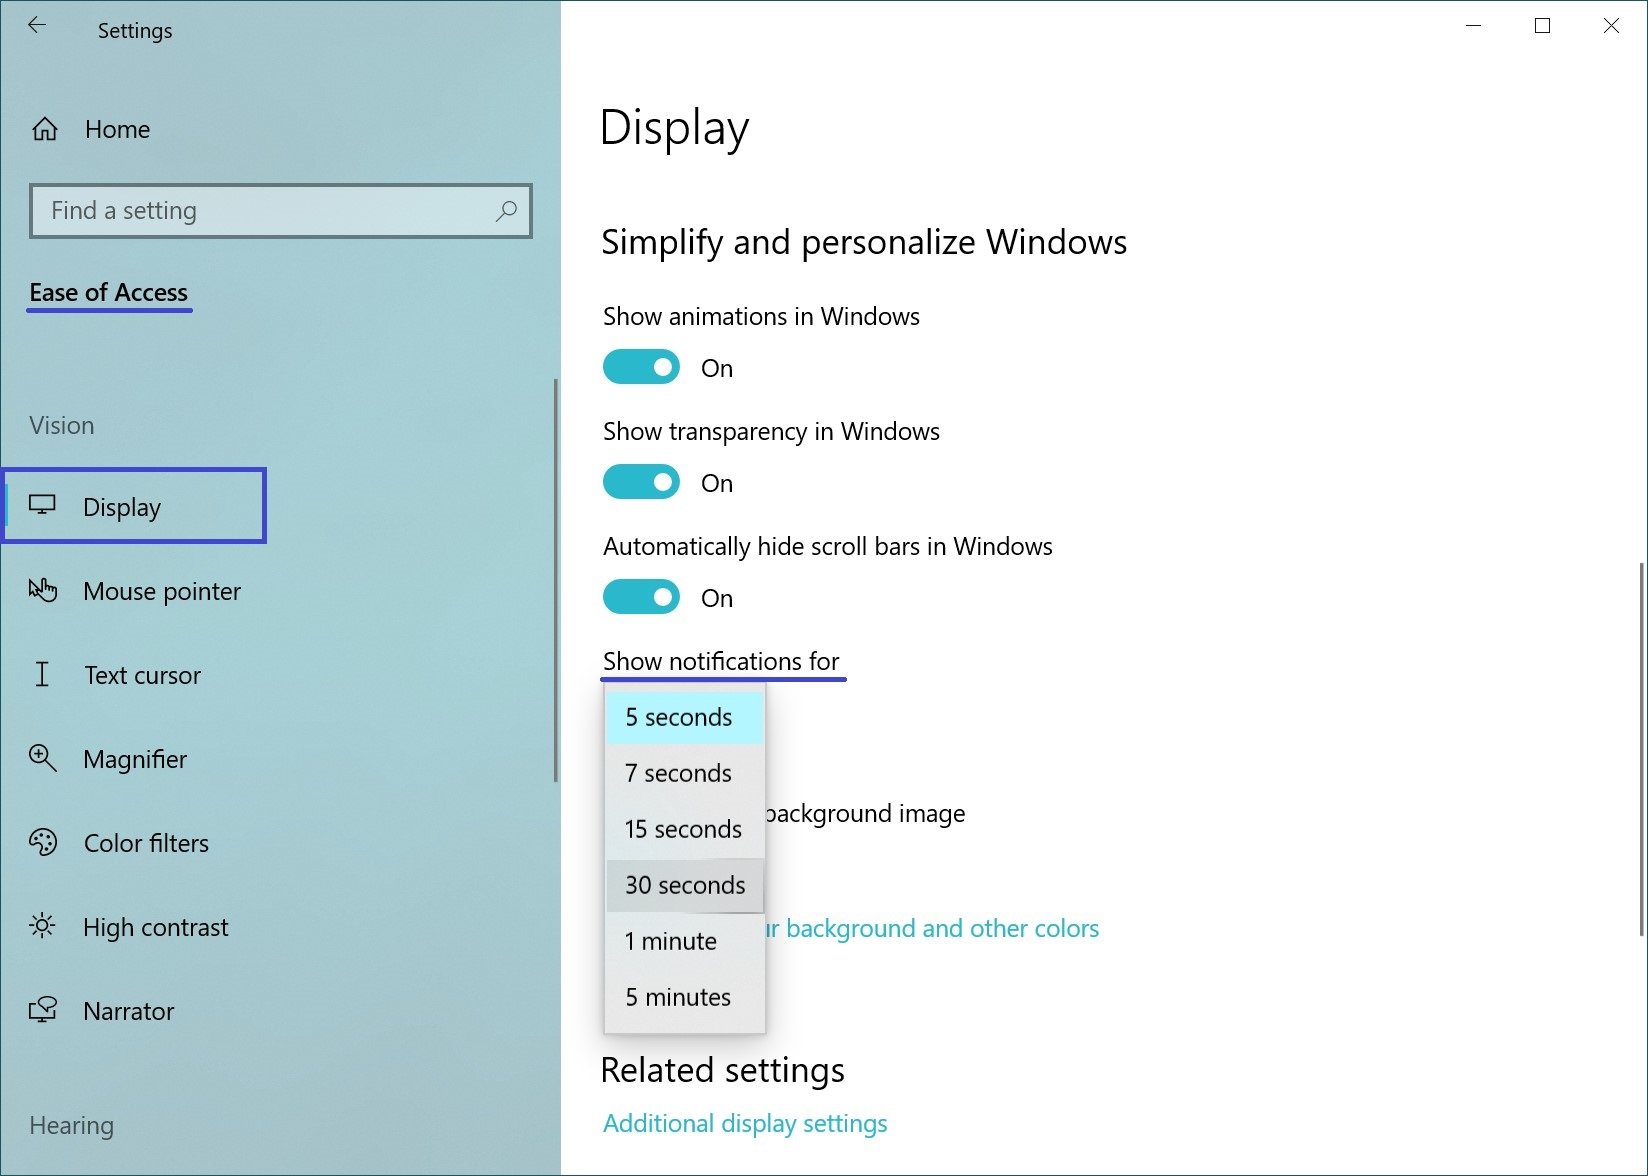
Next, on the Display tab, on the right side of the window, in the Show notifications for drop-down list, select the desired display time from 5 seconds (default) to 5 minutes.
The changes will take effect immediately and notifications will now be displayed for the time you have selected.
How to set notification display time using the registry editor
In the registry editor you can set any time for displaying notifications, unlike the fixed values offered by Windows.
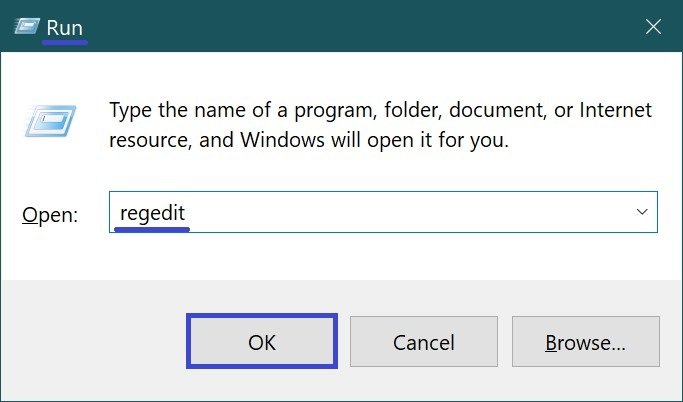
Press the Win+R keyboard shortcut and in the Run window that opens, type regedit and press Enter ↵.
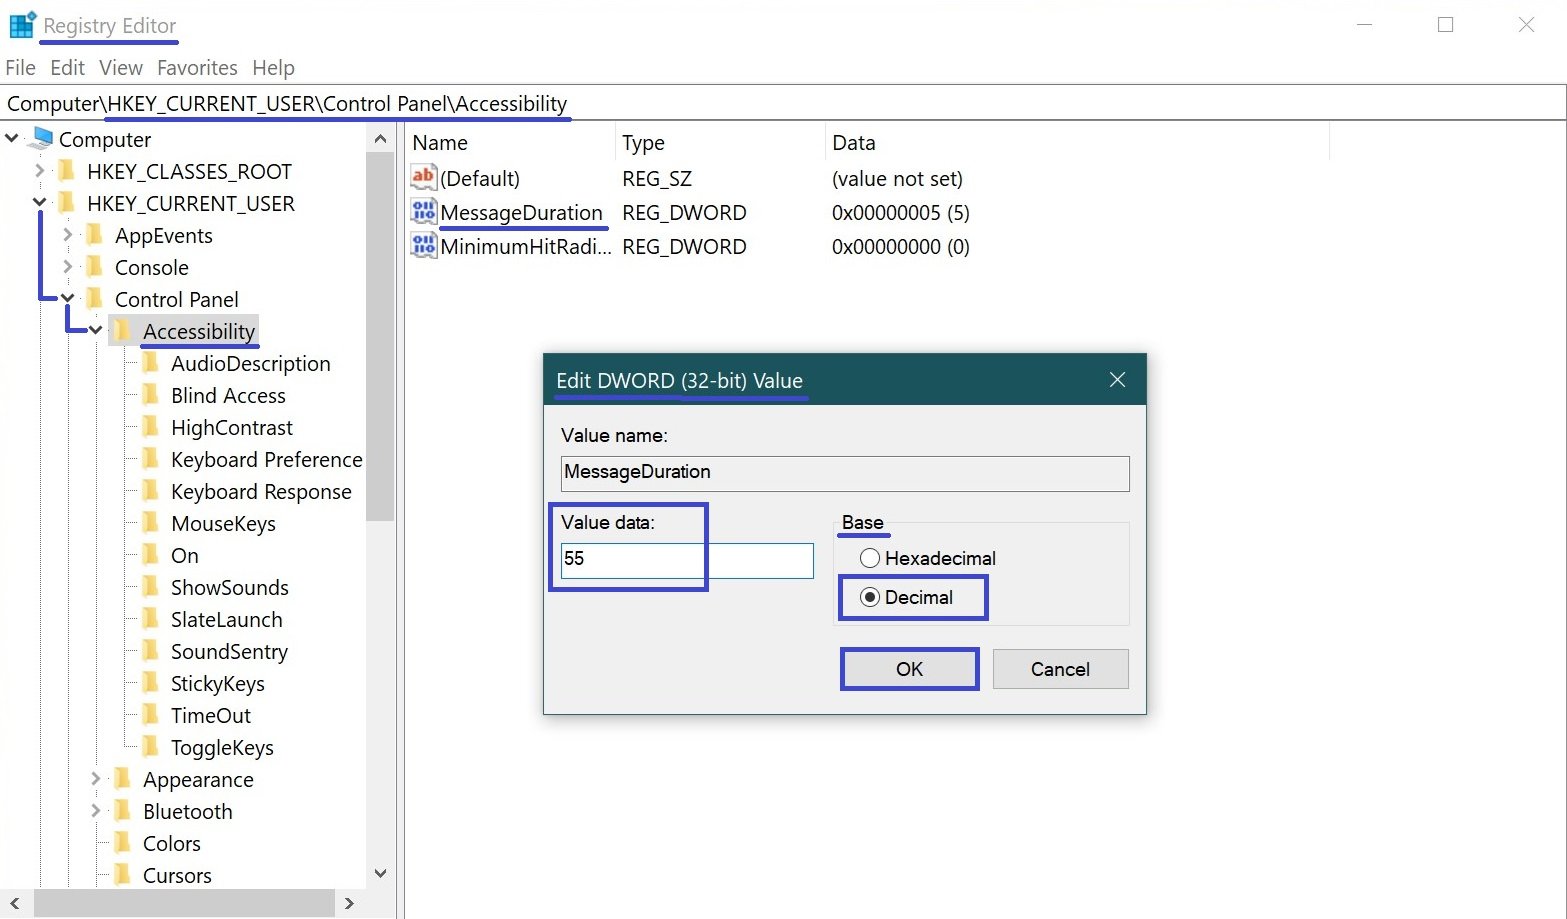
In the Registry Editor window, navigate to the following path:
HKEY_CURRENT_USER\Control Panel\Accessibility
In the right part of the registry editor window, find the DWORD (32-bit) parameter named MessageDuration (if it does not exist, create it), double-click on it with the left mouse button and in the Edit DWORD (32-bit) Value dialog box that opens, select Decimal and set the desired display time in seconds, click OK, close the registry editor.
For the changes to take effect, you must log out and log in again.
The minimum value of the MessageDuration parameter must not be less than 5, for example if you set the value from 1 to 4, the notifications will still be displayed for 5 seconds.