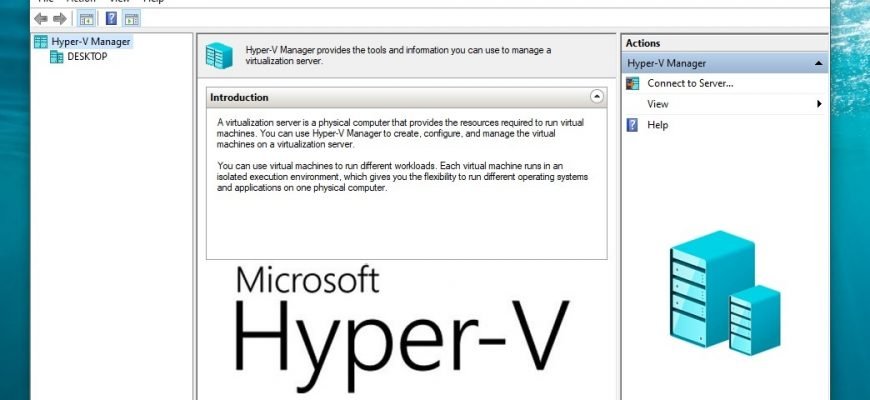
Hyper-V allows you to run multiple operating systems as virtual machines in Windows. The Hyper-V component can be enabled or disabled in several ways, including the Windows PowerShell console, the DISM command line utility (Deployment Image Maintenance and Management Tool), and using the Control Panel GUI.
Before enabling the Hyper-V component, the following requirements must be checked:
- Windows 10 Corporate, Professional or Educational
- 64bit processor with Layer 2 Address Translation (SLAT) support
- The processor must support virtualization technology (Intel VT-x or AMD-V)
- Computer must have at least 4GB of RAM installed
Also check that virtualisation technology is enabled in the BIOS/UEFI.
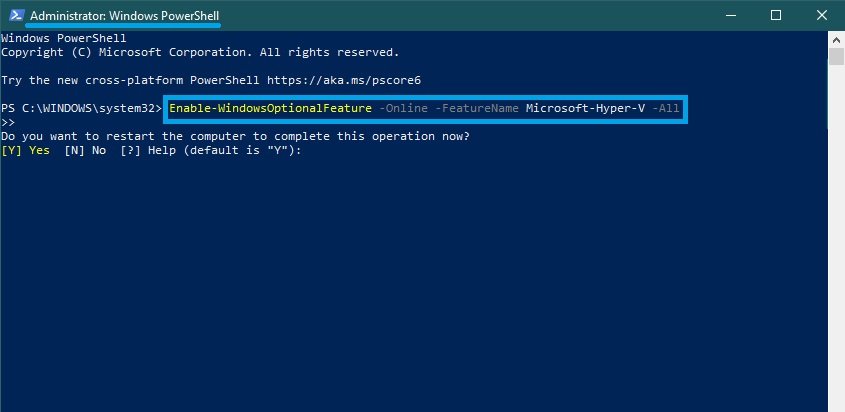
How to enable and disable via Windows PowerShell
The Hyper-V component can be enabled using the Windows PowerShell console.
To enable the Hyper-V component, open the Windows PowerShell console as administrator and run the following command:
Enable-WindowsOptionalFeature -Online -FeatureName Microsoft-Hyper-V -All
Reboot your computer to complete the installation.
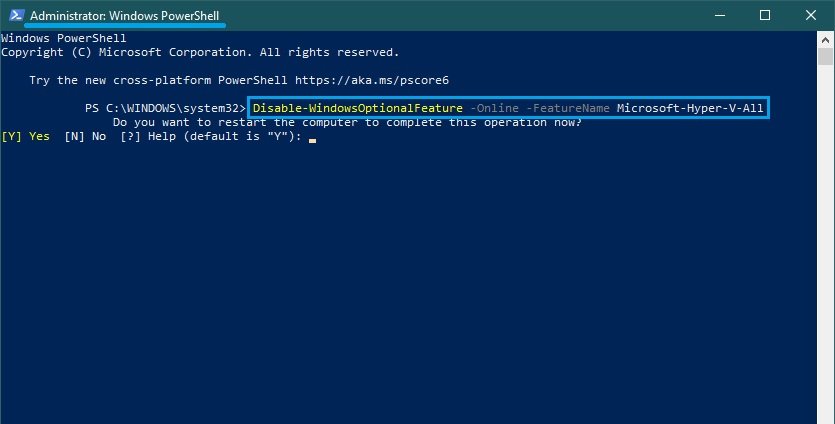
To disable the Hyper-V component, open the Windows PowerShell console as administrator and run the following command:
Disable-WindowsOptionalFeature -Online -FeatureName Microsoft-Hyper-V-All
To complete the operation of disabling the Hyper-V component, you must restart your computer.
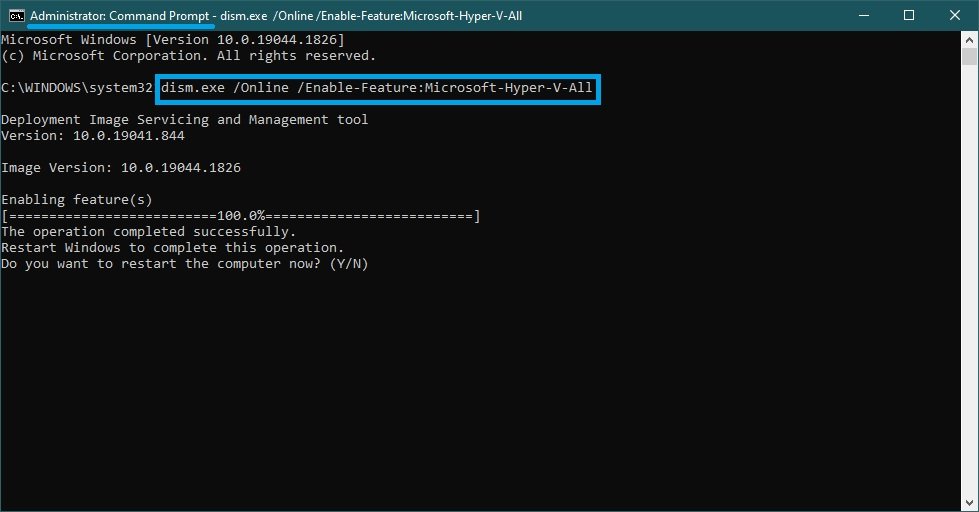
Managing Hyper-V with DISM
To enable the Hyper-V component using DISM, run the command line as administrator and run the following command:
dism.exe /Online /Enable-Feature:Microsoft-Hyper-V-All
Restart Windows to complete the operation.
To disable the Hyper-V component using DISM, run the command line as administrator and run the following command:
dism.exe /Online /Disable-Feature:Microsoft-Hyper-V-All
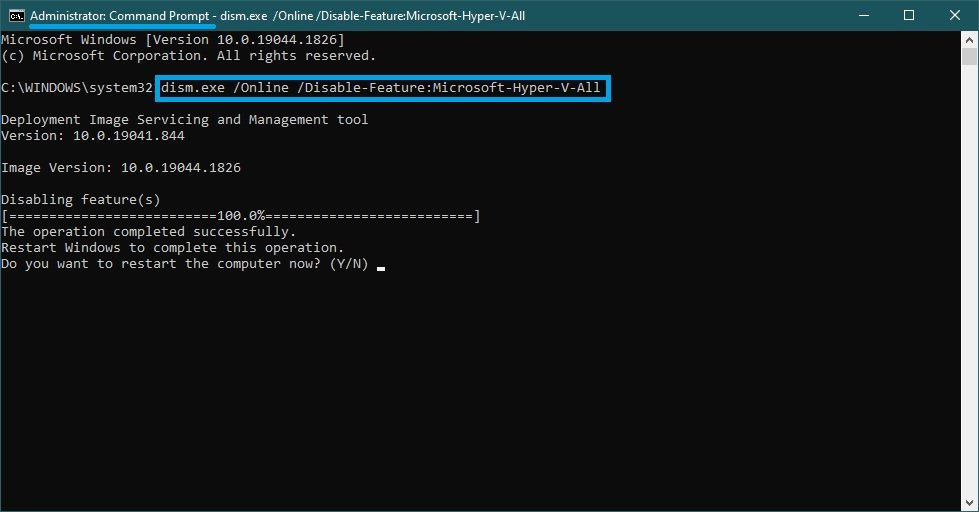
Restart Windows to complete the operation.
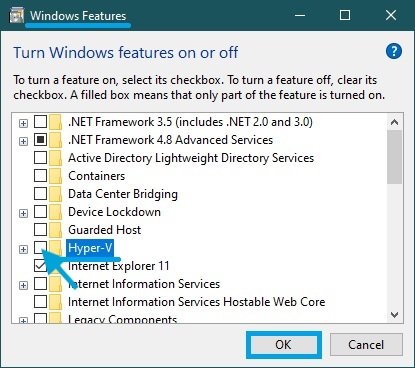
Activation in the “Windows-Features” window
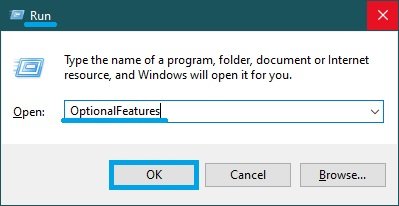
To enable the Hyper-V component in the “Windows-Features” window, press Win + R and enter (copy and paste) OptionalFeatures in the Run window that opens, then press Enter ↵.
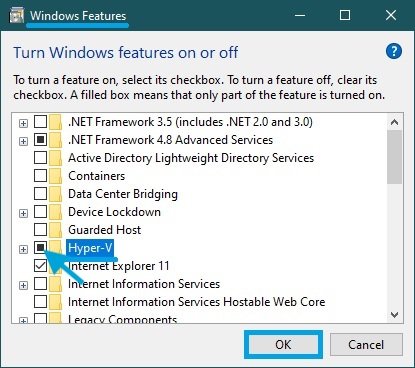
In the “Windows-Features” window that opens, select Hyper-V and click OK.
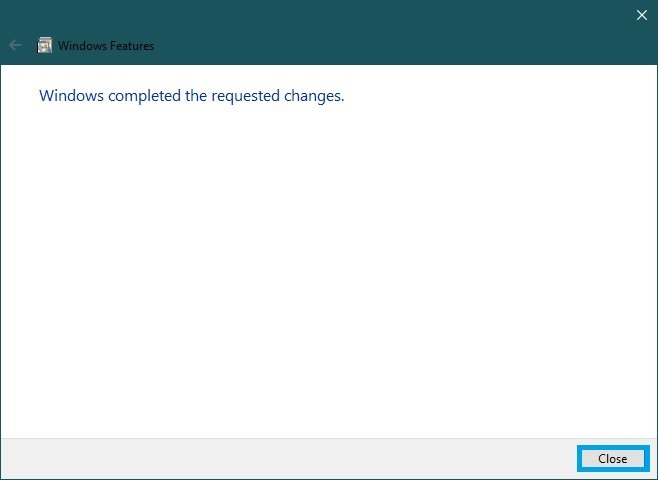
Once the installation is complete, you will be prompted to restart your computer.
To disable the Hyper-V component, in the “Windows-Features” window, disable Hyper-V and click OK.
Once the installation is complete, you will be prompted to restart your computer.

Using the steps above you can enable or disable the Hyper-V component.


