Locking your computer protects it from unauthorized use when you need to step away from your computer and you don’t want to log out or turn off your computer. When you lock your computer, the lock screen turns on by default. Other users can still log in to their accounts using the login screen.
If you disable the computer lock, the lock will be removed from the Start menu, the security screen (Ctrl+Alt+Del), and the Win + L key combination used to lock the computer will be disabled.
To prohibit (disable) or permit the locking of a computer, you must be logged in with administrator privileges.
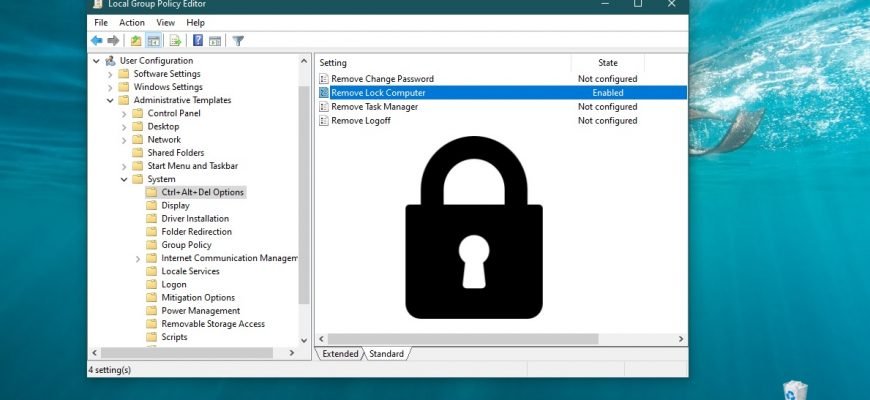
Local Group Policy Editor
Local Group Policy Editor is available in Windows 10 Pro, Enterprise, Education editions This method allows you to prohibit (disable) or allow locking the computer only for the current user account.
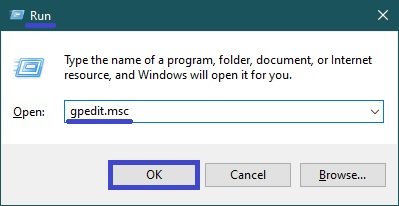
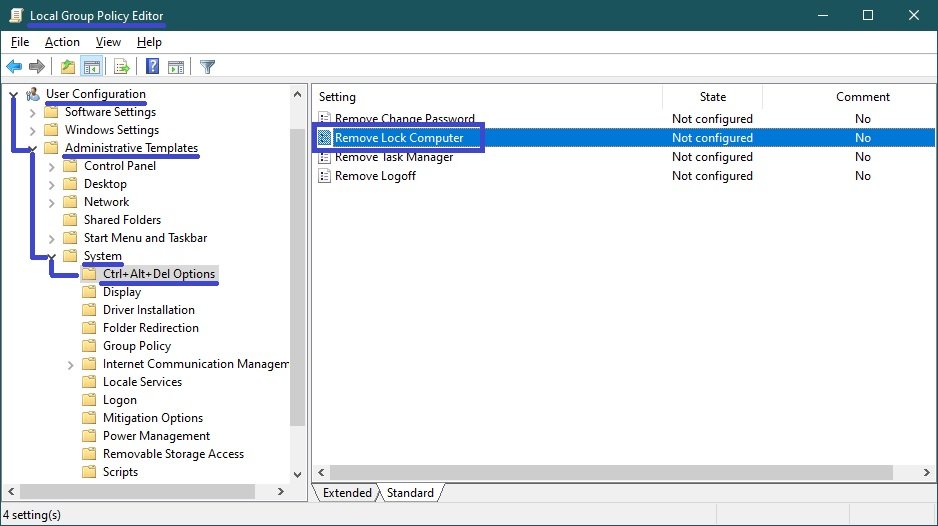
To prohibit (disable) or allow locking your computer, open the Local Group Policy Editor by pressing Win + R, in the Run window that opens type (copy and paste) gpedit.msc and click OK.
In the Local Group Policy Editor window that opens, expand the following list items:
User Configuration ➯ Administrative Templates ➯ System ➯ CTRL+ALT+DEL Options
Next, on the right side of the window, double-click the policy setting called Remove Lock Computer.
In the “Remove Lock Computer” window, set the switch to Enabled and click OK.
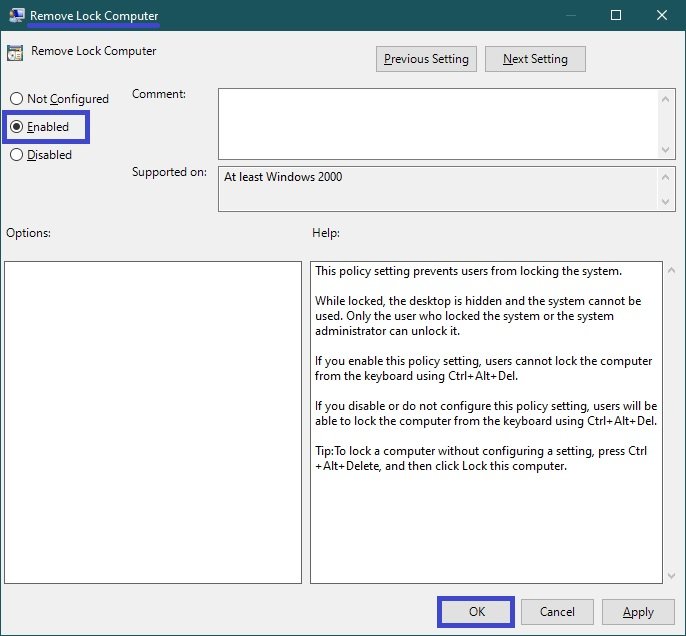
The changes are effective immediately.
Locking via Registry Editor
This method allows you to prohibit (disable) or allow the computer locking only for all users of the computer and involves changing settings in the Windows system registry.
Before making any changes to the registry, it is strongly recommended to create a system restore point
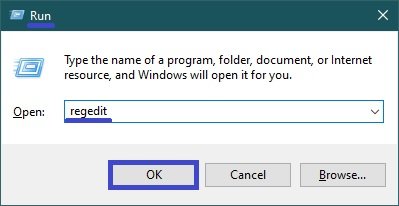
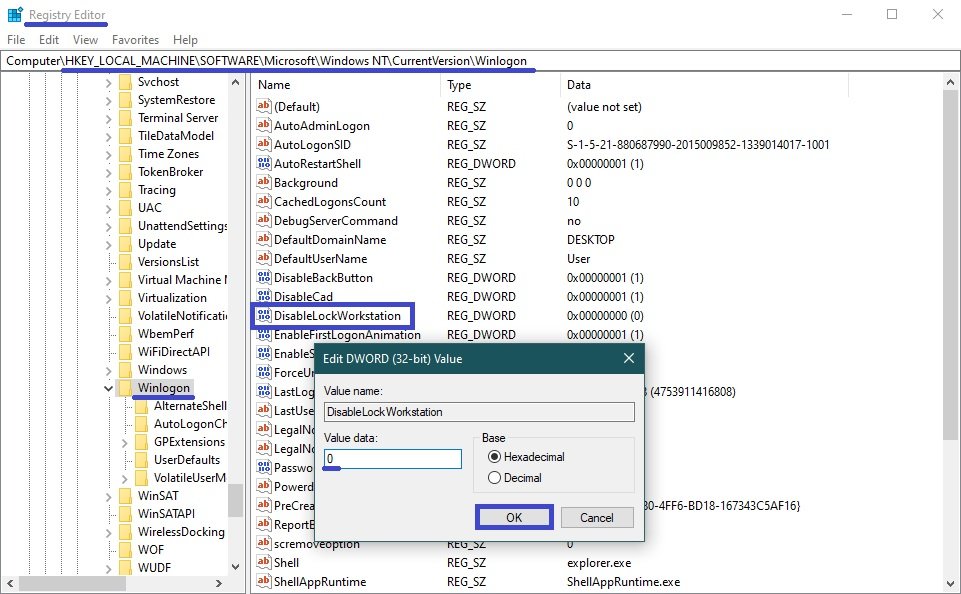
To disable (disable) computer locking for all (accounts) users in Windows, open the registry editor by pressing Win + R, in the opened Run window type (copy and paste) regedit and click OK.
In the Registry Editor window that opens, navigate to the following path:
HKEY_LOCAL_MACHINE\\SOFTWARE\\Microsoft\\Windows NT\\CurrentVersion\\Winlogon
Then in the Winlogon section, on the right side of the window, double-click the DisableLockWorkstation parameter, set it to 1 and click OK. The changes take effect immediately.
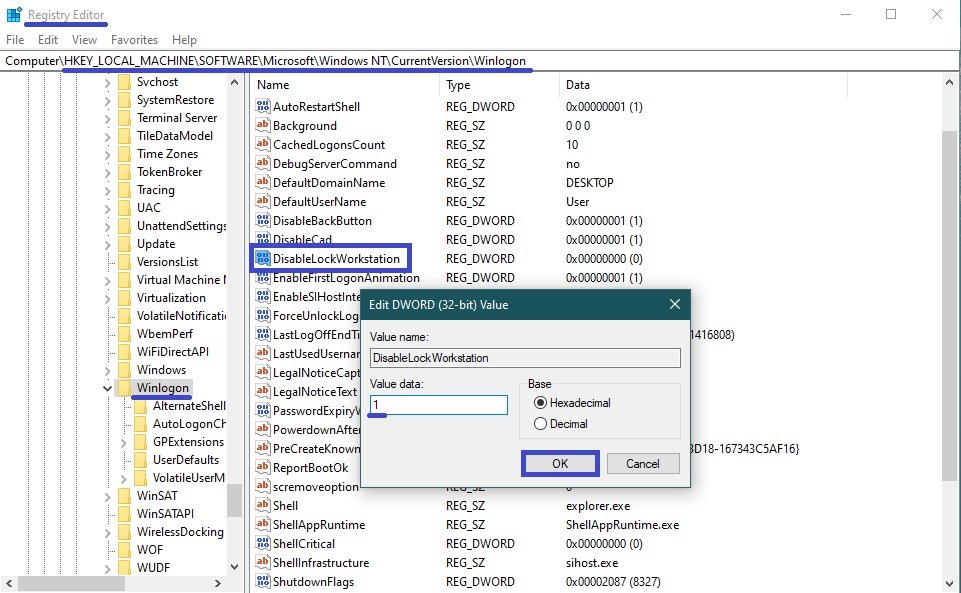
To allow (enable) computer locking, double-click the DisableLockWorkstation parameter, set its value to 0 and click OK. The changes take effect immediately.
Using a registry file
This method also allows you to prohibit (disable) or allow the locking of the computer for all users and for the current user by making changes in the Windows system registry through a registry file.
Before making any changes to the registry, it is strongly recommended to create a system restore point
All changes made in the registry are shown in the registry file listings below.
To prohibit (disable) computer locking for all users, create and apply the following registry file:
Windows Registry Editor Version 5.00
[HKEY_LOCAL_MACHINE\\SOFTWARE\\Microsoft\\Windows NT\\CurrentVersion\\Winlogon]
“DisableLockWorkstation”=dword:00000001
To allow (enable) computer locking for all users, create and apply the following registry file:
Windows Registry Editor Version 5.00
[HKEY_LOCAL_MACHINE\\SOFTWARE\\Microsoft\\Windows NT\\CurrentVersion\\Winlogon]
“DisableLockWorkstation”=dword:00000000
To prohibit (disable) computer locking for the current user, create and apply the following registry file:
Windows Registry Editor Version 5.00
[HKEY_CURRENT_USER\\Software\\Microsoft\\Windows\\CurrentVersion\\Policies\\System]
“DisableLockWorkstation”=dword:00000001
To allow (enable) computer locking for the current user, create and apply the following registry file:
Windows Registry Editor Version 5.00
[HKEY_CURRENT_USER\\Software\\Microsoft\\Windows\\CurrentVersion\\Policies\\System]
“DisableLockWorkstation”=-
Using the steps described above, you can disable or enable the computer locking for all users or for the current user account, on Windows 7, 8.1 and 10.

