The mouse pointer is a graphical interface element that points to the desired object on the screen to be interacted with using the mouse or touchpad.
You can change the size and colour of the mouse pointer in Windows 10 if required.
How to resize the mouse pointer in Windows 10
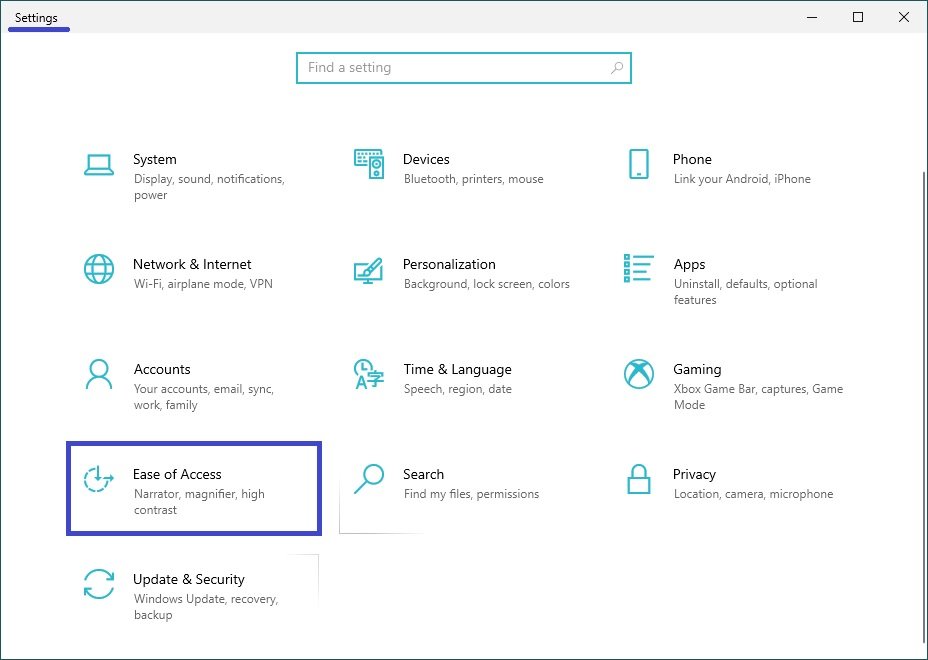
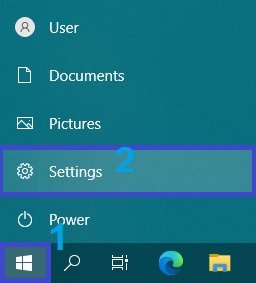
To resize the mouse pointer in Windows 10, open the Settings application by pressing the Start button on the taskbar and then select Settings or press Win + I on your keyboard.

In the Options window that opens, select Ease of Access.
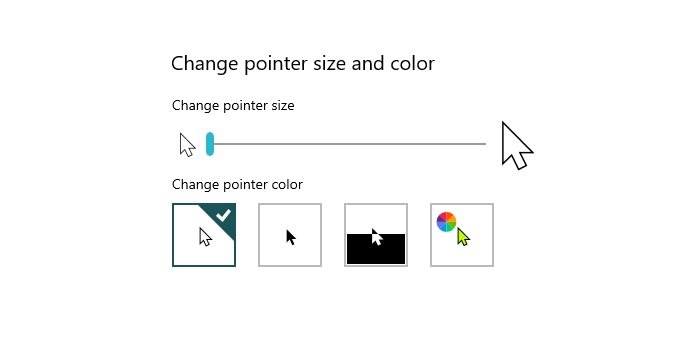
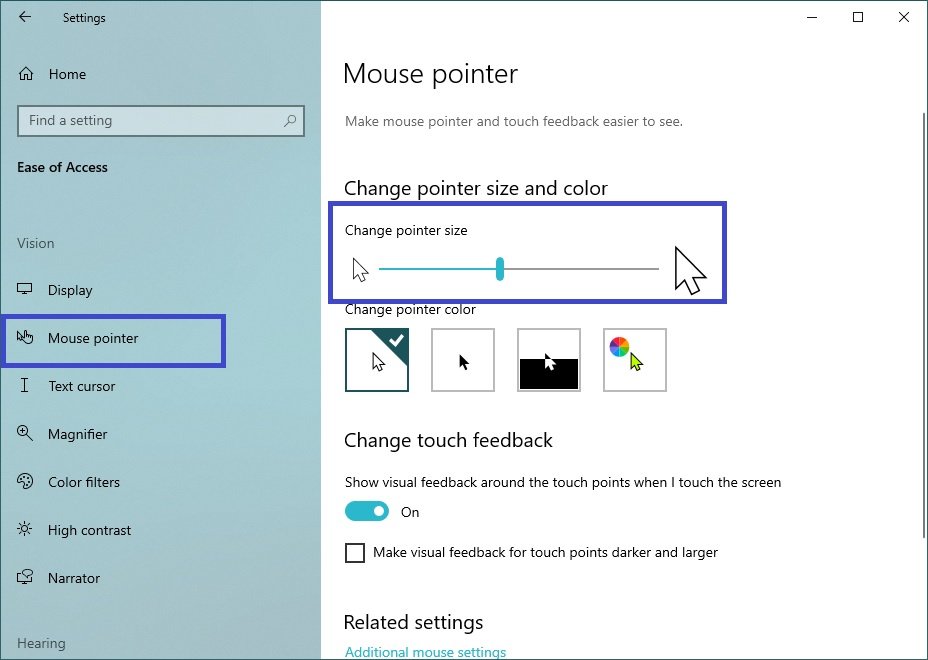
Then select the Mouse pointer tab, and on the right-hand side of the window, use the Change Pointer Size slider to set the size of the mouse pointer you want (see example in screenshot below).
How to change the colour of the mouse pointer in Windows 10
To change the colour of the mouse pointer in Windows 10, open the Settings application by pressing the Start button on the taskbar and then select Settings or press Win + I on your keyboard.
In the Options window that opens, select Ease of Access.

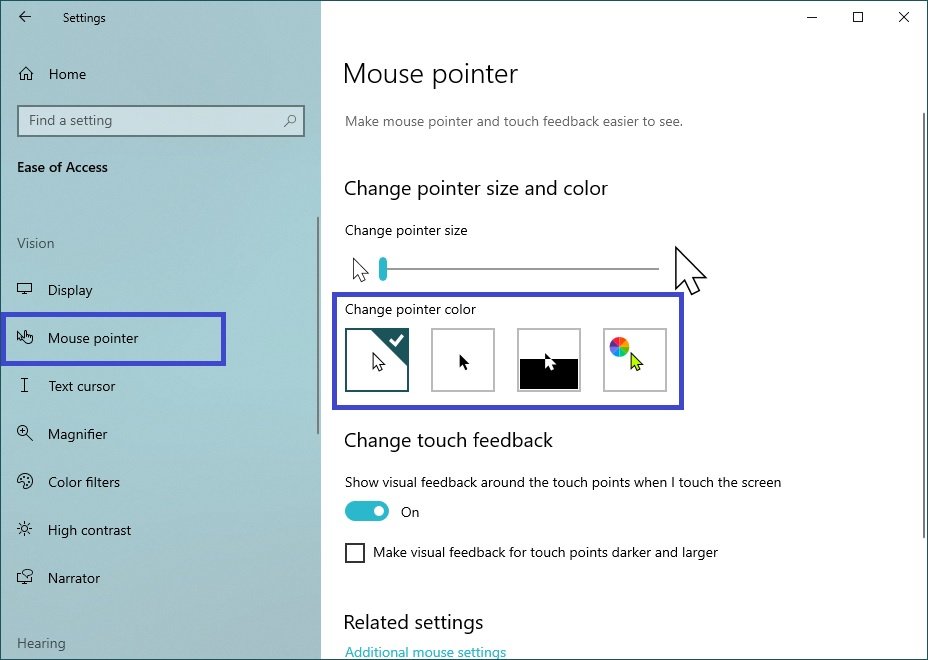
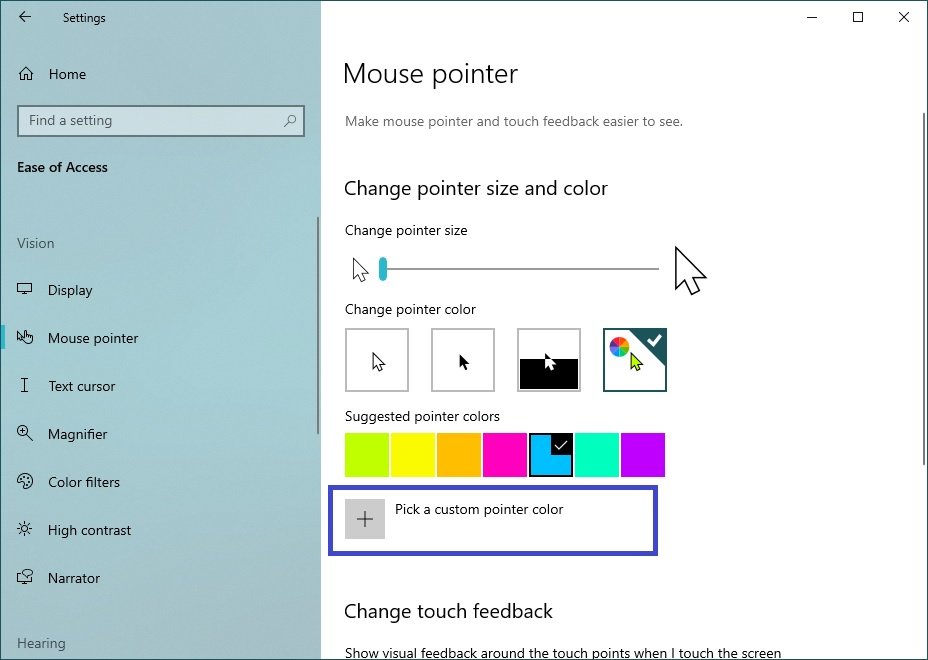
Then select the Mouse pointer tab, on the right side of the window, under Change Pointer Color there are four colour selection options available: white (default), black, contrasting black and white (inverse) and colour.
To change the pointer colour, select the last option and change the pointer colour to one of several recommended colours.
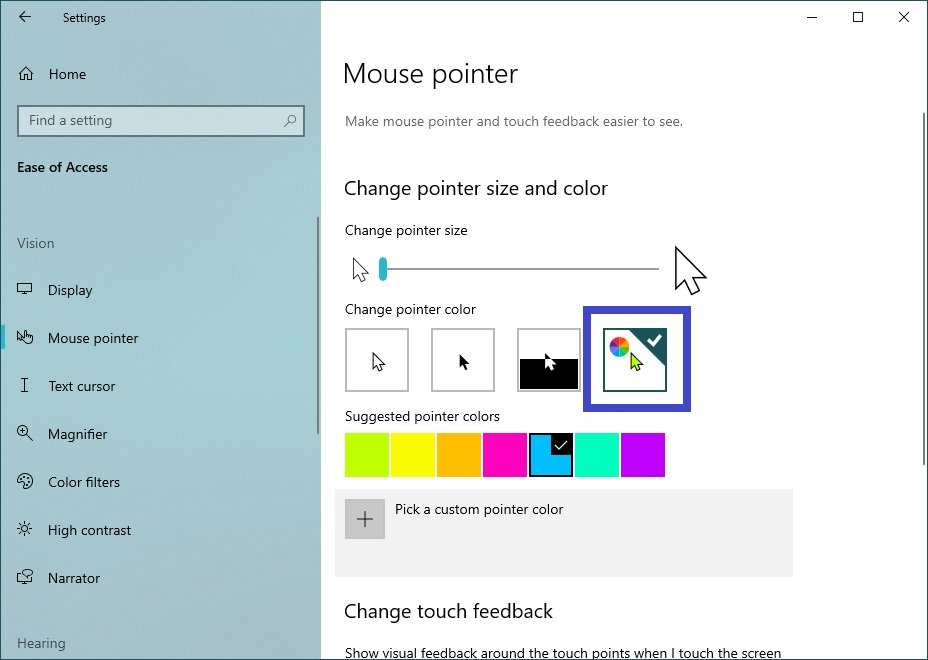
You can also select a customisable pointer colour by pressing the plus sign button.
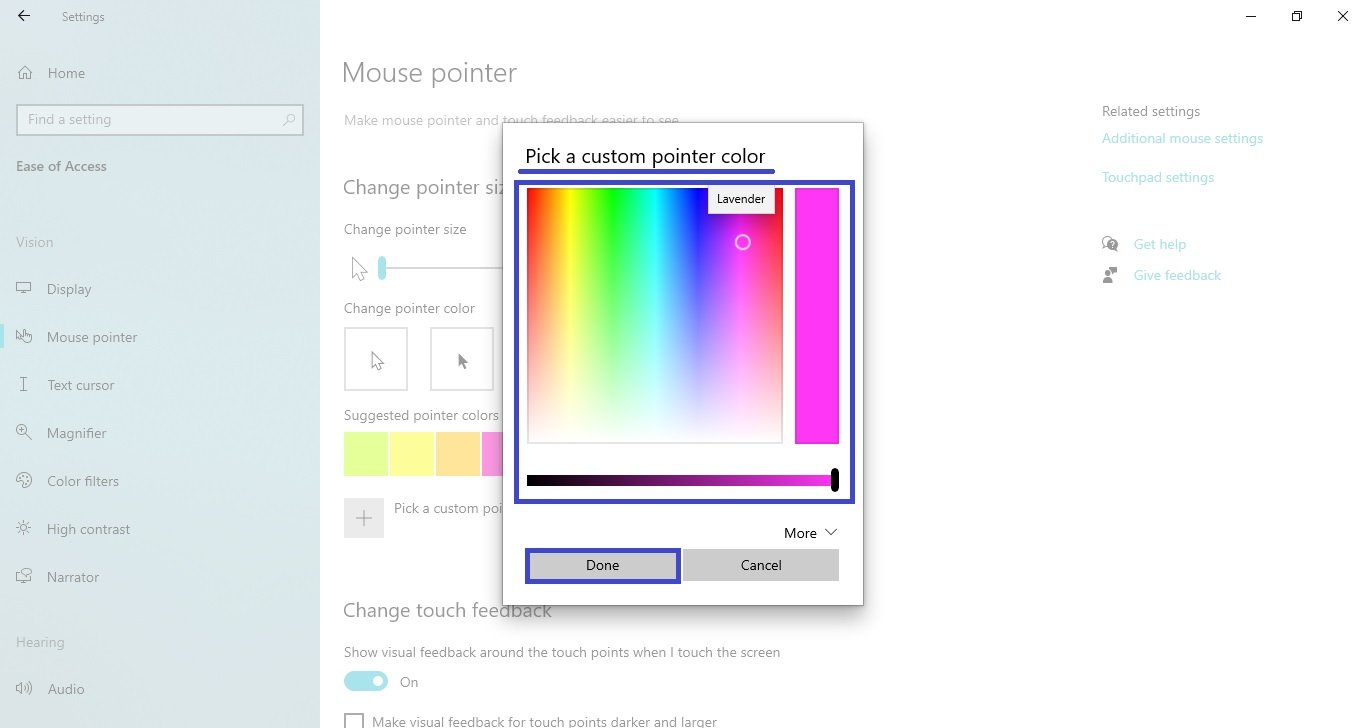
Then in the “Pick a custom pointer color” window, select the required colour from the colour palette and click Done.
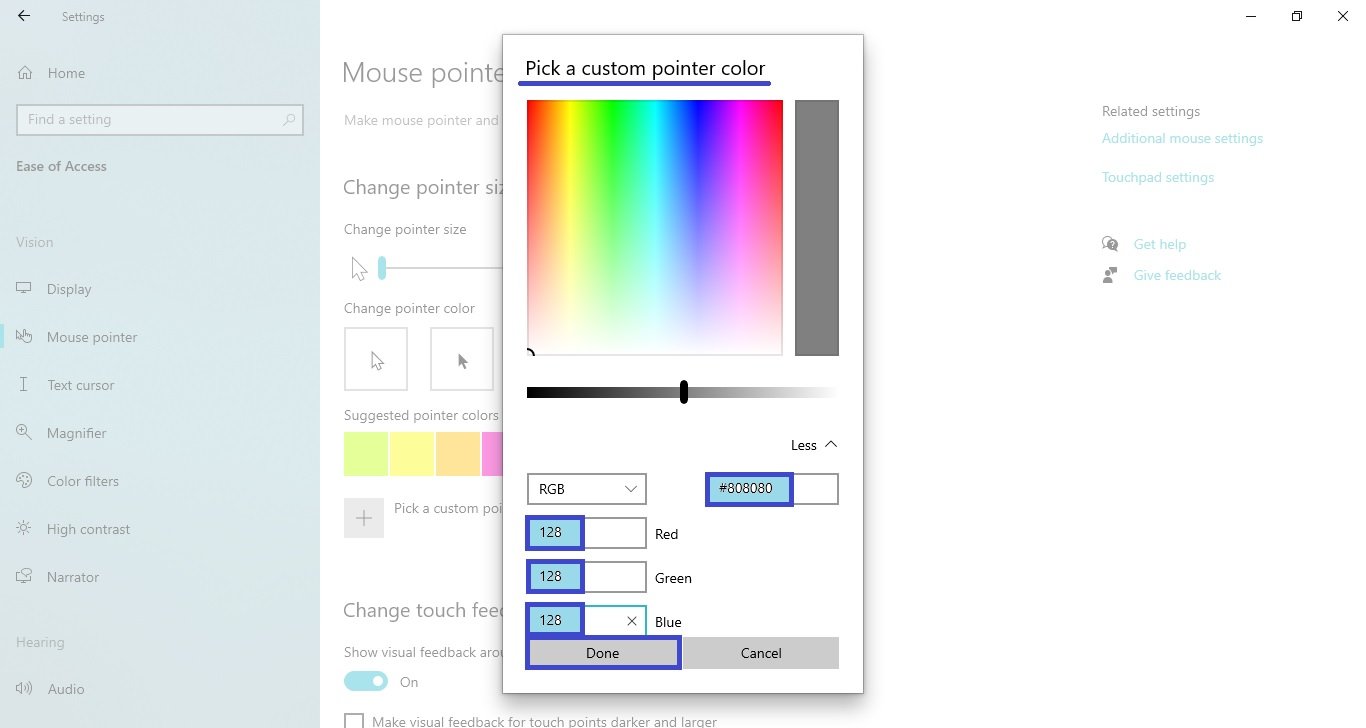
You can also enter the required colour code in RGB or HEX format.
Using the steps above, you can change the size and colour of the mouse pointer in Windows 10.