
Most users use the default mouse settings, but there are also users who have different preferences for how fast their mouse pointer moves across the screen when they move the mouse.
For example, adjusting the speed of the mouse pointer is especially useful when you are playing a variety of games. Also, when you connect a different mouse to your computer, the speed may be faster or slower than what you are used to.
You can reduce or increase the speed of the mouse pointer if necessary.
How to change the speed of the mouse using the classic settings
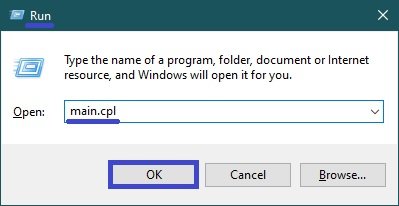
To change the mouse pointer speed, press Win+R on your keyboard, enter (copy and paste) main.cpl in the Run window and press OK.
In the “Mouse Properties” window that opens, select the Pointer Options tab, and in the “Motion” section, use the Move slider to Set pointer speed: adjust the pointer speed and click OK.

How to change speed of the mouse in the Windows Settings app
This setting is available in Windows 10 from build 18963 onwards.
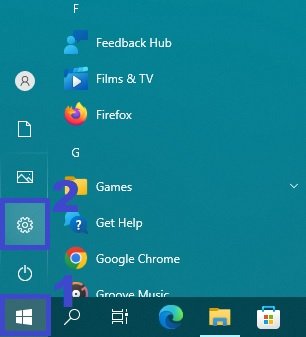
To change the speed of the mouse pointer, press the Start button on the taskbar and then select Settings or press the Win+I shortcut.
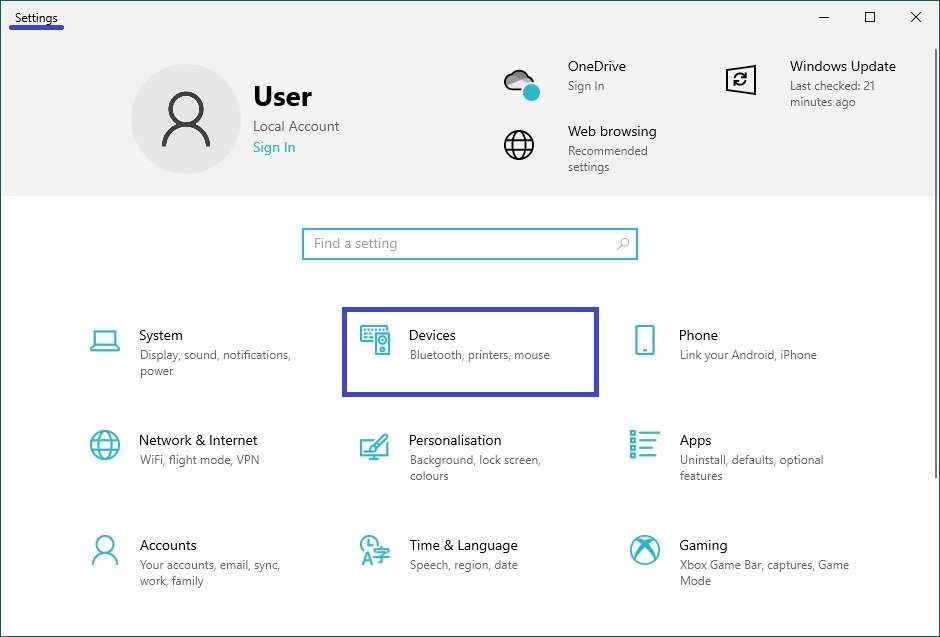
In the Settings window that opens, select Devices.
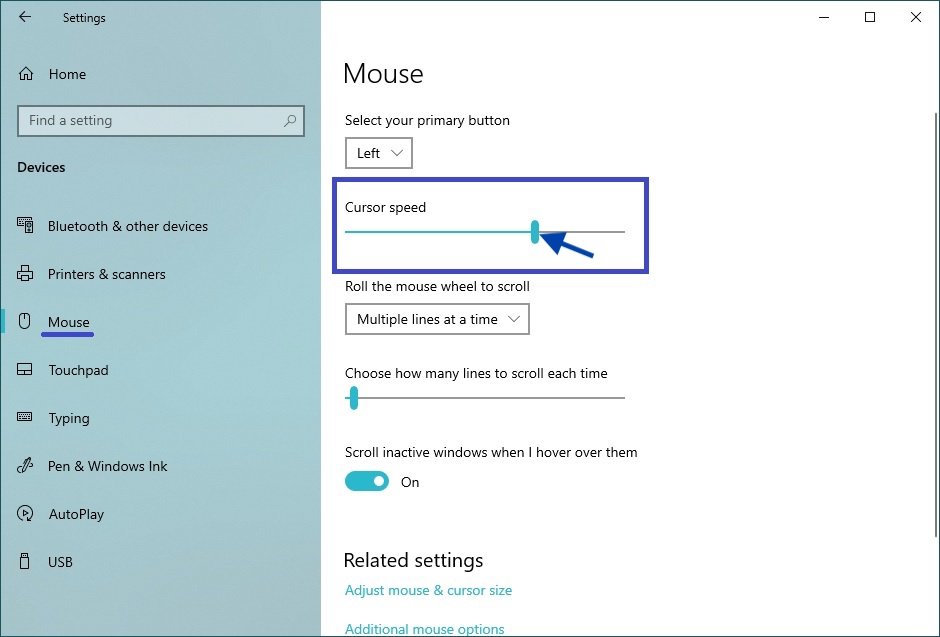
Then select the Mouse tab and use the Cursor Speed slider on the right-hand side of the window to adjust the speed of the mouse pointer (slower to the left or faster to the right).
Using the steps above, you can change the speed of the mouse pointer (cursor) in Windows 7, 8.1 and 10.


