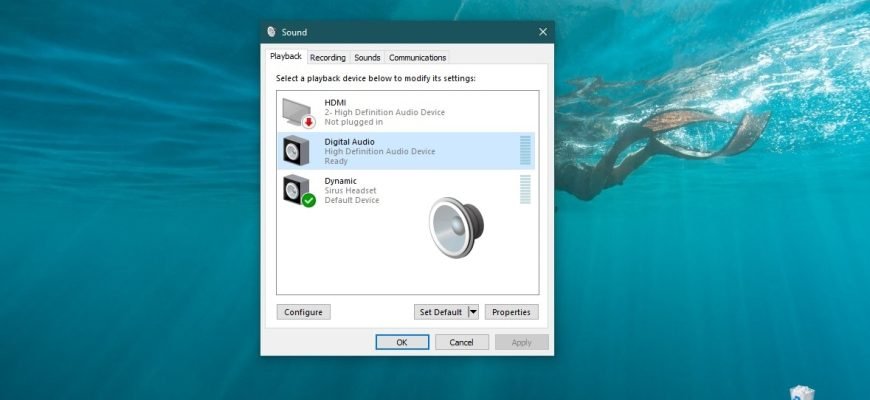
The default audio output device is the device that the operating system uses for sound playback.
When you connect speakers, headphones, Bluetooth headsets or other audio devices to your computer, you can select (change) the default audio output device. This can be done in various ways, which are discussed later in this article.
How to change default device in the taskbar
To change the default audio output device, click on the volume icon in the taskbar, and in the window that appears, click on the arrow above the main volume control.

Then in the Select Playback Device list, select the device you want to use for the default sound output.

Via the Settings app
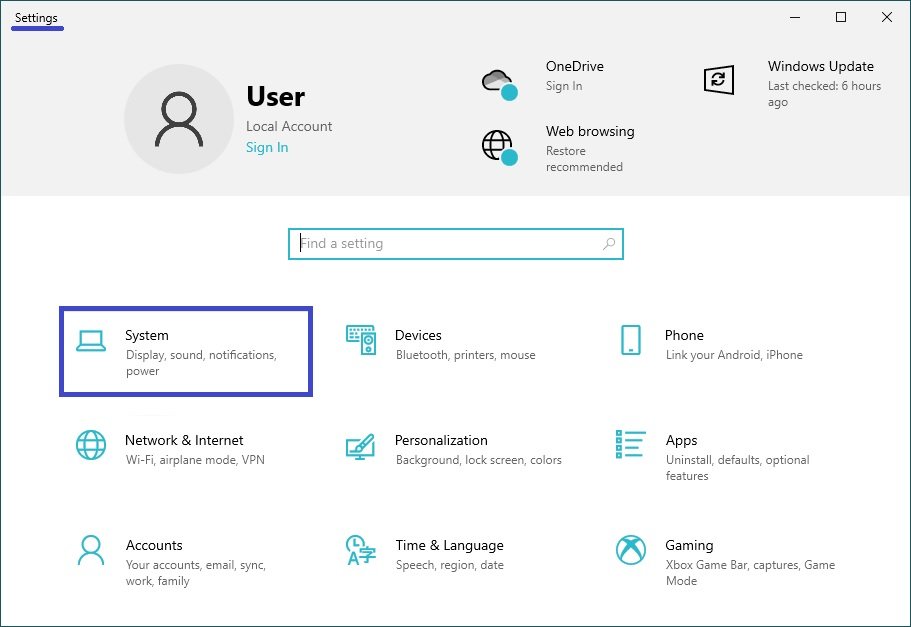
To change the default sound output device, click the Start button on the taskbar and then select Options or press Win+I

In the Settings window that opens, select System
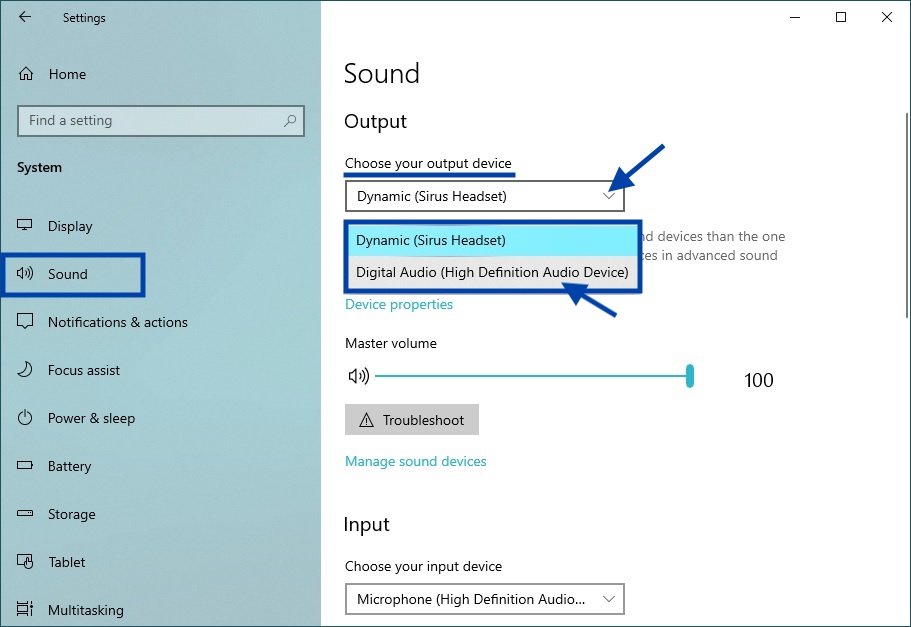
Then select the Sound tab, and on the right side of the window in the Choose your output device drop-down list select the device you want to use for the default sound output.
Using the control panel
To change the default sound output device, open the Classic Control Panel, from the View by: drop-down list select Small icons and then select Sound
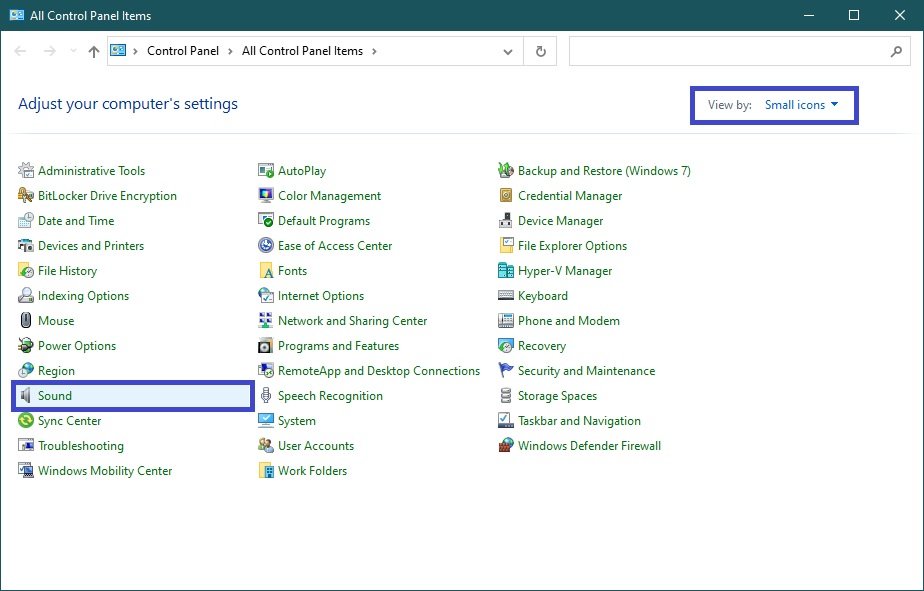
Then on the Playback tab select and right-click on the device you want to use for the default sound output and select Set as Default Device from the context menu that appears
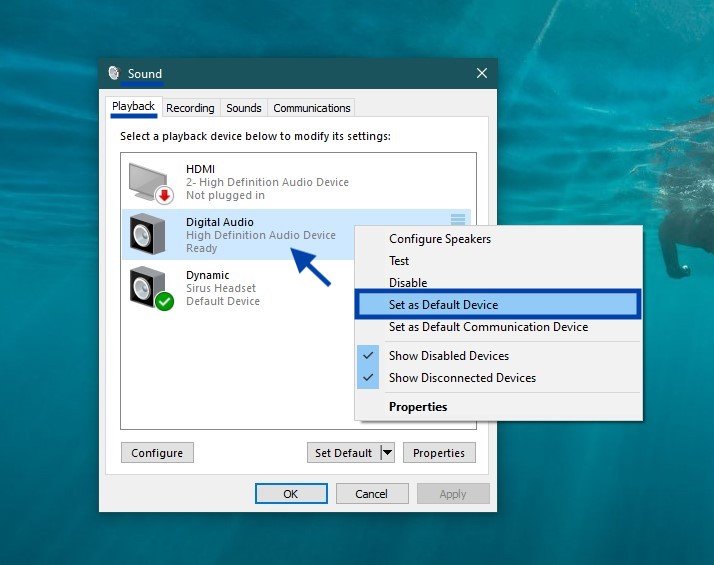
You can also open the “Sound” applet of the Classic Control Panel using the Run window, to do this in the Run window, type (copy and paste) control mmsys.cpl,,0 and click OK.
Changing sound output device in the game panel
To change the default sound output device, open the game panel by pressing Win+G on your keyboard, then click on the Audio icon in the game panel and select from the list the device that you want to use as the default sound output (overlay).
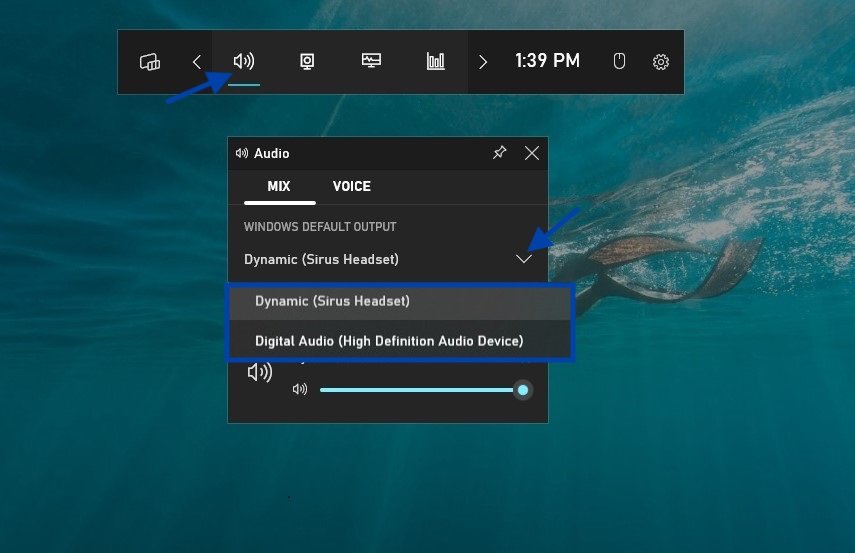
Using the above steps, you can change the default sound output device in Windows 10.

