What are Windows 10 certificates?
A certificate is an encrypted file containing personal information that enables the secure exchange of data over a network between the parties involved in the exchange. Thanks to certificates, a user or subject can be identified by the publisher or owner. This is the principle on which public service websites operate. To submit a request for any document, there is no need to personally go to a government agency and provide a passport, your identity is confirmed by a digital certificate.
The certificate includes the owner’s public key field, in which data is entered by the user and then transmitted in encrypted form. The owner uses the private key to open messages and decrypt them. Certificates are issued by a certificate authority (certification authority) – a body or organization that, as a rule, is a third-party issuer of certificates.
Where are certificates stored?
Special storages are used to store certificates. In the system they are usually of 2 types:
- local computer storage
- current user’s storage.
A user with administrator rights has the ability to view all storages. Regular users who do not have administrator privileges have access only to the second type.
The local computer store contains global certificates for all users, while the current user store contains certificates for a specific account.
In turn, the stores inside are divided into nested stores, i.e. certificates are grouped depending on the purpose of the certificate.
Certificates for the current user inherit the contents of local computer certificate stores.
Viewing Certificates
If you find yourself working with certificates and need to view them, check their properties, or just out of curiosity, below we will look at the methods available for this purpose.
Using the Management Console
On the keyboard, press the Win+R key combination → enter “MMC” → Ok at the open line. If the Account Control window is displayed, click the “Yes” button, thereby giving permission for the application to make changes.
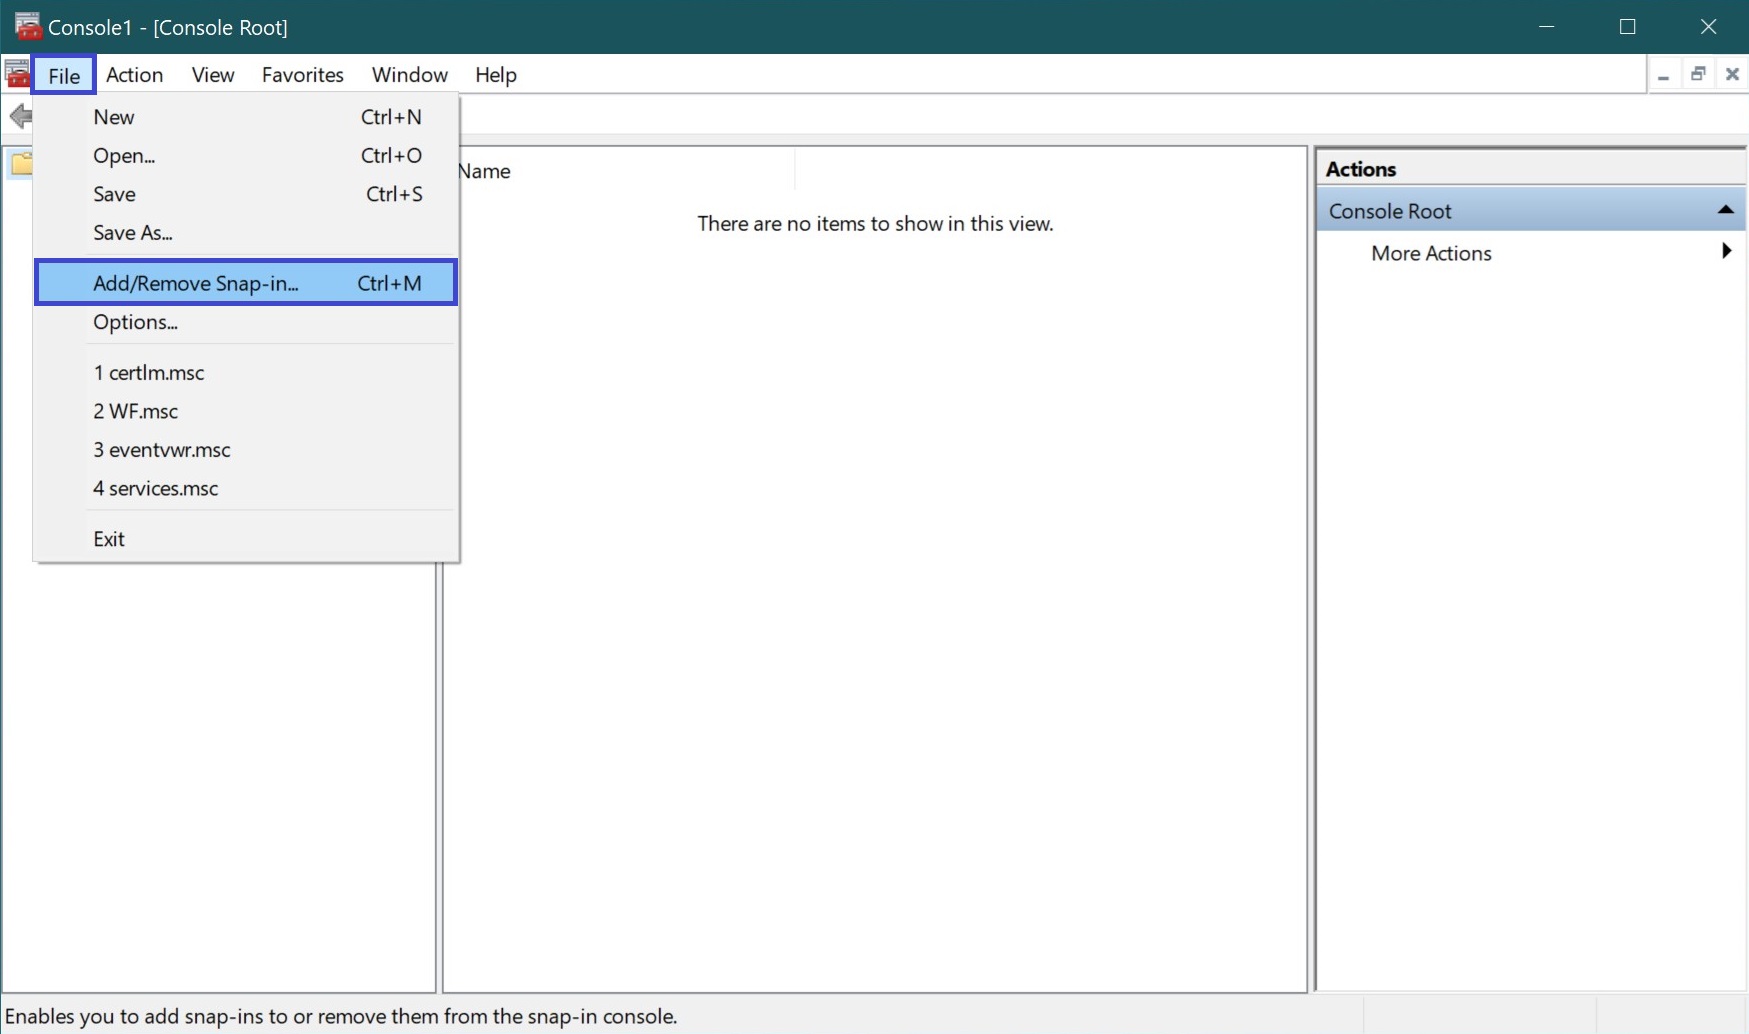
After opening the console, go to File → select Add/Remove Snap-in…
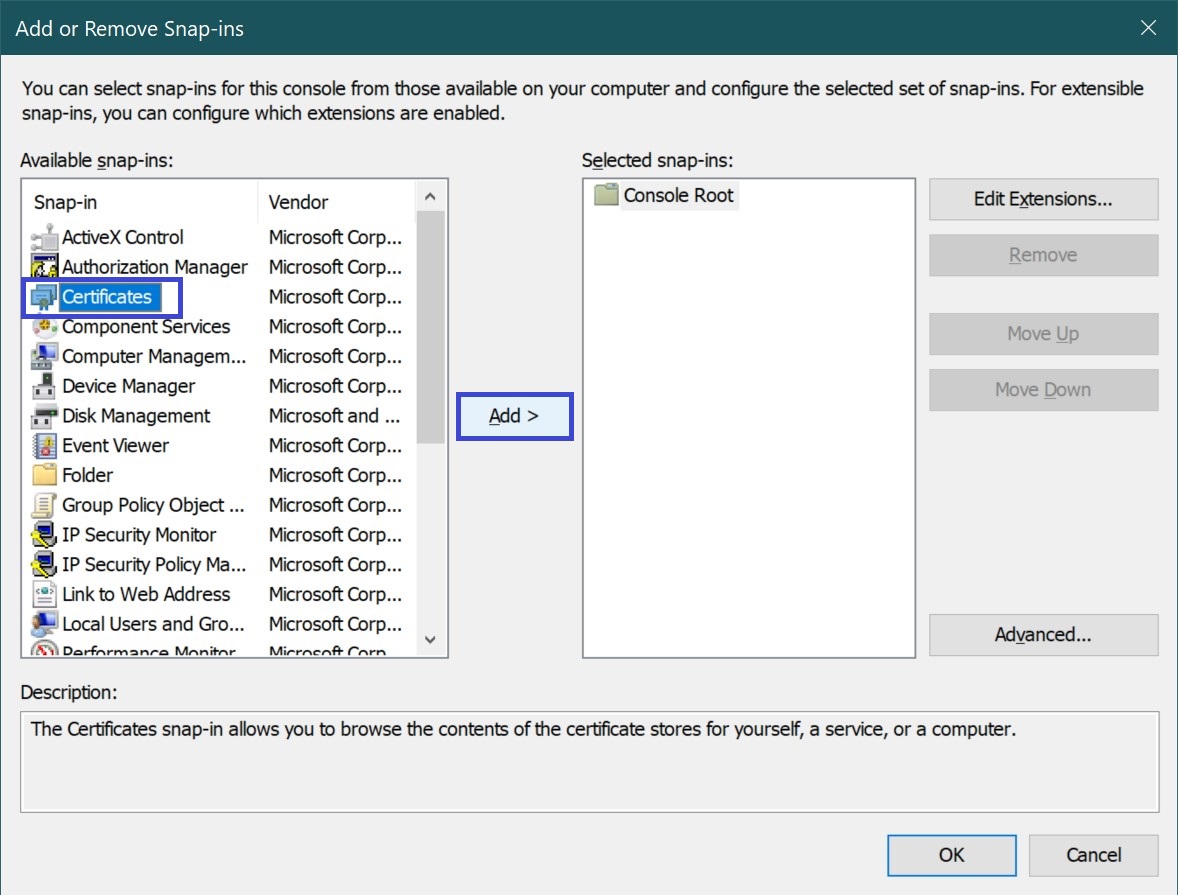
In the window that opens, you will see a list of available snap-ins on the right. Select Certificates → click the Add button.
Next, you will be prompted to select which certificates you want to manage. Select “Computer account” → Next.
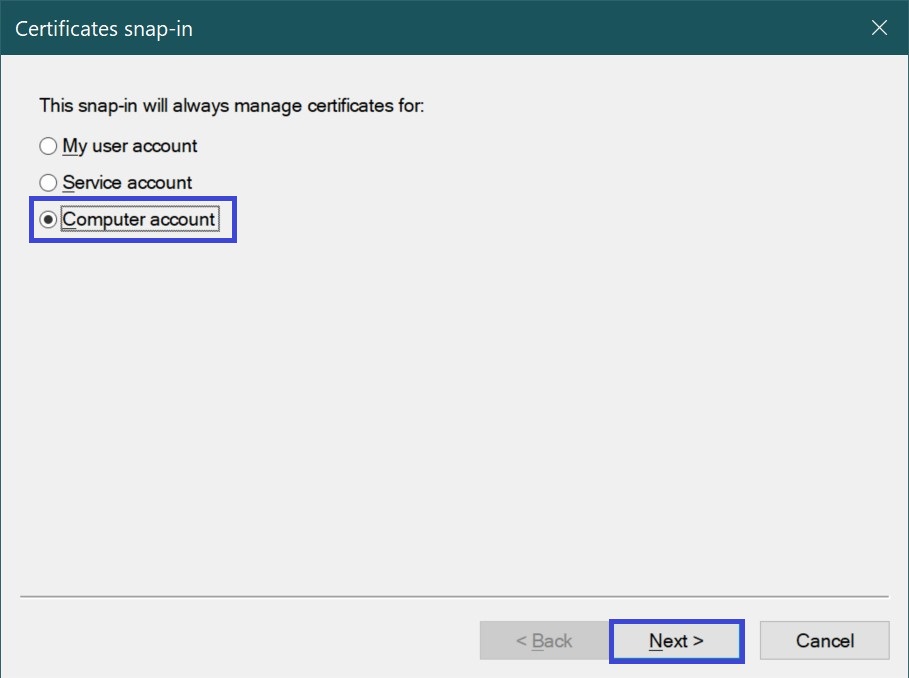
If you are not the administrator of the computer, certificates can only be managed for the user account under which you logged in.
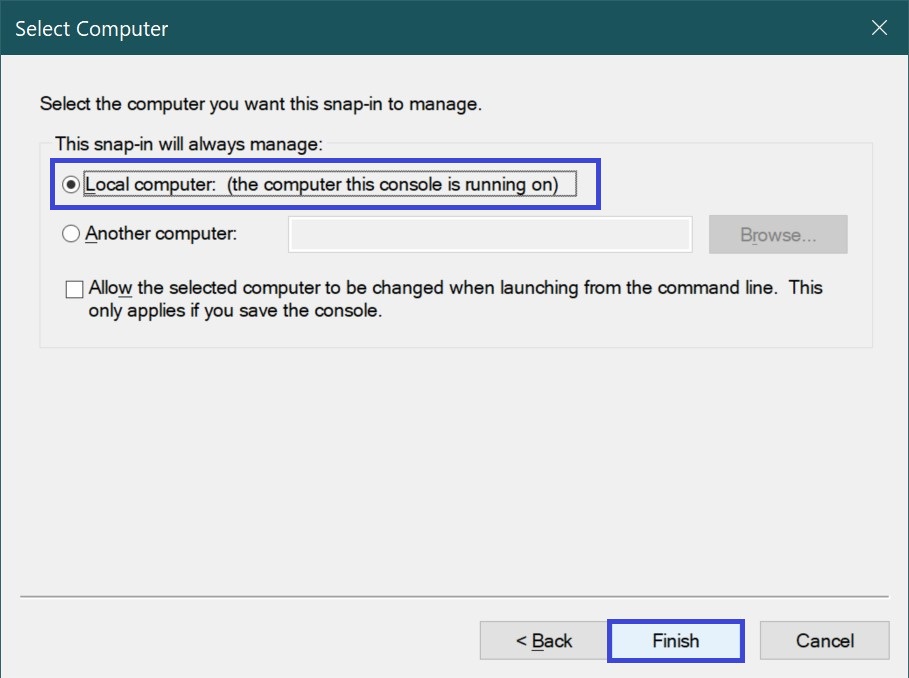
In the next window, leave the “Local computer” option selected → click Finish.
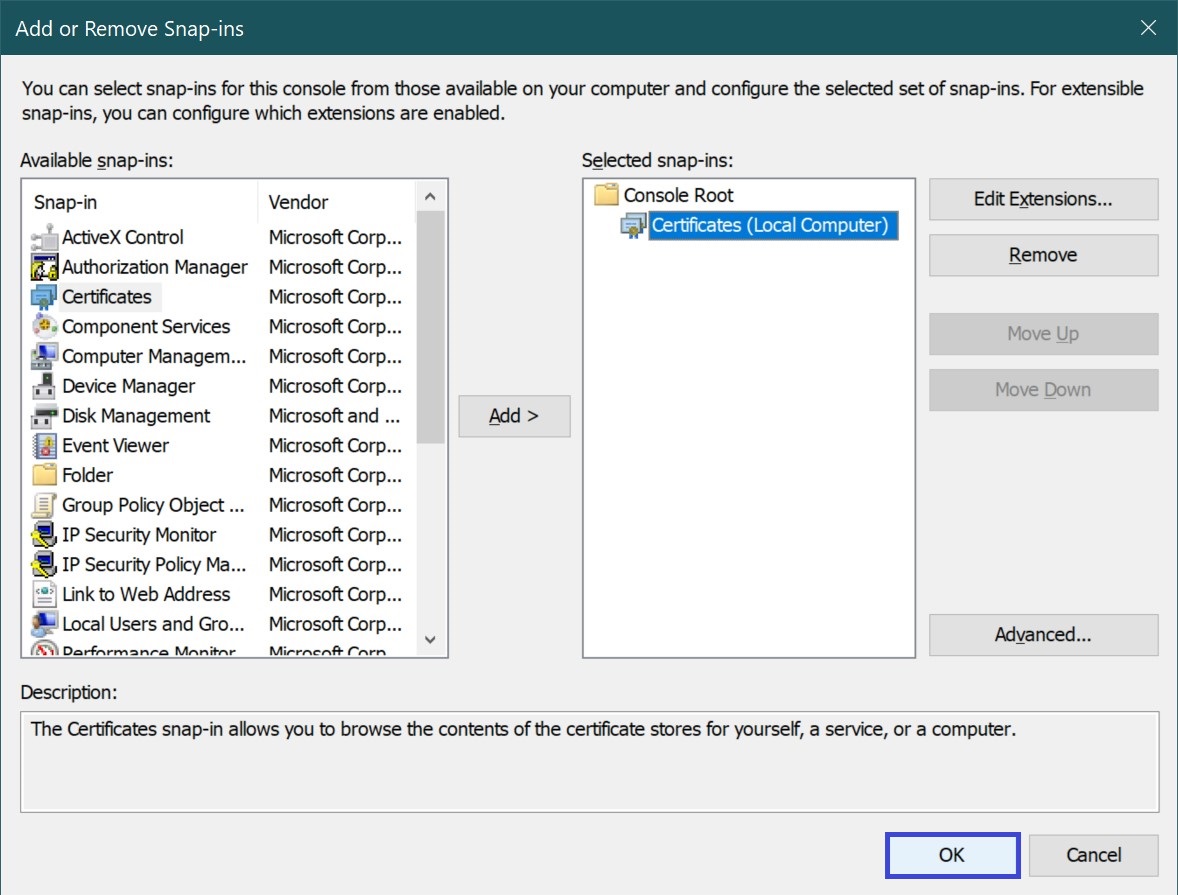
You will be returned to the Add or Remove Snap-ins window, where Certificates (local computer) will appear in the selected snap-ins (on the left) → click Ok.
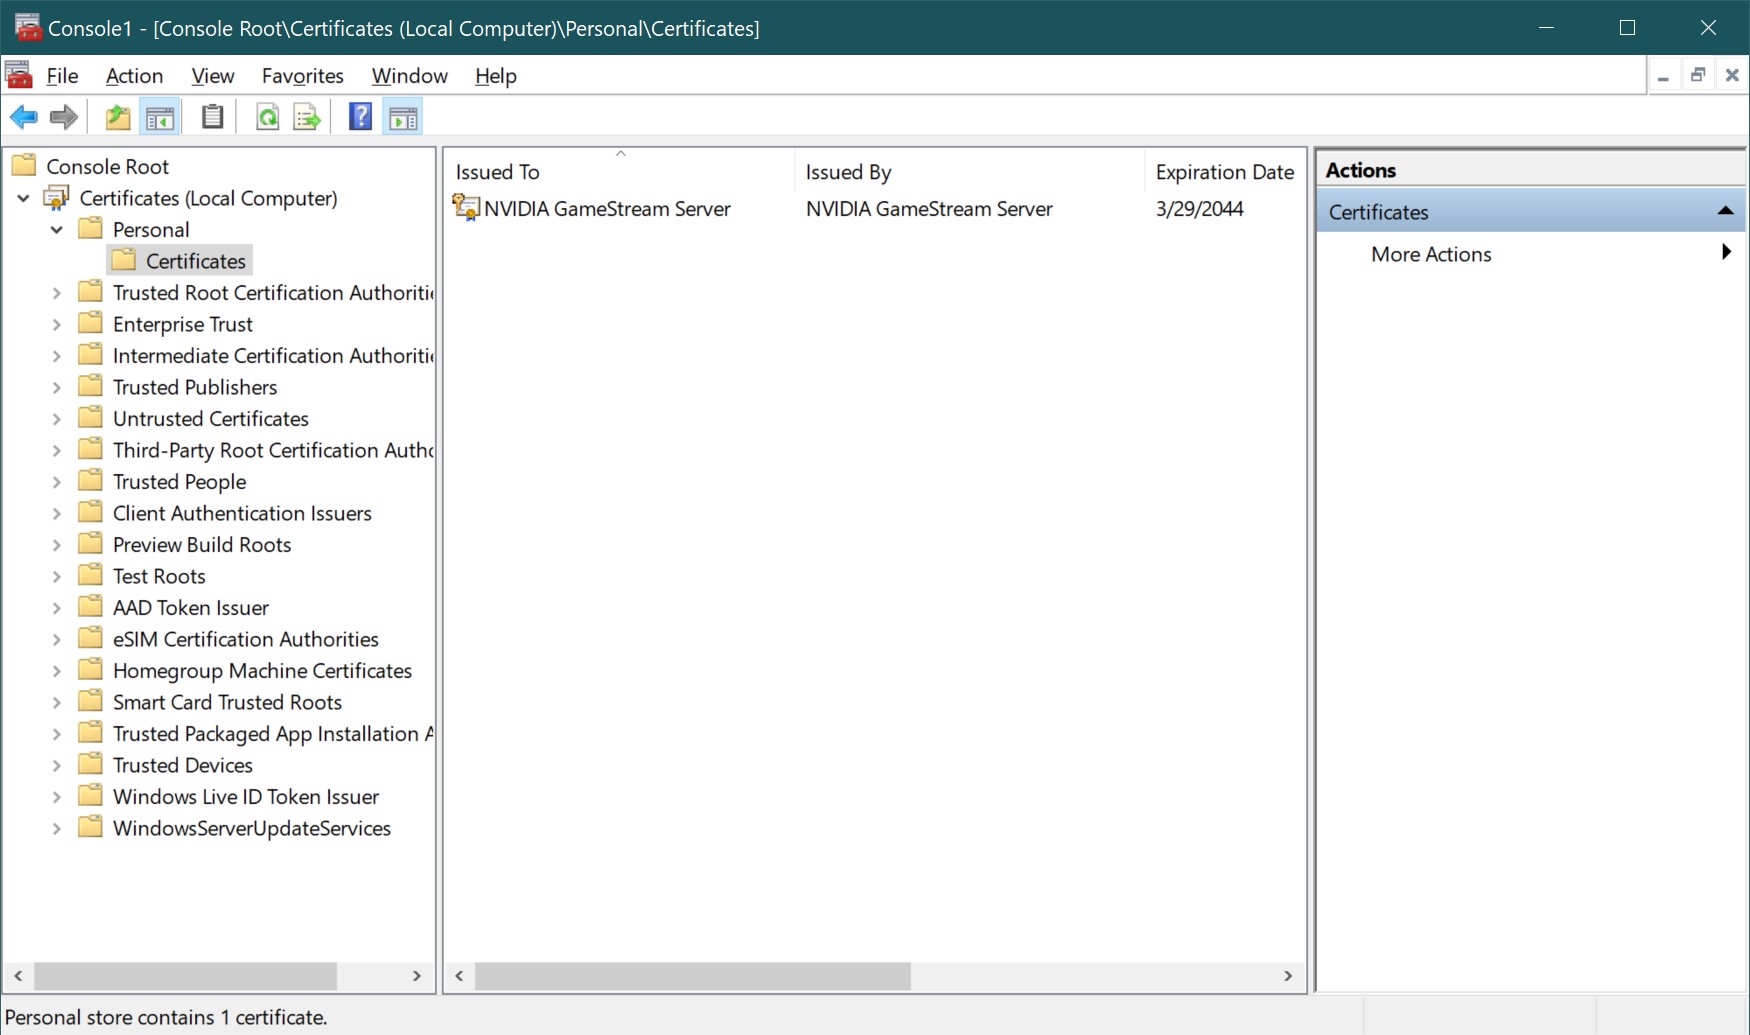
In the Root of the console, expand the list of directories. All installed certificates will be sorted by type. By expanding the required type you can view, export, import or delete certificates.
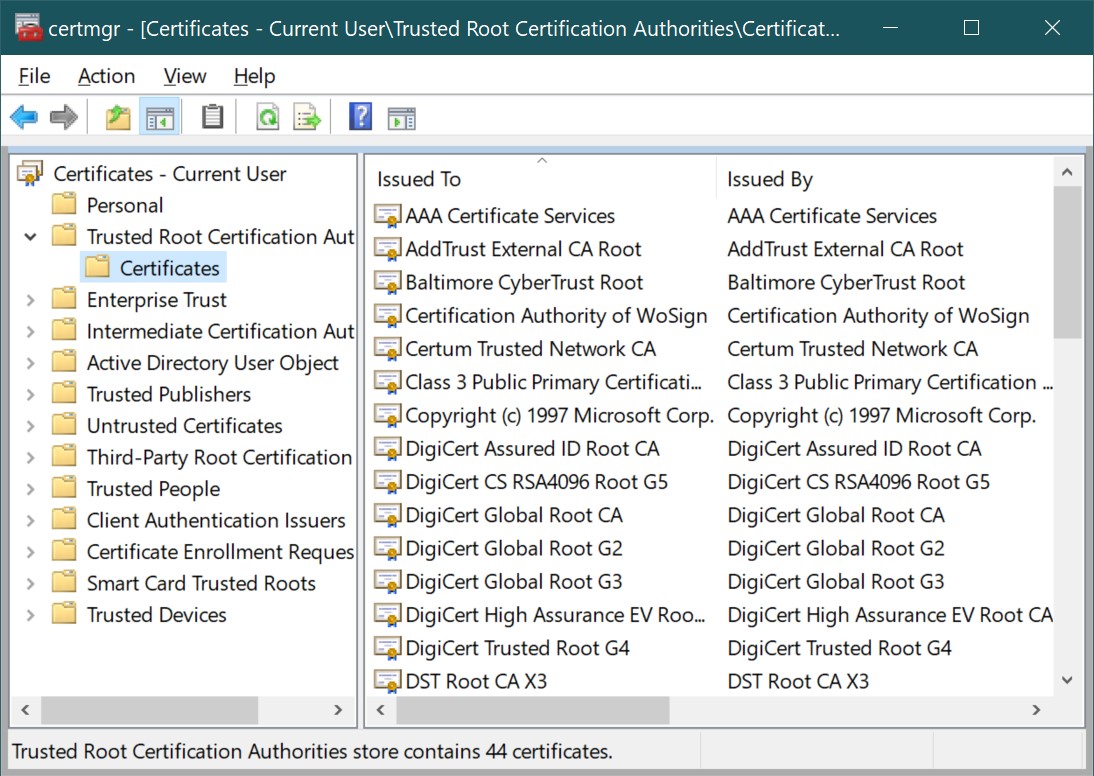
Certificate Manager
To view a user’s certificates, you can use the certmgr.msc command (local computer certificates can be opened with certlm.msc) by typing it into the Run dialog box. This will open the Certificate Manager. To view the desired type, click on the certificate on the left side of the window.
Microsoft Edge
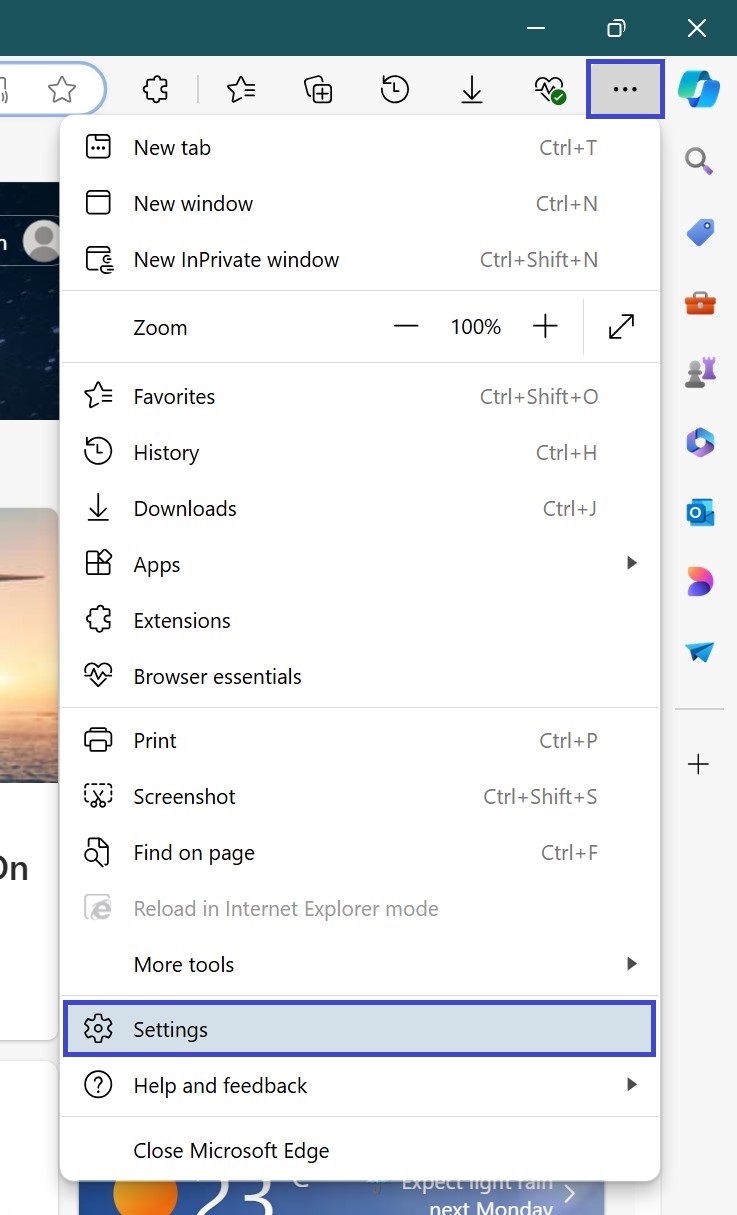
Launch the Microsoft Edge browser (for example, by finding it via the Search button on the taskbar) → click the icon ••• Settings and Other (or Alt+F) → Settings.
In the Browser Settings window, click the Privacy, Search and Services tab → on the right side, find the Security section and click on Manage certificates.
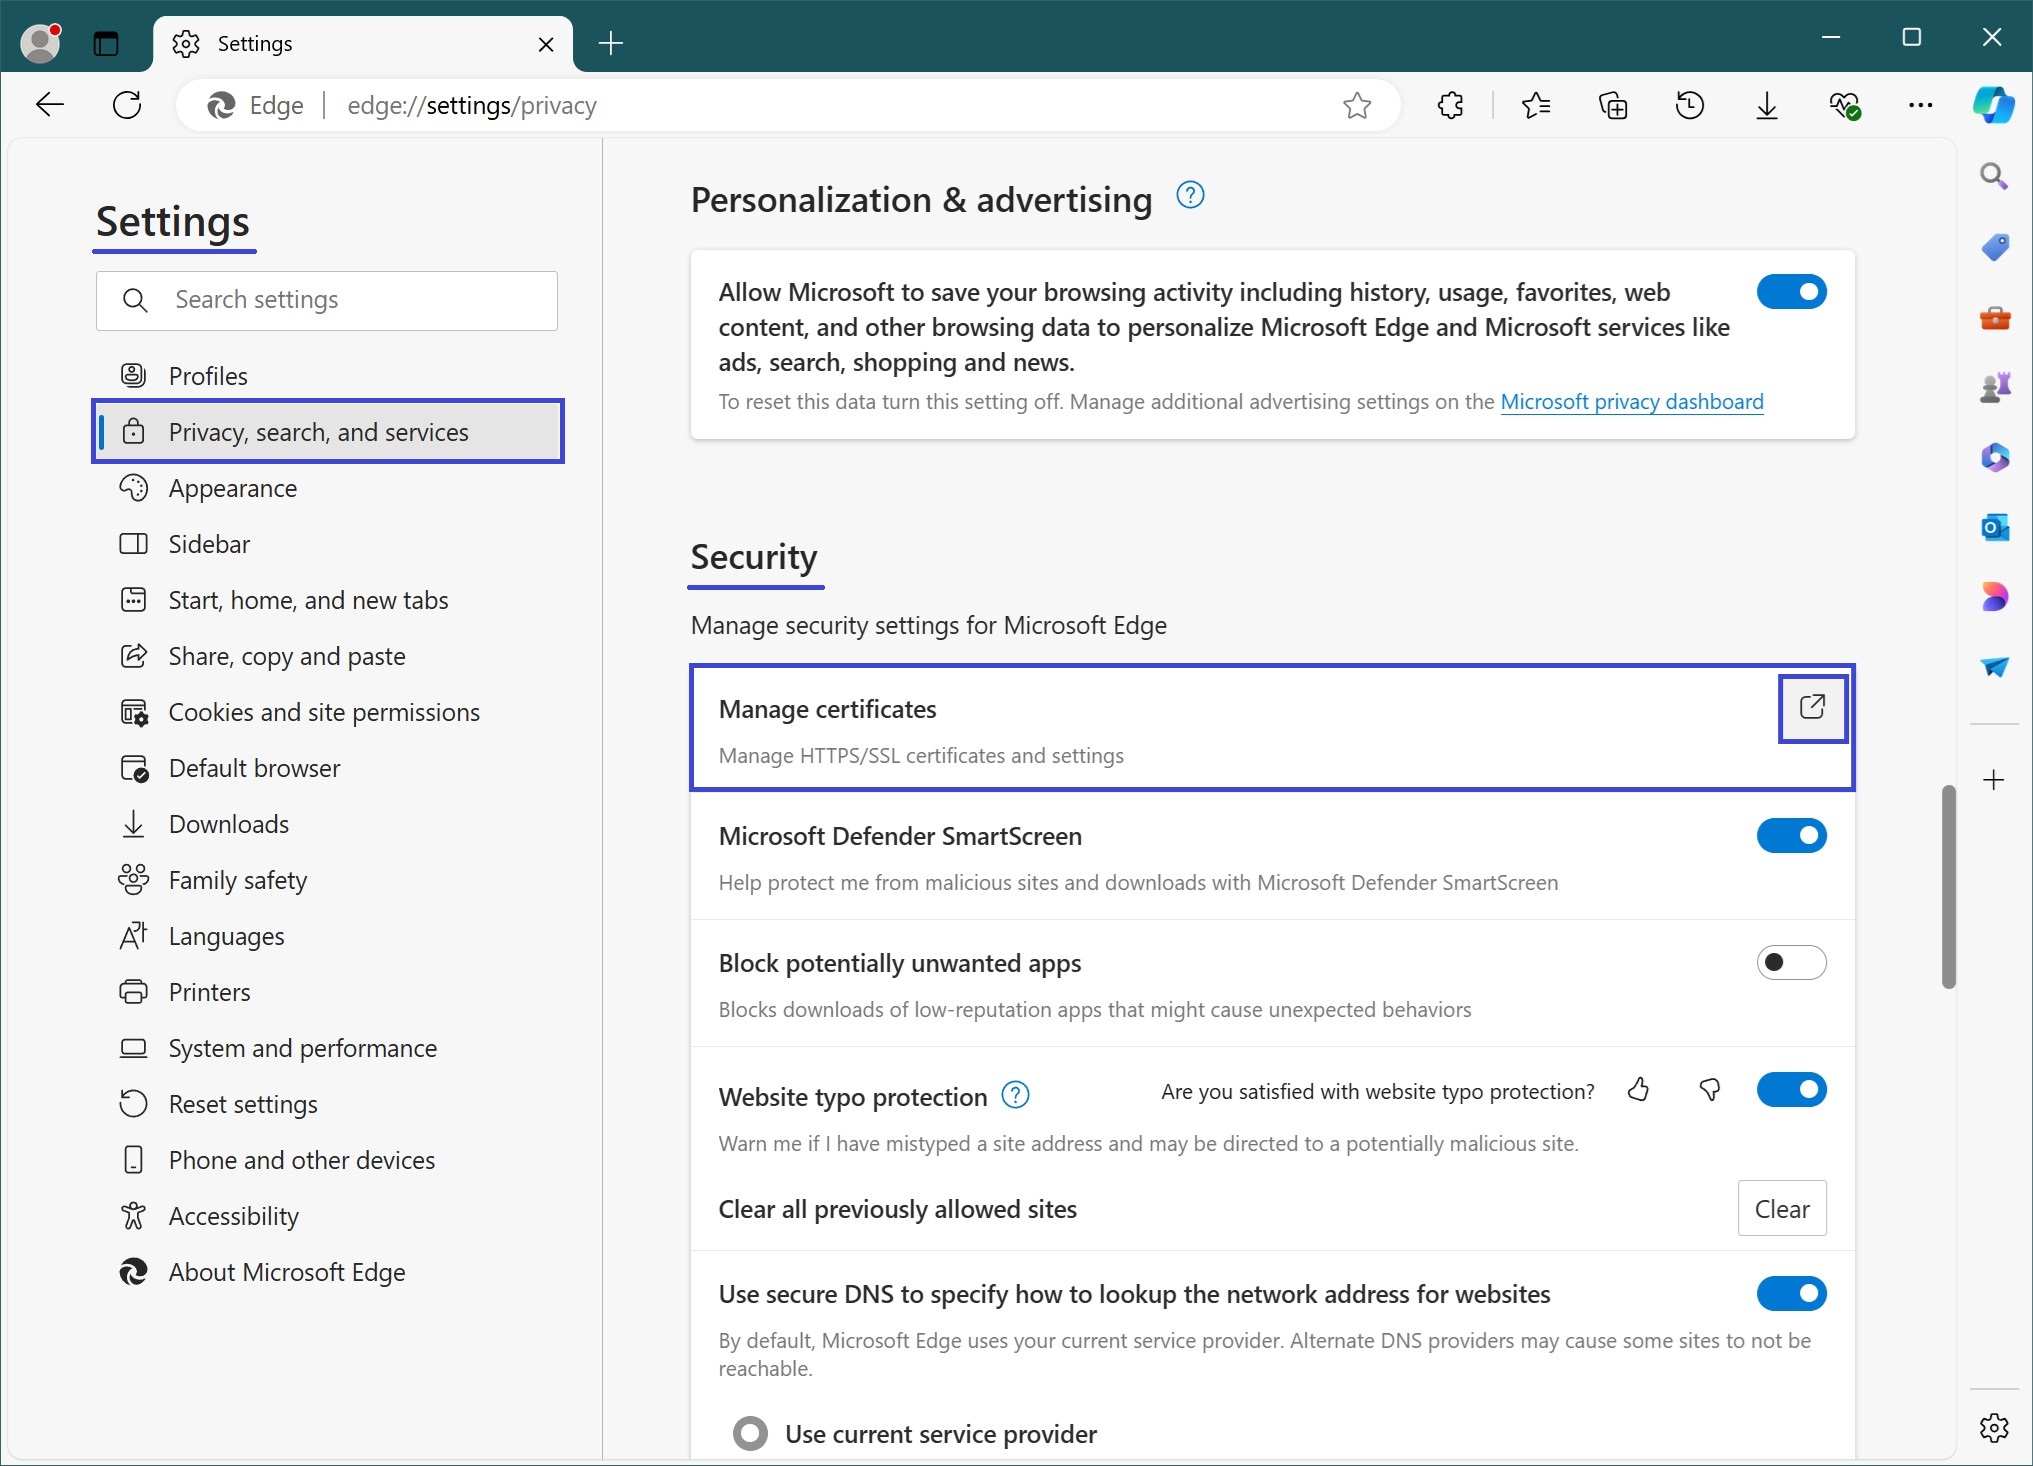
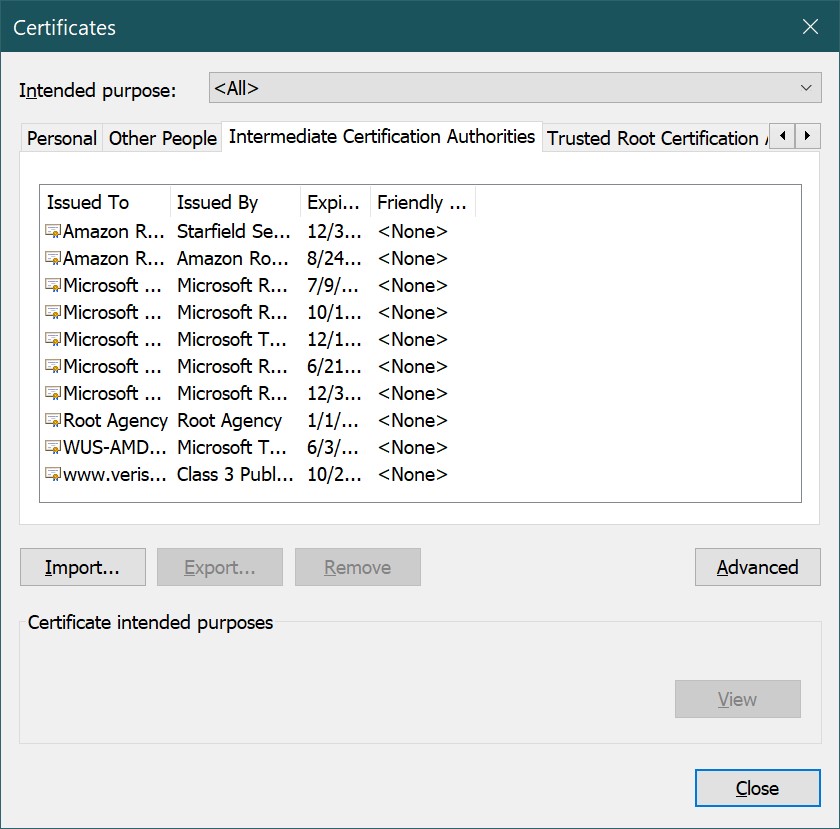
In the opened “Certificates” window you can manage installed certificates (! without having administrator rights in the system). For convenient viewing, you can filter them by purpose or use the tabs that group certificates by type.