
The font cache is a file or set of files used by Windows to manage and display fonts installed on your computer.
Sometimes the font cache can become corrupted and cause fonts to become distorted or displayed incorrectly. To fix font cache corruption, you must delete the old font cache and restart your computer to restore the new font cache.
To restore the font cache in Windows 10 operating system, you need to log in with administrator privileges
How to restore font cache on the command prompt
You can restore the font cache using the command prompt.
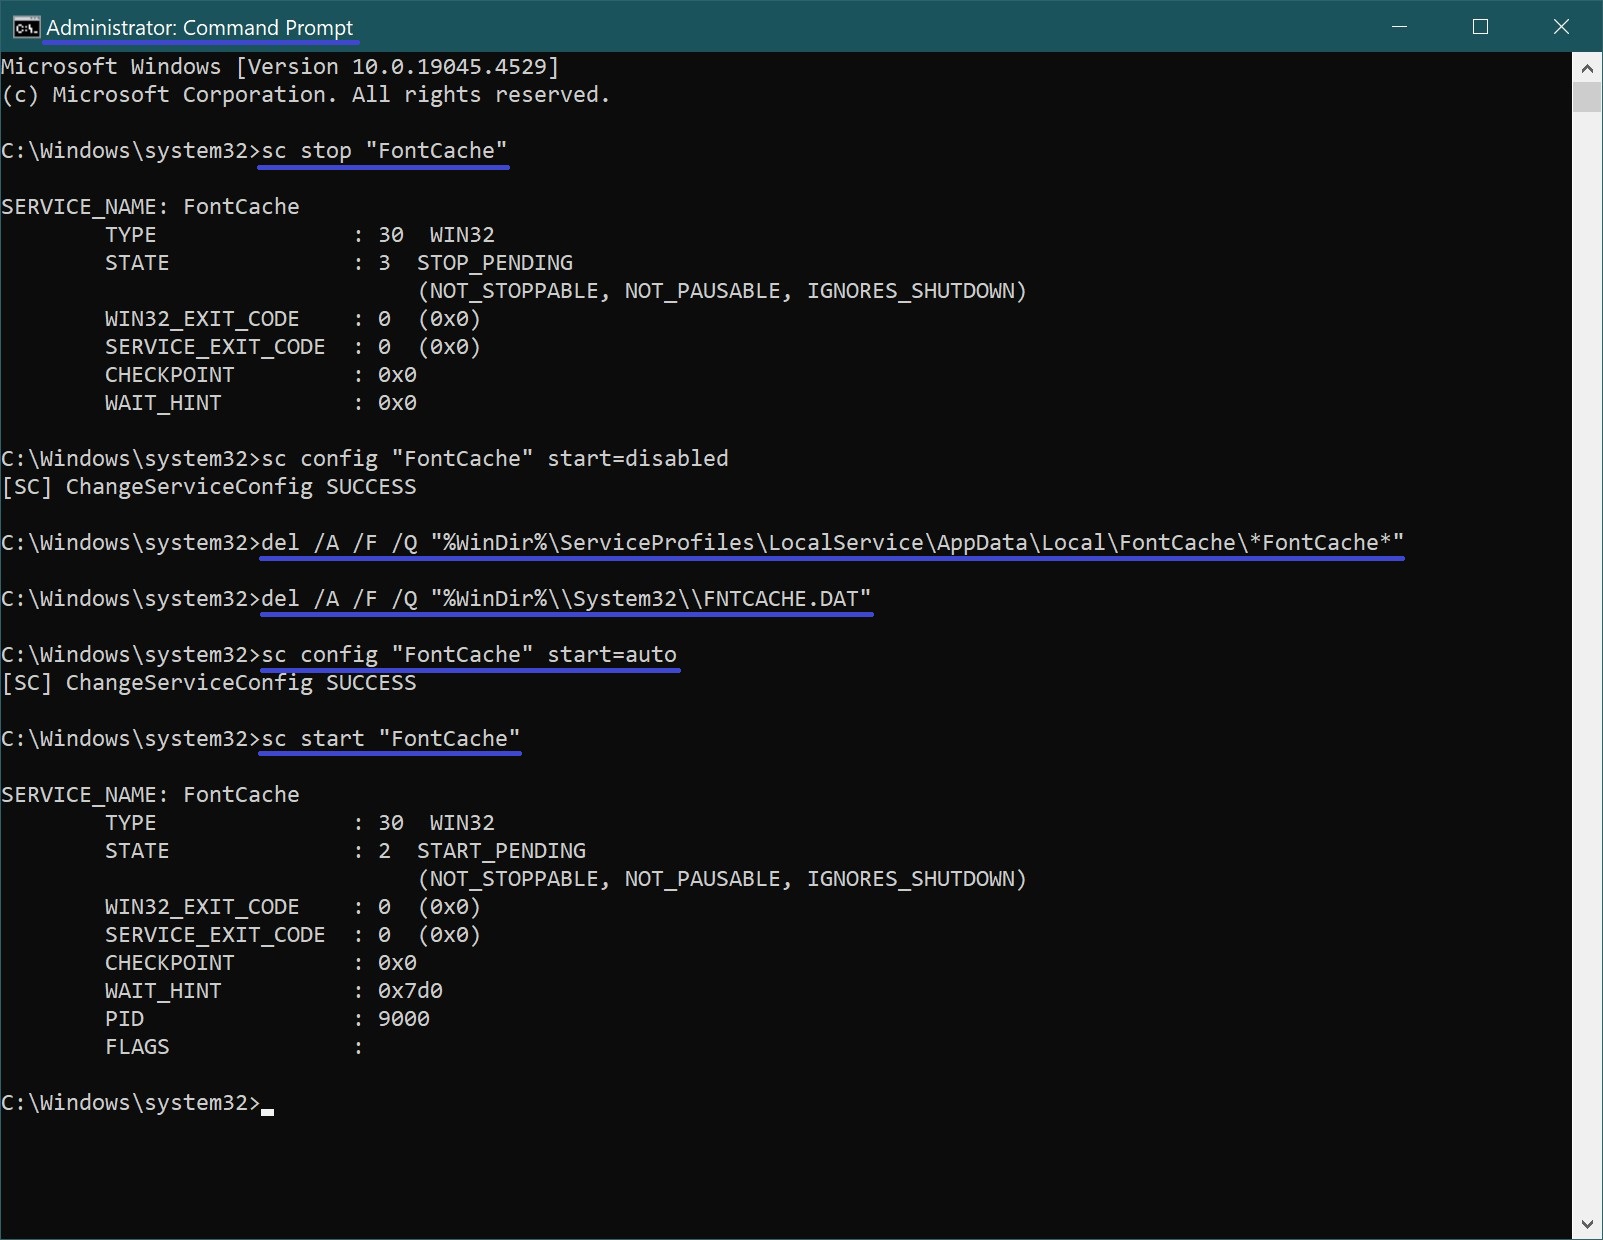
Run the command prompt as administrator and stop the Windows font cache service with the first command:
sc stop “FontCache”
Set the startup type disabled for the Windows font cache service by running the command:
sc config “FontCache” start=disabled
Then use two commands to delete the font cache files:
del /A /F /Q “%WinDir%\\ServiceProfiles\\LocalService\\AppData\\Local\\FontCache\\*FontCache*”
del /A /F /Q “%WinDir%\\System32\\FNTCACHE.DAT”
Now set the startup type to start automatically for the Windows font cache service, to do this, run the command:
sc config “FontCache” start=auto
Start the Windows font cache service by running the command:
sc start “FontCache”
The execution of the commands is shown in the screenshot below.
After executing the commands, close the command prompt window and restart your computer.