The default design theme in Windows 10 is light by default. However, a dark theme (mode) is also available, which can be enabled in the Windows Settings application or using the registry editor if desired.
Activation via the Windows Settings application
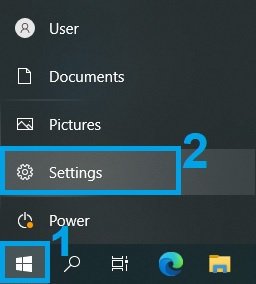
To activate or deactivate the dark theme, open the “Windows Settings” application by pressing the “Start” button on the taskbar and then select “Settings” or press the Win + I key combination on your keyboard.
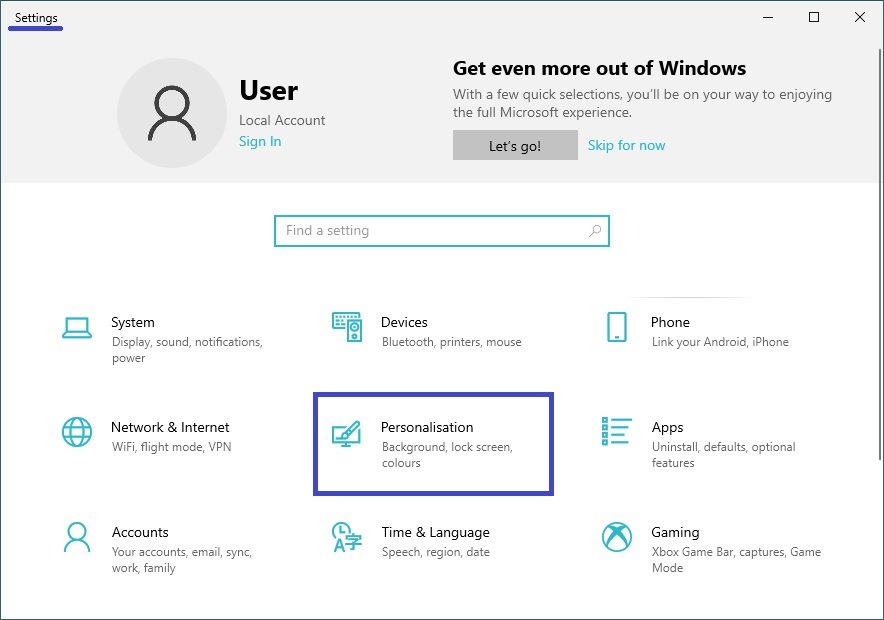
From the Windows Settings application window that opens, select the Personalisation category.
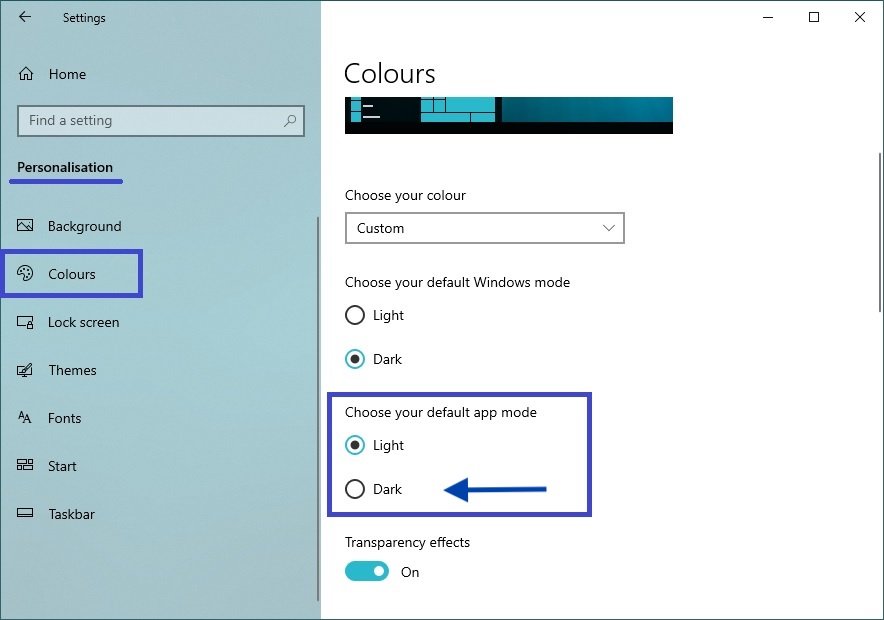
Next, go to the Colours tab and on the right-hand side of the window under Select Application Mode, set the switch (radio button) to Dark.
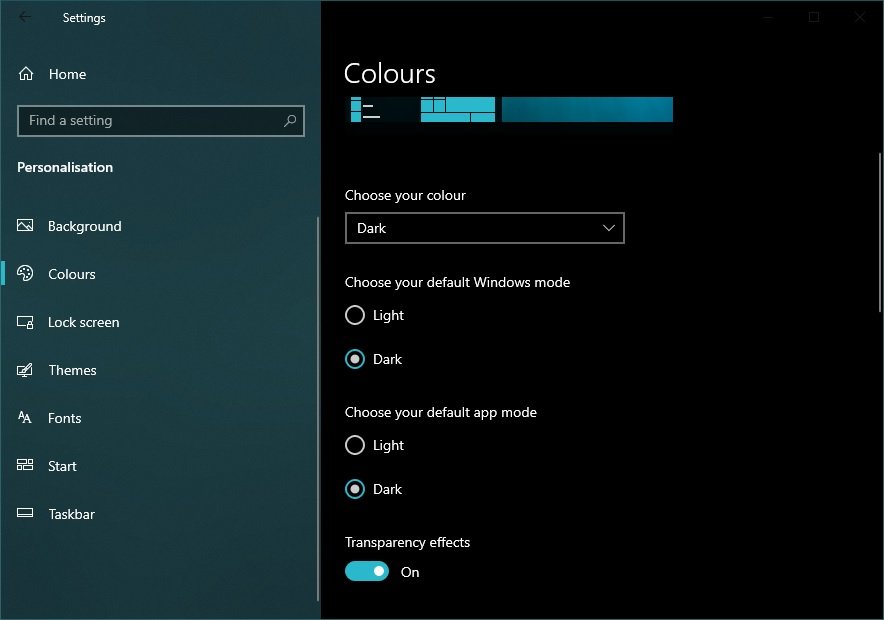
After this, the Windows Settings application window and some other applications of the operating system will change colour to dark.
The Windows Store (Microsoft Store) will also change to a dark theme.

Activating the dark theme in Edge, Firefox and Chrome
You can also change the interface of popular web browsers such as Microsoft Edge, Mozilla Firefox and Google Chrome.
You can enable a dark theme in Microsoft Edge browser and some other standard Windows applications by reading this article here.
To enable a dark theme in your Mozill Firefox browser, read our detailed article.
You can also enable a dark theme for Mozilla Firefox and Google Chrome using the theme shop. To do this, go to the Chrome or Firefox browser theme shop and select the appropriate theme.
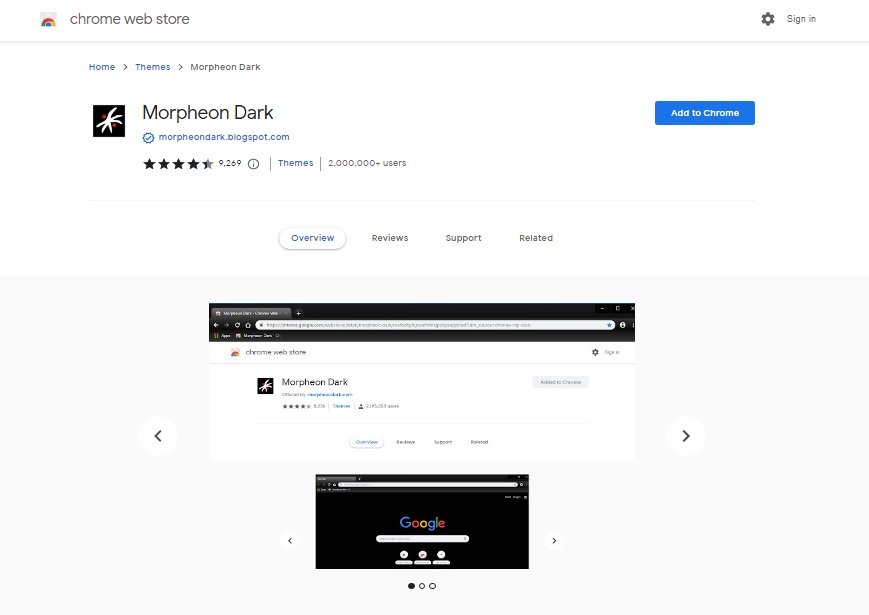
In Chrome, you can use Morpheon Dark, for example, and High Contrast for Chrome even allows you to modify sites by inverting colours or changing their appearance to monochrome.
Using high contrast mode
In the operating system settings, you can change the colour scheme for all elements of the Windows interface, such as Windows Explorer, universal and desktop applications, and the desktop.
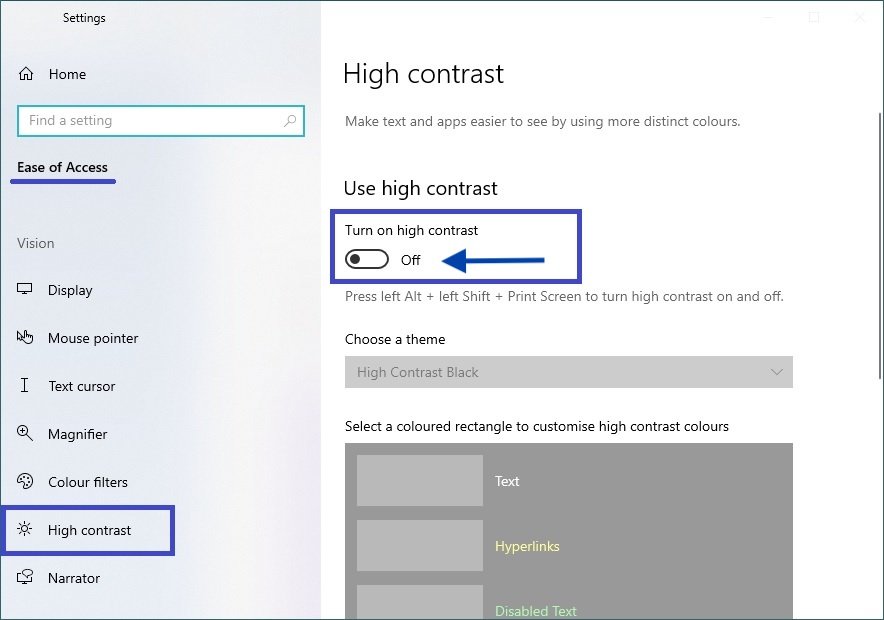
To do so, use the high contrast mode. To activate high contrast mode, sequentially open
Windows settings → Ease of Access → High contrast mode.
On the right-hand side of the window, set the Turn on high contrast Mode switch to On.
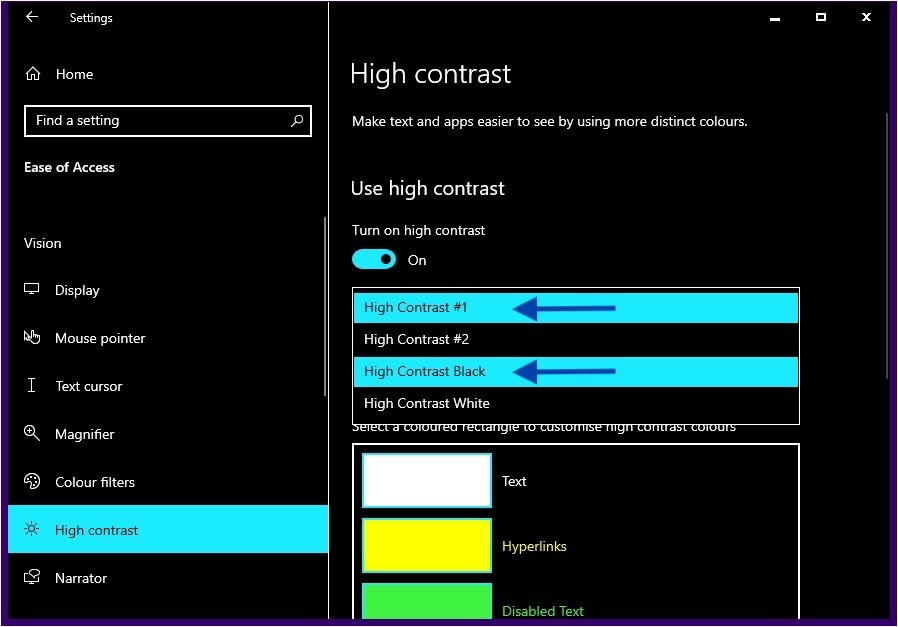
After activating High Contrast mode, you will immediately see the changes. You can also select other high-contrast themes.
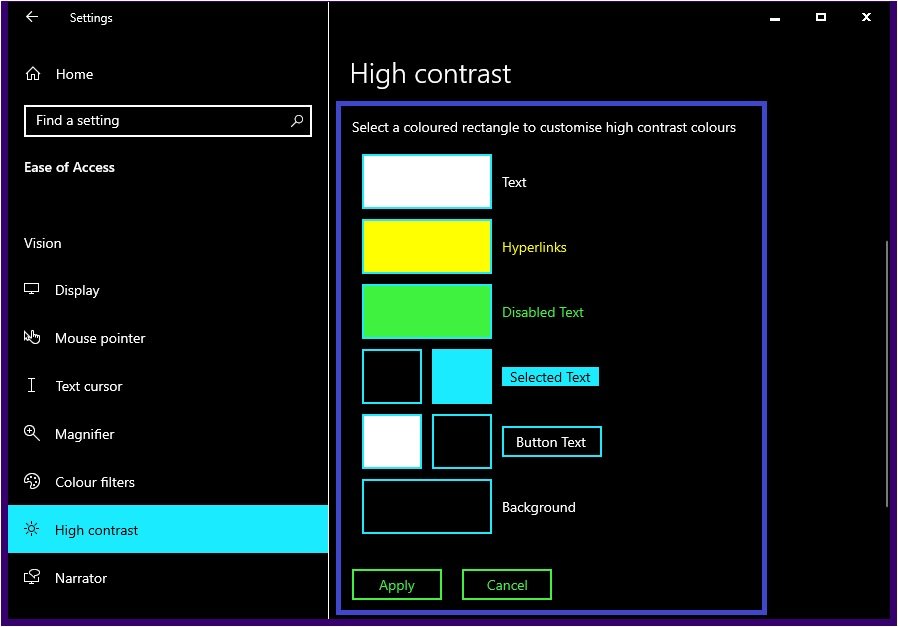
You also have the option of adjusting the high-contrast colours yourself by selecting the appropriate coloured rectangle.
Of course, this method of modifying the Windows interface is very aggressive, so not all users will be happy with the result.
Activate dark mode in the registry editor
This method of enabling a dark theme was used in earlier versions of the Windows 10 operating system, when it was not possible to enable a dark theme in the graphical interface.
This method is still workable and you can also use it. But before making any changes to the Windows registry, it is strongly recommended that you create a restore point.
So open the registry editor by pressing Win + R, then enter regedit in the Run window and press Enter.

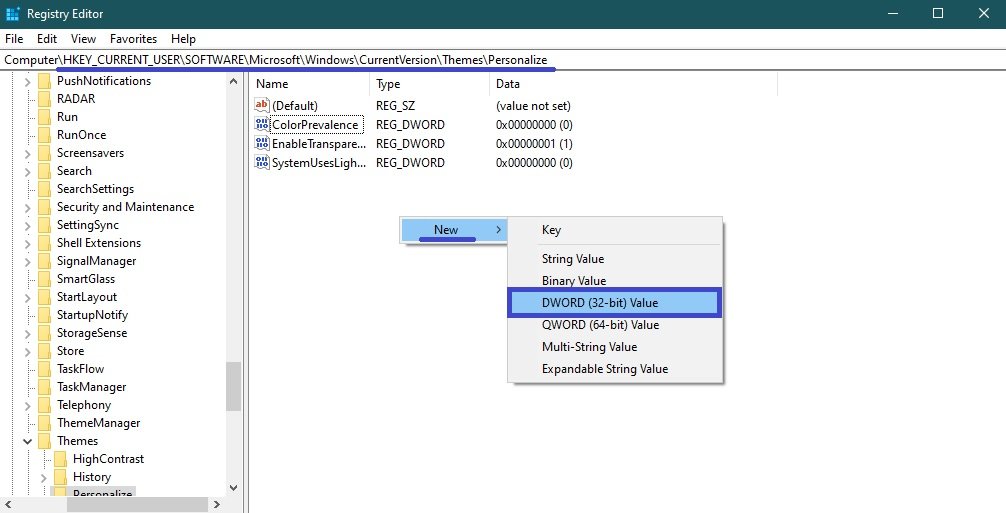
In the Registry Editor window that opens, navigate to the next section:
HKEY_CURRENT_USER\\SOFTWARE\\Microsoft\\Windows\\CurrentVersion\\Themes\\Personalize
Once you have navigated to Personalize, right-click on the right-hand side of the window and select New → DWORD (32-bit) Value from the context menu that appears.
Give the created parameter the name AppsUseLightTheme and the value 0.
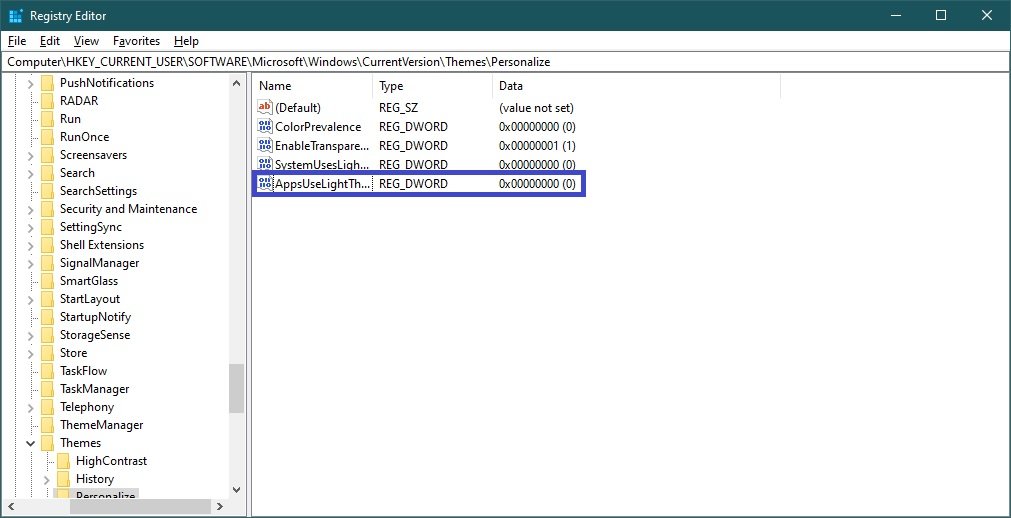
The changes are effective immediately.
If you decide to revert to a light theme, simply delete the created AppsUseLightTheme setting or change its value to 1.
You can also create and apply the following registry file to enable a dark theme:
Windows Registry Editor Version 5.00
[HKEY_CURRENT_USER\\SOFTWARE\\Microsoft\\Windows\\CurrentVersion\\Themes\\Personalize]
“AppsUseLightTheme”=dword:00000000
To disable the dark theme, create and apply the following registry file:
Windows Registry Editor Version 5.00
[HKEY_CURRENT_USER\\SOFTWARE\\Microsoft\\Windows\\CurrentVersion\\Themes\\Personalize]
“AppsUseLightTheme”=-
You can also download ready-made registry files to enable/disable the dark theme.


