Various actions performed by the operating system are accompanied by sound signals. These include notifications from different applications, displayed as pop-up banners in the bottom-right corner of the screen, as well as other alert sounds.
To personalize this process and set different sounds for different types of notifications, we offer a step-by-step guide. It will help you change notification sounds to one of the system’s default options or any other sound of your choice.
Change Notification Sounds in Windows 10
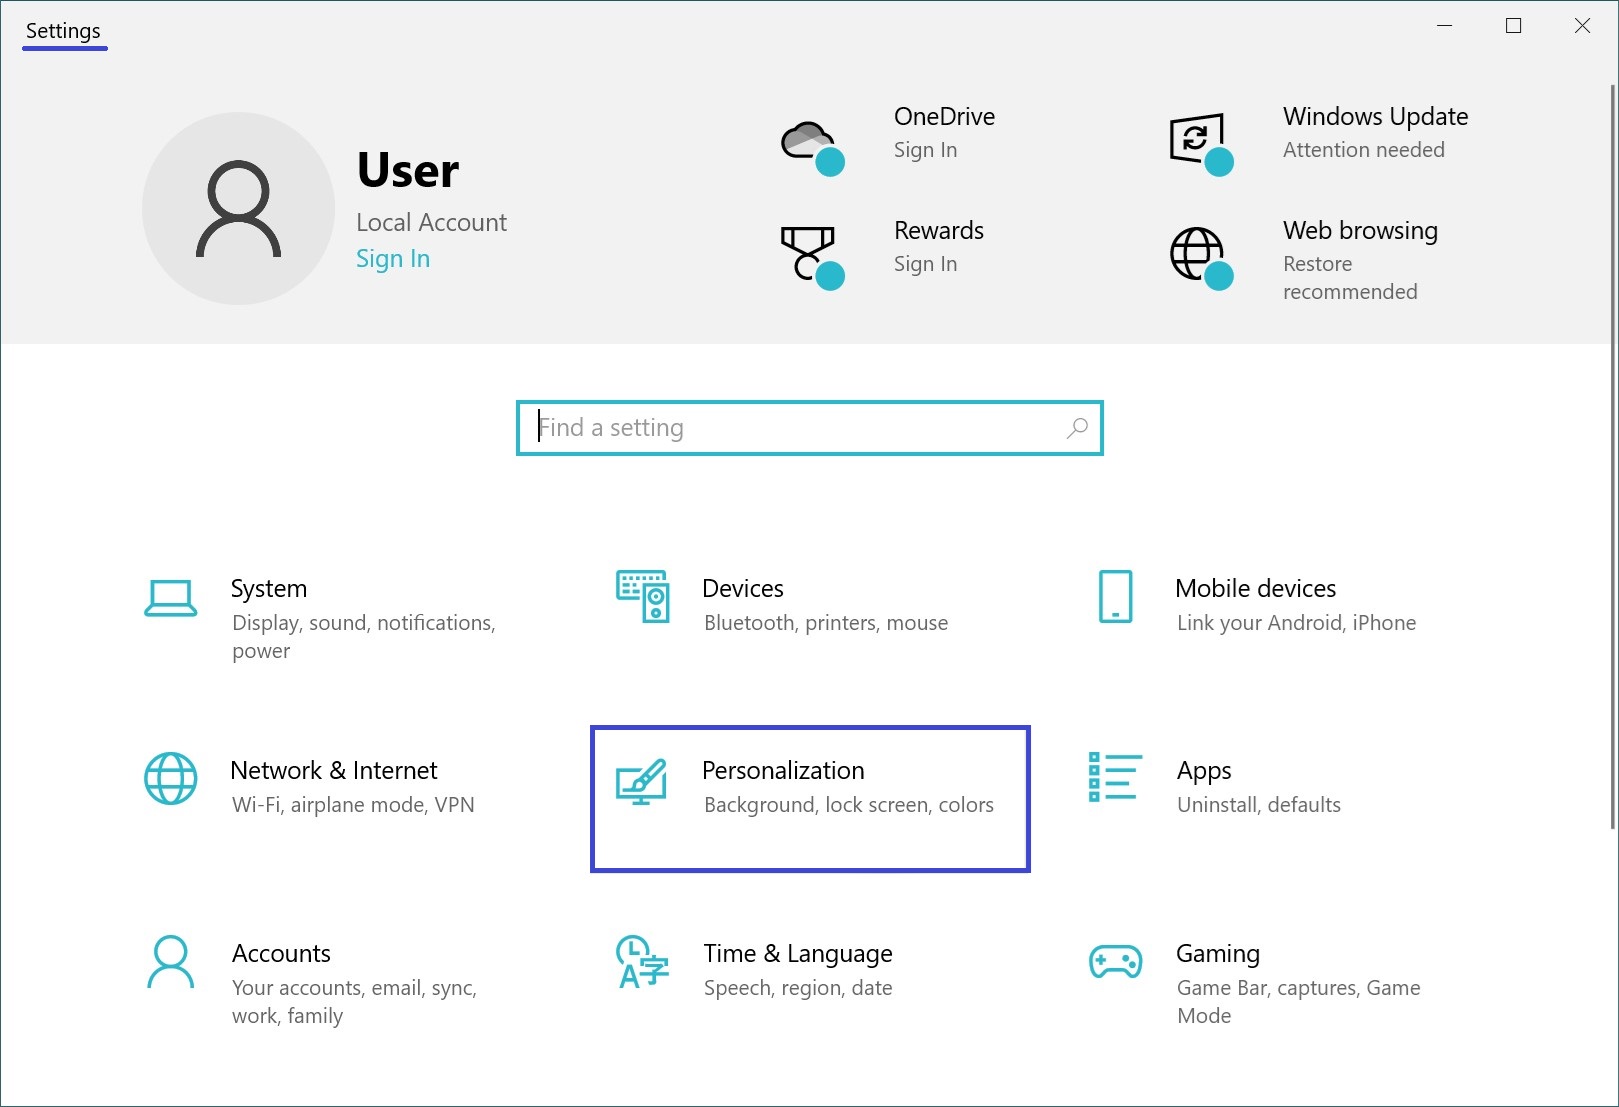
To modify notification sounds to one of the default system options, open “Settings.” Click the Start button on the taskbar and select Settings, or press the Win + I keys on your keyboard.
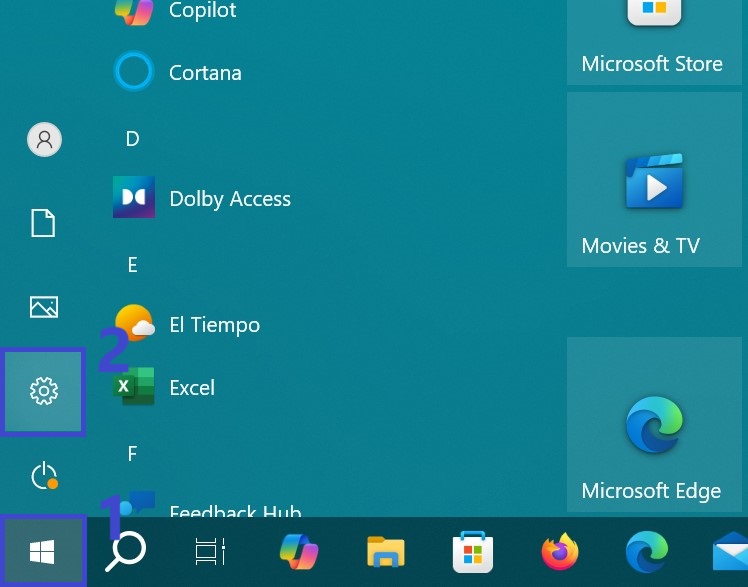
In the opened “Settings” window, select Personalization.
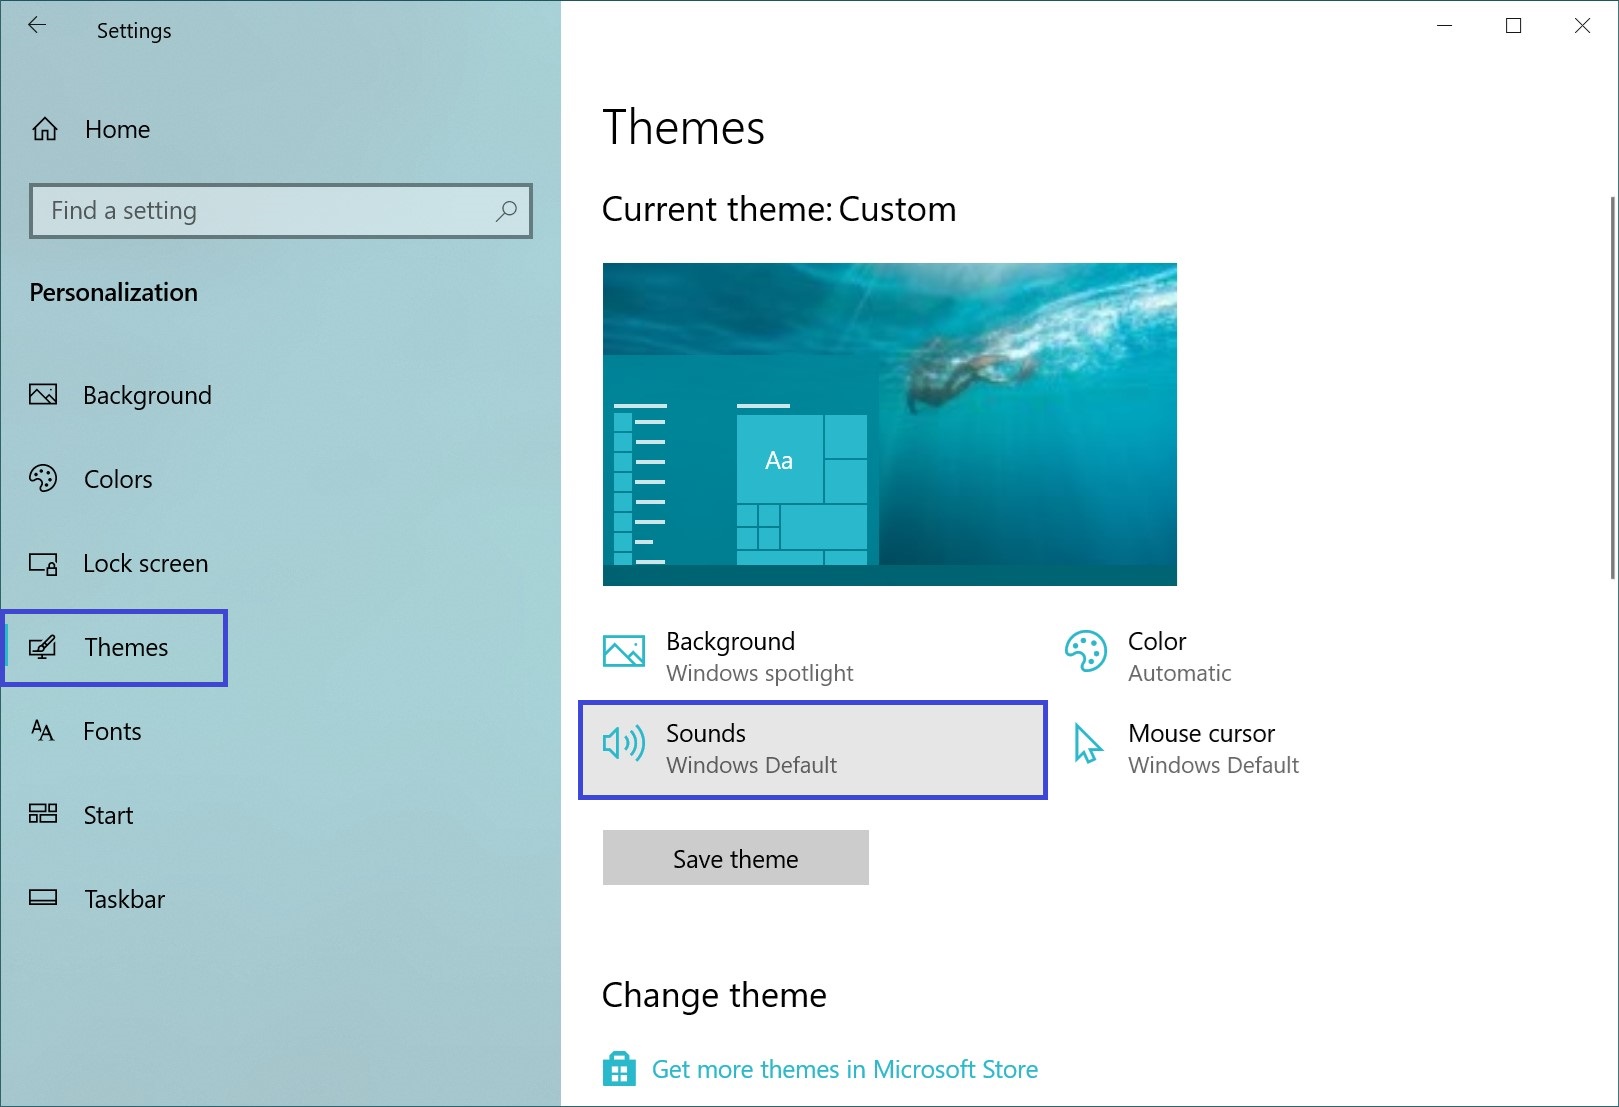
Then, select the Themes tab and click Sounds on the right side of the window.
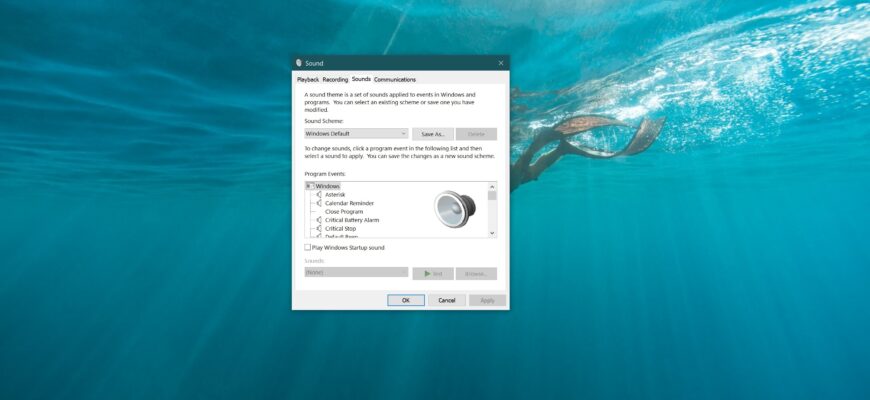
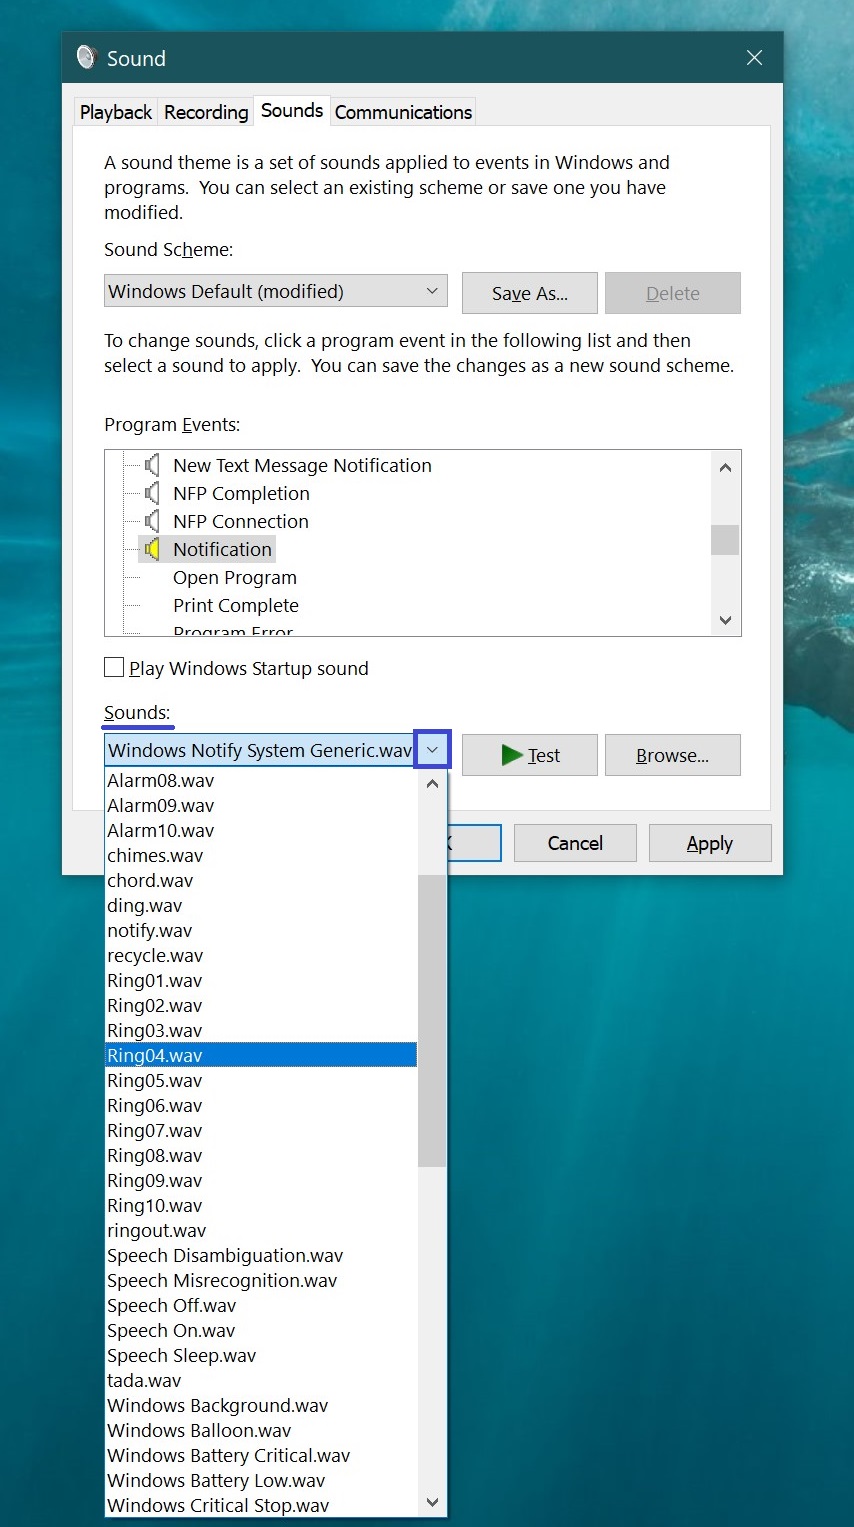
In the Sound window, under the Sounds tab, navigate to the Program Events section and select the Notification event.

Then, in the Sounds dropdown menu, select one of the default system sounds and click OK.
If none of the default sounds appeal to you, you can set your own melody.
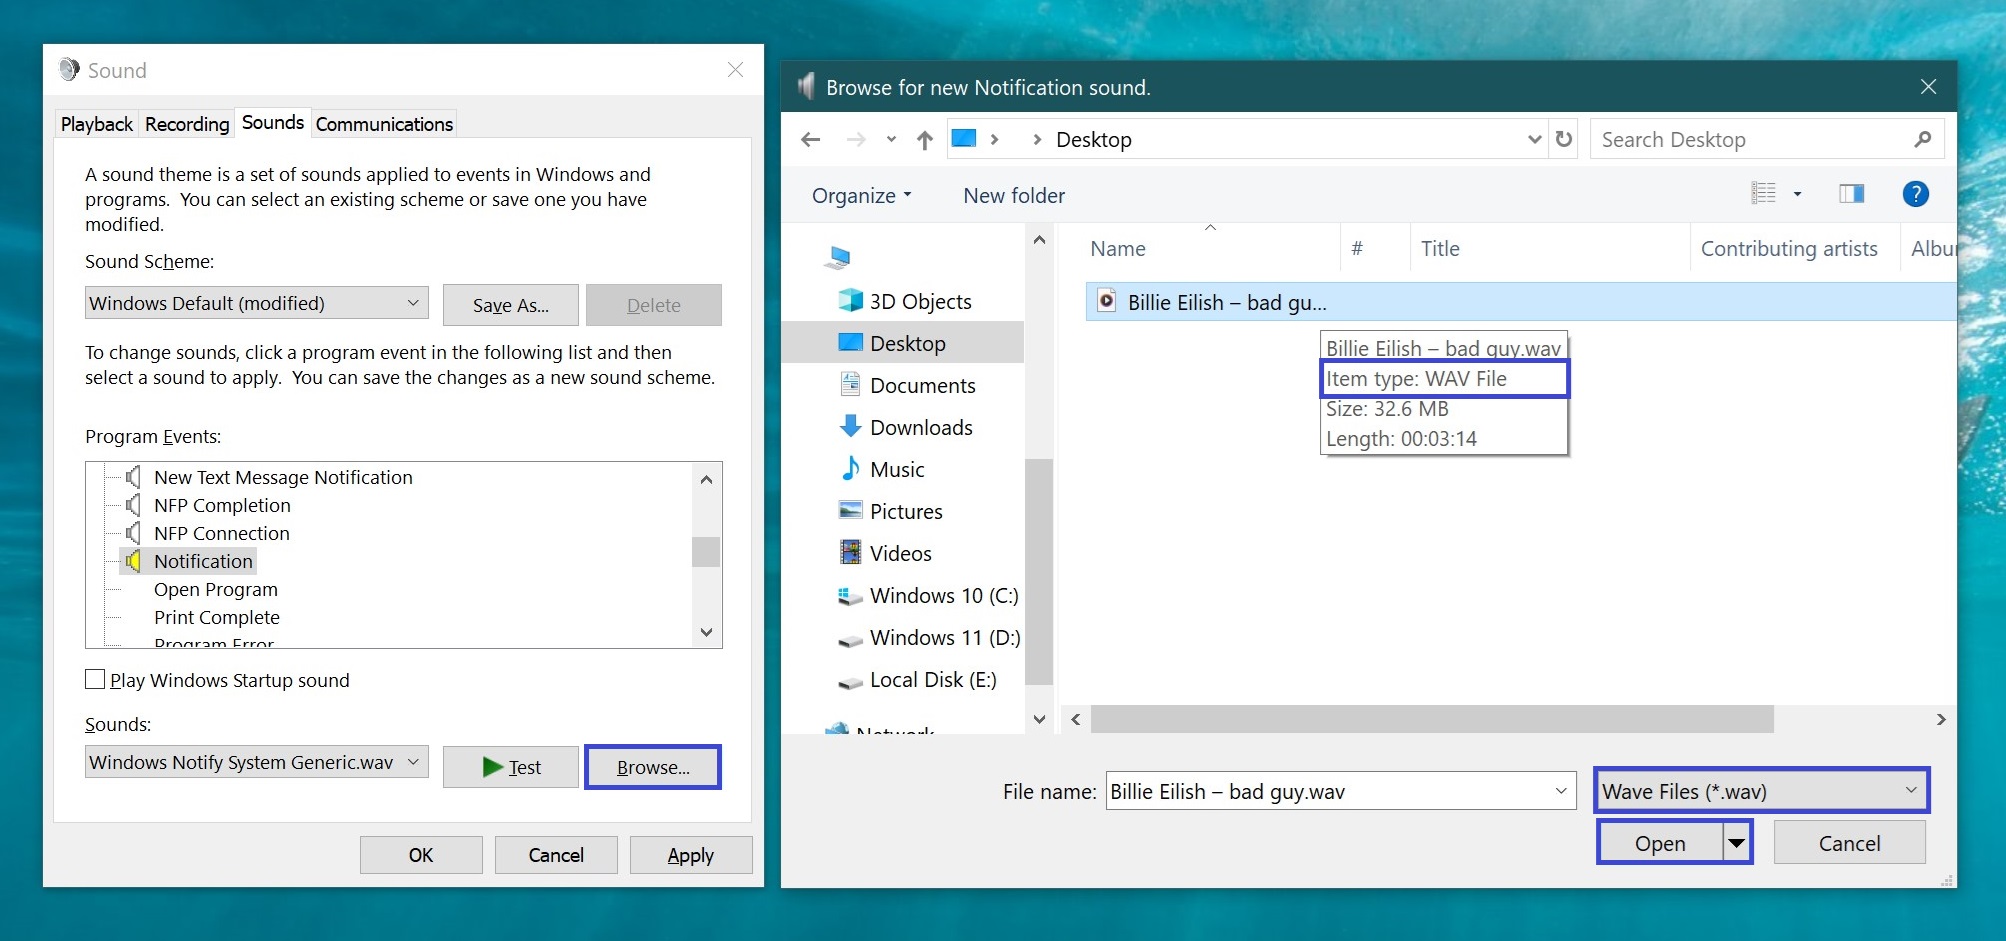
In the Sound window, click Browse and specify the path to your desired file. The file must be in .wav format.
If your preferred sound is on your PC but not in the .wav format, you can use an online audio converter. Many free and simple options are available.
After selecting the sound, click Test to check if it plays correctly. If everything works and the sound is played properly, click Apply and then OK.
Windows Sound Scheme (Modify, Create, and Delete)
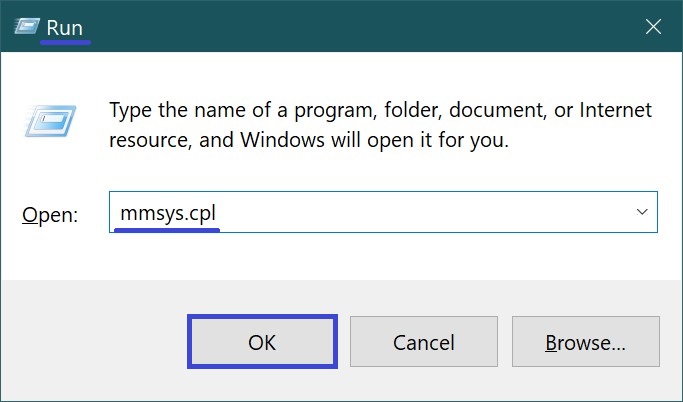
You can adjust the sound scheme based on your preferences and tasks. To do this: Go to Start → Settings → Personalization → Themes → Sounds. Alternatively, open the Run menu by pressing Win + R, type mmsys.cpl, and hit Enter to access the Sound tab.
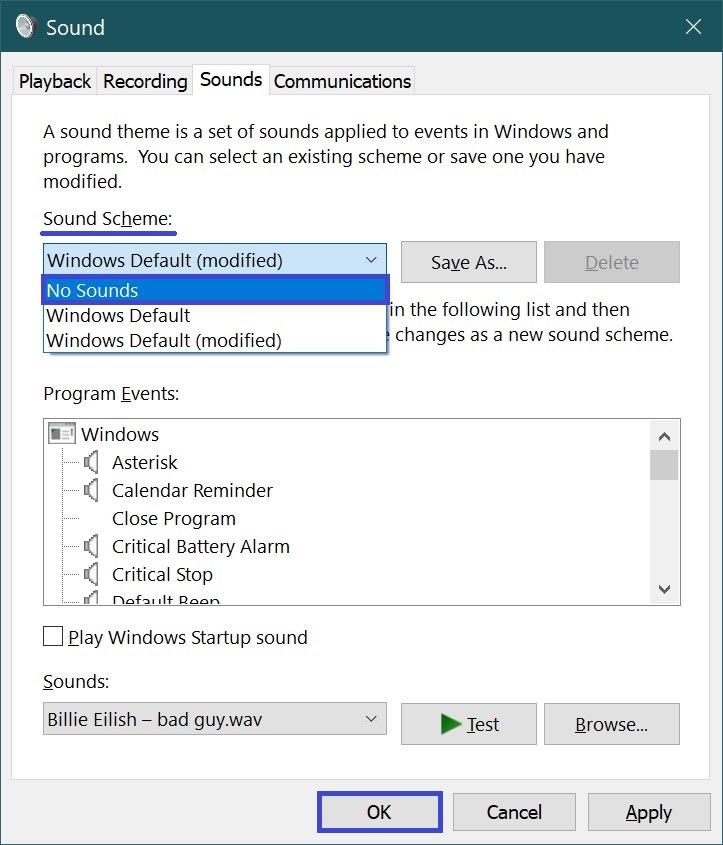
In the Sound Scheme section, choose the sound theme you prefer. You can also select No Sounds if you prefer to silence system notifications and prevent any interruptions. After making your choice, click OK to apply the settings.
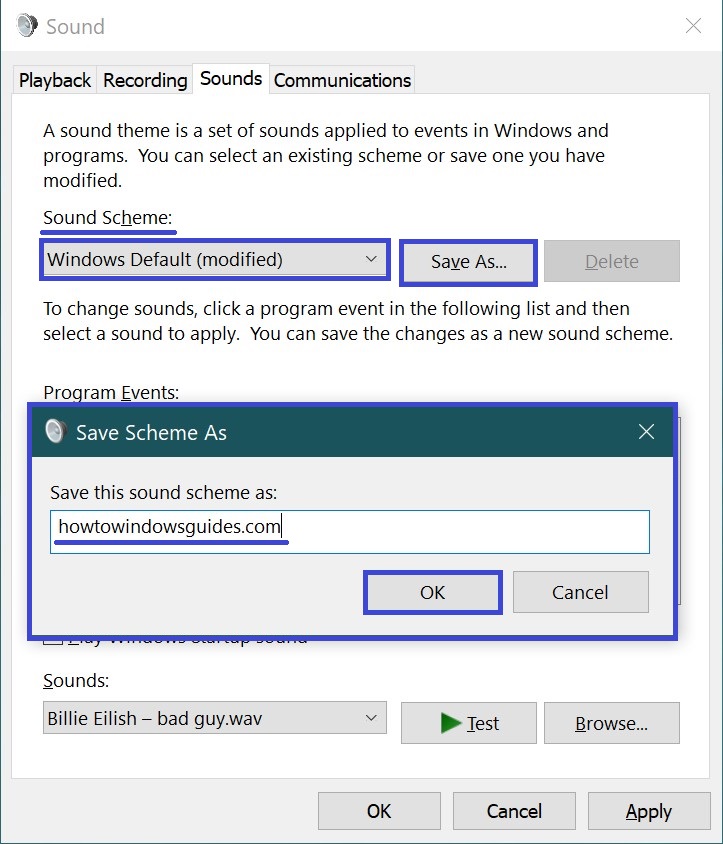
After making any changes to system sounds (such as setting new sounds for error messages, notifications, etc.), a custom sound scheme will appear under Sound Scheme. It will be saved automatically with the name “Windows Default (modified)”. For convenience, you can rename this scheme.
To do so, click on the Save As button next to the scheme. In the Save As… window, enter a name for your custom scheme and click OK to save it.
In the same tab, there is an option to delete unused sound schemes. To do this, select the unwanted scheme from the drop-down list and click the Delete button on the right.
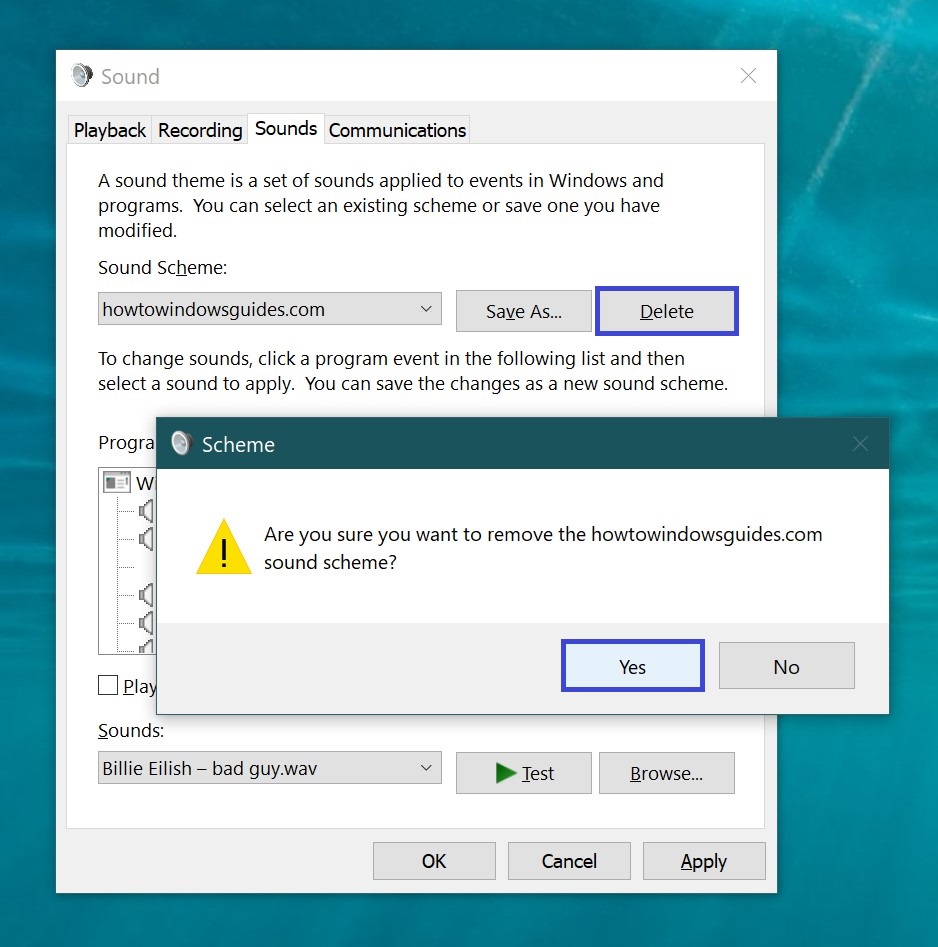
To confirm the deletion of a sound scheme, click Yes in the warning dialog box. Once confirmed, the unwanted scheme will be deleted.
Changing Sounds through the Registry Editor
Before making any changes to the Windows Registry, it’s crucial to create a System Restore Point to avoid potential issues. This step ensures that you can revert your system to its previous state in case anything goes wrong.
To open the Registry Editor, use one of the following methods, such as pressing Win + R, typing regedit in the Run dialog, and then clicking OK.
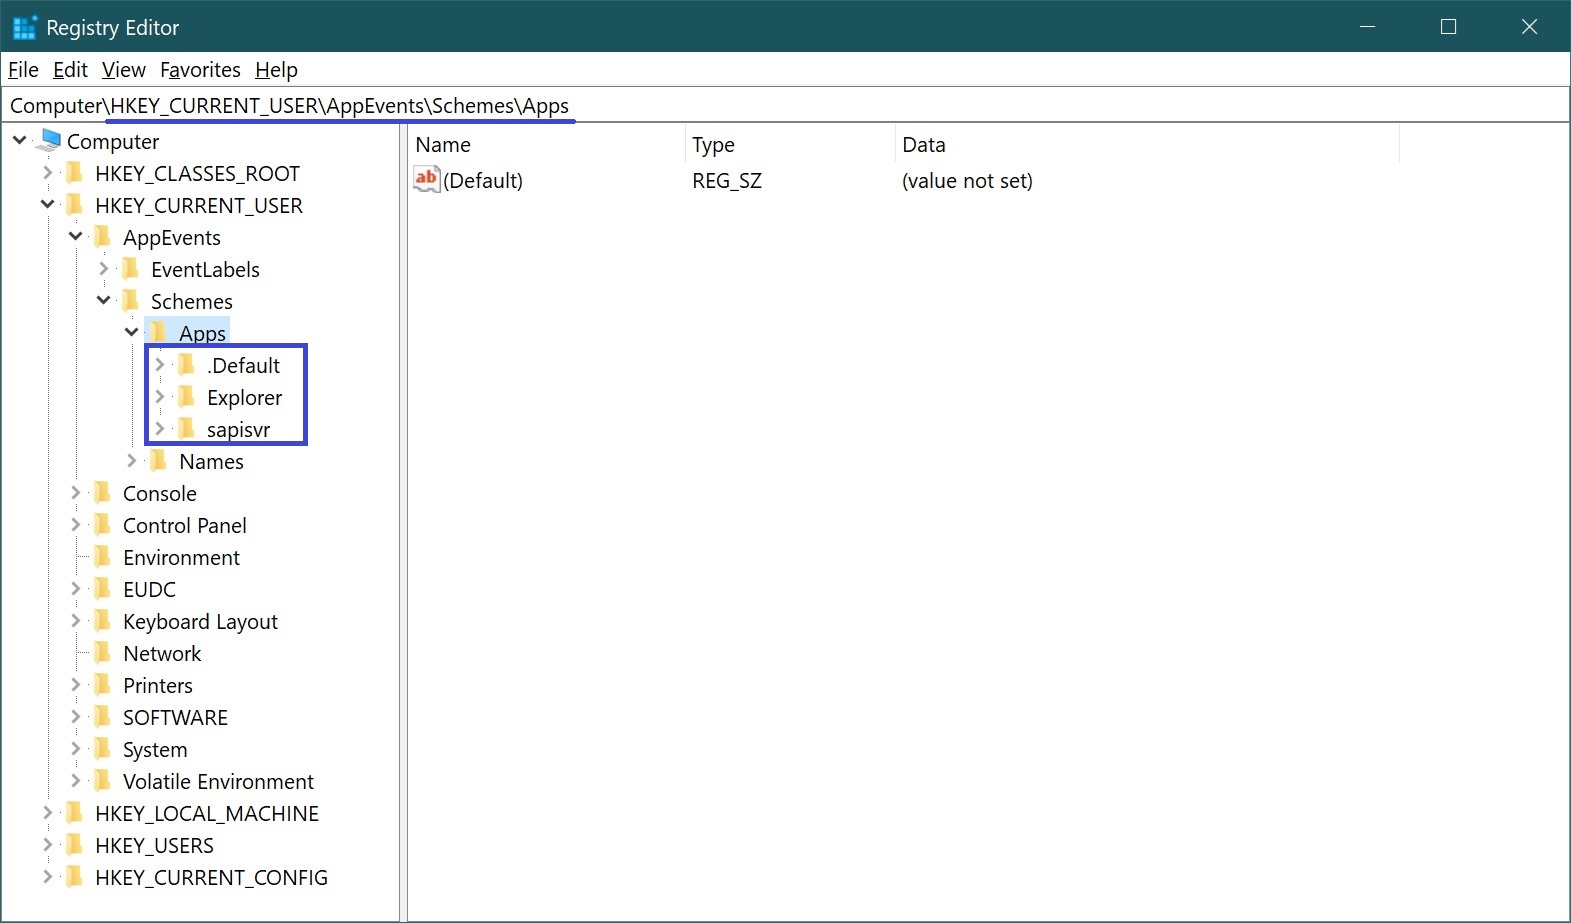
Once in the Registry Editor, navigate to the following path: HKEY_CURRENT_USER\AppEvents\Schemes
In this section:
- The .Default subkey contains event sounds for Windows 10.
- The Explorer subkey stores event sounds related to File Explorer.
- The sapisvr subkey controls sounds related to speech recognition or Search.
For example, let’s consider the case where you want to change the notification sound for receiving mail.
Navigate to the .Default section → then find the relevant event (in our case, Notification.Mail) → go to the .Current section.
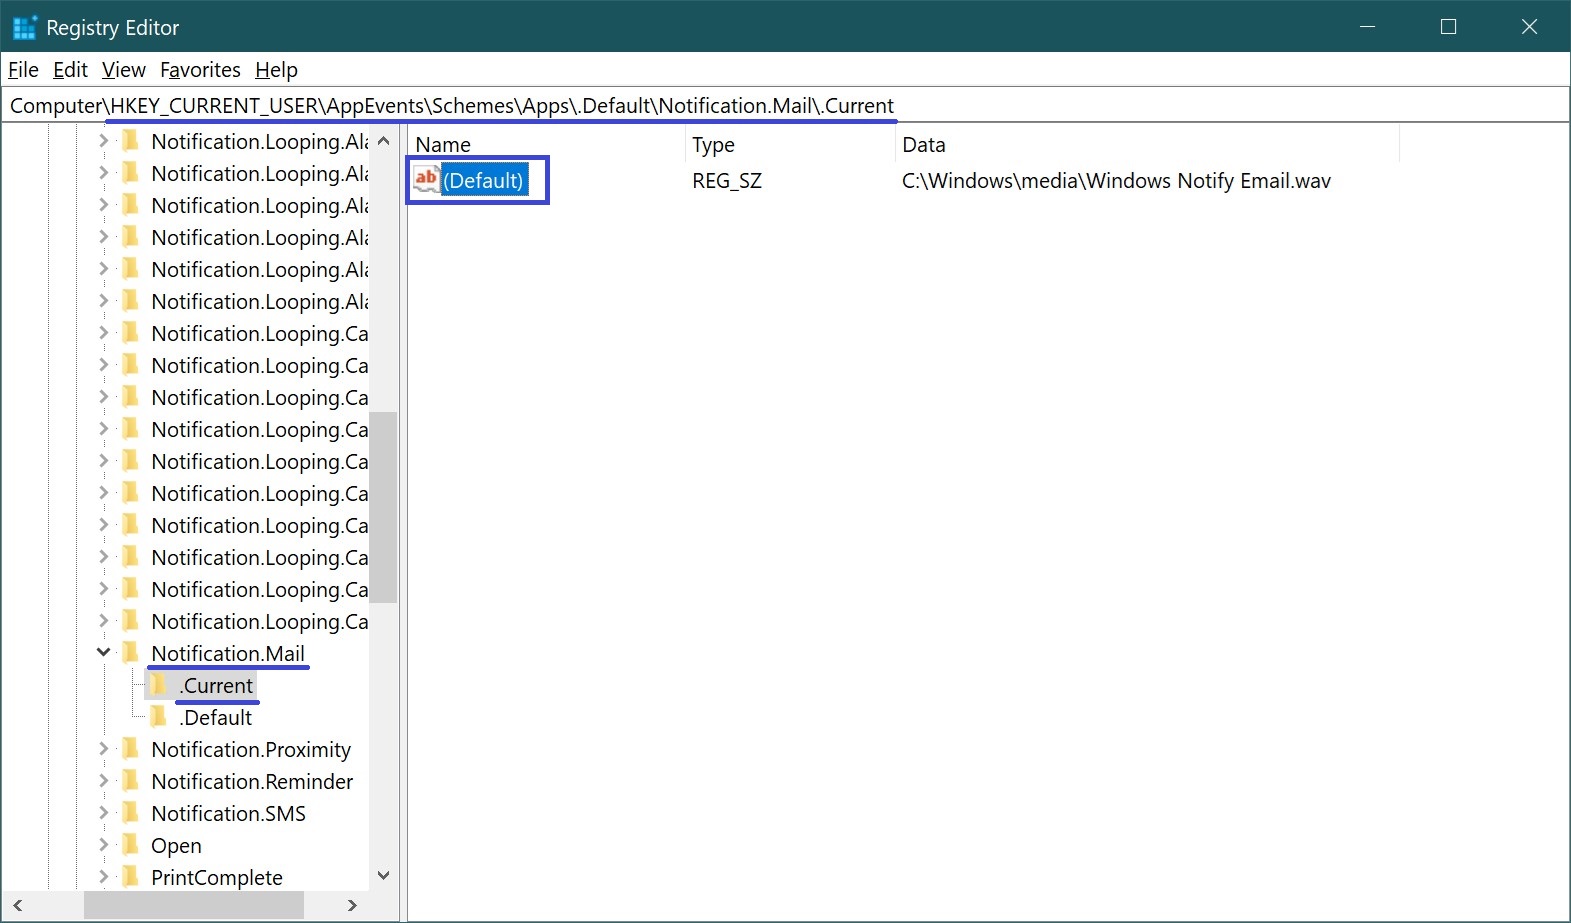
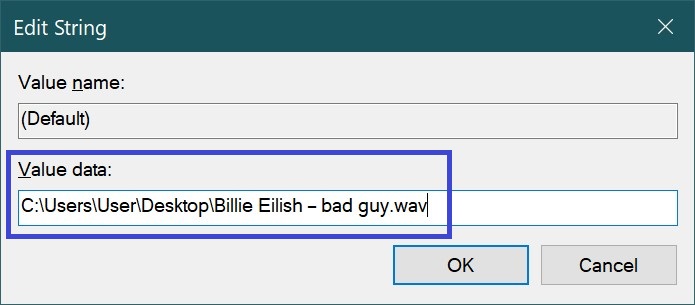
Now, on the left side of the registry editor, open the Default parameter (by double-clicking it with the left mouse button or right-clicking it → select Modify). In the Value data field, enter the path to the .wav file and click OK.
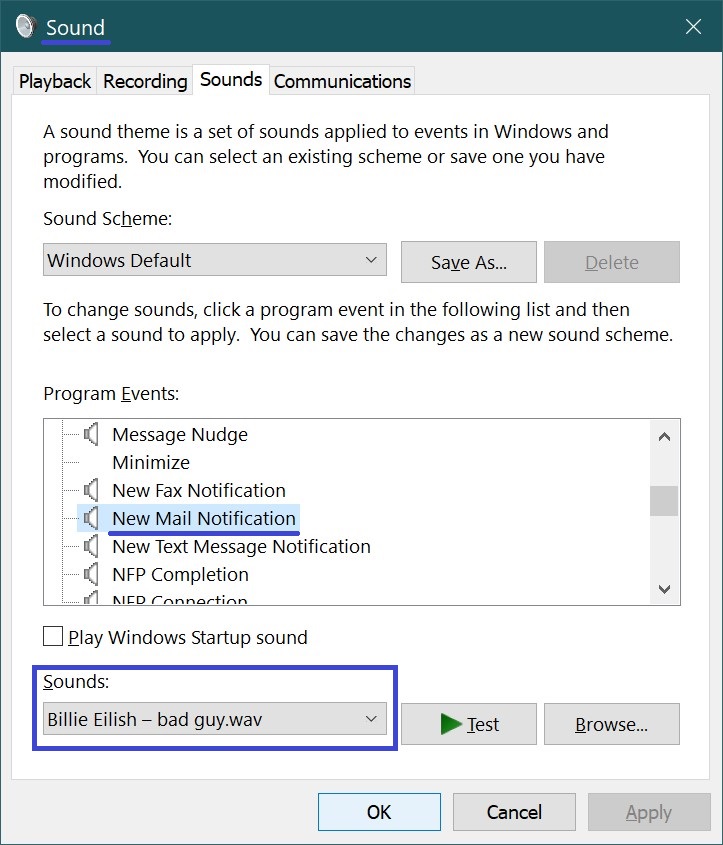
Go to the Sound settings. In the Sounds tab → under Program Events, select New Mail Notification → below, you will see that the default sound has been changed to the one we selected.
Use any of the above methods to perform sound customization in Windows 10.